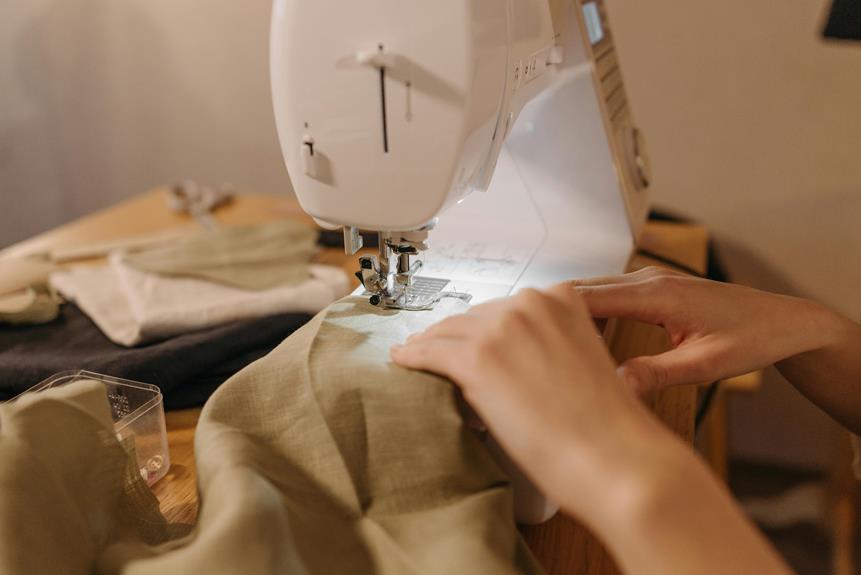
When you're pinning curved seams, the right technique can make all the difference in achieving a polished finish. Start by selecting fine, sharp pins to minimize distortion, and be sure to pin at critical points first. As you work around the curve, keep the pins positioned perpendicular to the seam line for easy removal. You might also consider a basting stitch for those more challenging curves. But what happens when you encounter particularly tricky shapes or fabrics? Knowing how to adjust your strategy could change your approach entirely.
Table of Contents
Key Takeaways
- Use fine, sharp pins and pin every 1 to 2 inches to maintain control and avoid puckering along curves.
- Pin critical points first, like the ends of the curve, before filling in along the seam.
- Angle pins perpendicular to the seam line for easy removal while sewing and to prevent interference.
- Consider basting tricky curves to check fit and make adjustments before final pinning.
Choose the Right Pins
When you're pinning curved seams, selecting the right pins can make all the difference in achieving a smooth finish. You'll want to choose pins that are fine and sharp, as they penetrate the fabric easily and minimize distortion. Look for glass-head or nylon pins, as they resist heat and won't melt if you accidentally press your fabric.
Next, consider the pin length. Longer pins are great for thicker fabrics, while shorter ones work better for lightweight materials. You might also want to use curved safety pins for tight curves, as they can hug the fabric without slipping.
Also, think about using specialty pins, like flower head pins or double-headed pins, which allow for easier handling and can hold multiple layers securely.
While pinning, place the pins perpendicular to the seam line, ensuring they're close together but not overlapping. This positioning helps to keep the fabric layers aligned without distorting the curves.
Prepare Your Fabric
Preparing your fabric properly ensures that your curved seams will lie flat and smooth during sewing. Start by washing and pressing your fabric before cutting. This pre-treatment removes any shrinkage and helps eliminate wrinkles, which could affect your seam integrity. If you're working with delicate fabrics, consider using a gentle cycle and air-drying to avoid damage.
Next, when you cut your fabric, pay close attention to the grainline. Align your pattern pieces with the fabric's grain to maintain the garment's structure and drape. This step is crucial for achieving balanced curved seams that fit well. Use sharp scissors or a rotary cutter for clean edges, which reduces fraying and makes pinning easier.
Once your pieces are cut, you might want to stay-stitch around the edges of the curved seams. This technique helps prevent stretching and distortion during the sewing process. Finally, give everything another press before you start pinning. Ensure that all pieces are smooth and flat, as this will make pinning more effective and your curved seams more manageable. Taking these steps will set you up for success with your sewing project.
Use the Right Technique
Using the right technique for pinning curved seams can make a significant difference in achieving a polished finish. When you're working with curves, it's crucial to apply the right methods to ensure your fabric lays flat and the seams align perfectly.
Here are some techniques to keep in mind:
- Use Short, Evenly Spaced Pins: Placing pins closer together helps maintain the shape of the curve without distorting the fabric.
- Pin on the Seam Allowance: Pinning within the seam allowance helps you avoid pinning through the actual seam line, allowing for smoother sewing.
Pinning Strategies for Curves
Effective pinning strategies for curves can greatly enhance your sewing experience and lead to better results.
Start by choosing the right pins; use fine, sharp ones that easily penetrate the fabric without distorting it.
Position your fabric pieces right sides together, then begin pinning at the most critical points, like the ends of the curve.
Next, work your way along the curve. Instead of placing pins far apart, pin frequently—every 1 to 2 inches—to maintain control over the fabric's shape. This will help you avoid puckering.
When pinning, angle the pins perpendicular to the seam line, allowing for easy removal while you sew.
For tighter curves, consider using a technique called “pinning in a spiral.” This involves adding pins in a circular pattern, allowing the fabric to ease in naturally.
If you're dealing with a very tight curve, you can also use basting stitches before pinning to hold the fabric in place.
Adjusting for Seam Allowance
When pinning curved seams, it's important to consider the seam allowance to ensure your final garment fits well and looks polished. Seam allowance refers to the extra fabric beyond the stitch line, and adjusting it correctly can make a significant difference in the overall look of your project.
Start by checking your pattern for the recommended seam allowance. If you're working with a curved seam, remember that you'll need to clip or notch the fabric to allow it to lay flat during sewing. This helps accommodate the curve while keeping your seam allowance intact.
Here are some tips to help you adjust for seam allowance effectively:
- Measure Twice: Always double-check your seam allowance before cutting or pinning to avoid mistakes.
- Use Tailor's Chalk: Mark the seam allowance on your fabric to guide your pins and stitching accurately.
Frequently Asked Questions
What Type of Fabric Is Best for Curved Seams?
When working with curved seams, lightweight fabrics like cotton or rayon work best. They're easier to manipulate and shape around curves. Avoid heavy fabrics, as they can create bulk and make sewing more challenging.
How Do I Remove Pins Safely While Sewing?
To remove pins safely while sewing, keep your eyes on the needle and pull pins out gently as you sew. This way, you avoid any accidents and maintain a smooth, uninterrupted sewing process.
Can I Use Clip Instead of Pins for Curves?
Yes, you can use clips instead of pins for curves! They provide a strong hold without distortion, making it easier to sew smoothly. Just make sure they're secure and positioned properly to avoid shifting.
What Is the Best Way to Press Curved Seams?
To press curved seams effectively, you should use a tailor's ham. Position the seam over the ham, then gently press with an iron, allowing the curve to take shape without flattening the fabric.
How Do I Handle Multiple Layers When Pinning Curves?
When you're handling multiple layers, start by aligning them carefully. Use shorter pins to avoid bulk, and pin at regular intervals, ensuring each layer stays flat and aligned as you work through the curves.

- How Does Ring Spun Cotton Affect Garment Fit and Shape Retention? - August 13, 2024
- What Are the Challenges in Producing Ring Spun Cotton? - August 13, 2024
- Is Ring Spun Cotton Suitable for Plus-Size Clothing? - August 13, 2024


