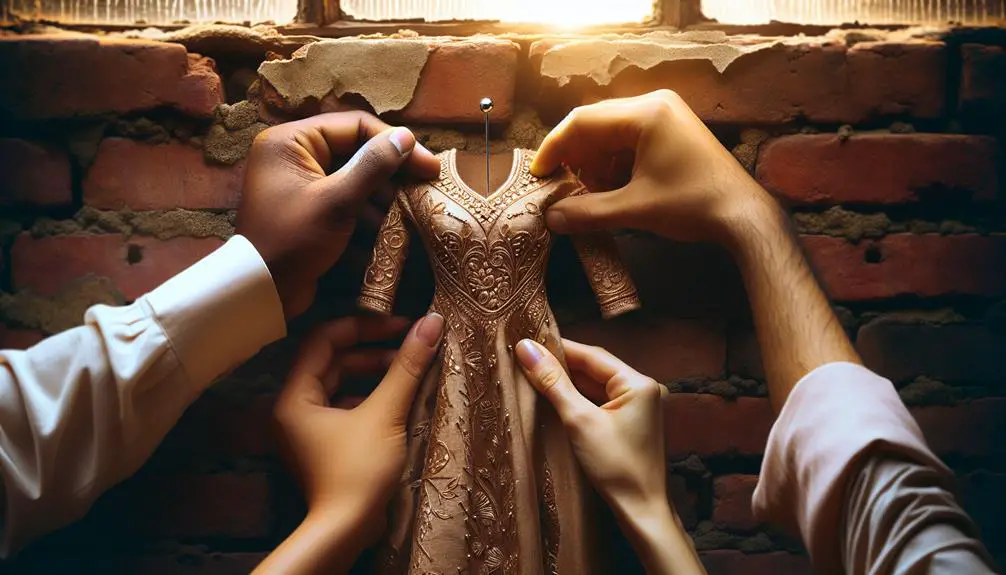
As I delicately grasp the fabric, carefully maneuvering the pins, the transformation begins. Pinning a dress is like sculpting – every adjustment, every pin, shaping the garment to fit perfectly.
But the real magic happens when you step back and see the dress hugging the body just right, exuding elegance and confidence.
Want to learn the secrets behind achieving that flawless fit that makes heads turn? Let's uncover the art of dress pinning together.
Key Takeaways
- Proper dress pinning ensures a perfect fit and tailored appearance.
- Choose the right pins for fabric type and thickness.
- Utilize specific pinning techniques for different fabrics and dress types.
- Securely pin hems, seams, and areas like sleeves for professional results.
Importance of Proper Dress Pinning
Pinning a dress is essential for achieving a perfect fit that complements your body shape and style preferences. When you have excess fabric bunching up in the waist, bust, or hip areas, pinning allows you to visualize how the dress would look and feel once tailored to your specific measurements. It's like creating a personalized blueprint for your outfit!
Moreover, when it comes to sleeve length, pinning plays a crucial role. Getting the right sleeve length can make a significant difference in how the dress looks and feels on you. By pinning the sleeves and shoulders, you can ensure that the dress fits comfortably and flatters your arms and upper body.
Essential Tools for Dress Pinning
When it comes to ensuring a perfect fit for your dress, having the right tools is key. Here are essential tools for dress pinning:
- Straight Pins: These versatile pins are a staple for pinning fabrics together. They work well for general pinning tasks and are suitable for most fabrics. When pinning the back seam of a dress, straight pins provide a reliable hold.
- T-Pins: Ideal for heavier fabrics or multiple layers, T-pins offer stability and control during the pinning process. Their T-shaped heads make them easy to handle and provide extra security, ensuring your fabric stays in place, especially when dealing with thicker materials.
- Dressmaker Pins: With fine points designed for delicate fabrics like silk or chiffon, dressmaker pins minimize damage to the material. When working on intricate details or pinning the back seam of a delicate dress, these pins provide precision without causing snags or runs in the fabric.
Selecting the Right Pins
When it comes to selecting the right pins for pinning your dress, two key points to consider are the pin length and the pin material.
The length of the pin should be appropriate for the thickness of the fabric you're working with, ensuring it securely holds everything in place.
Additionally, choosing the right material, like stainless steel or nickel-plated pins, can prevent any unwanted reactions with the fabric and ensure the longevity of your dress.
Pin Length
Selecting the right pins for pinning a dress involves considering the fabric type and thickness to ensure secure placement without causing any damage. When it comes to pin length, here are three key points to keep in mind:
- Length Matters: Opt for longer pins when working with thicker fabrics or multiple layers for better grip and stability during pinning.
- Short Pins for Delicate Fabrics: Shorter pins are ideal for delicate or lightweight materials to prevent snagging or puckering while pinning.
- Consider Dress Weight: Take into account the weight and structure of the dress when choosing the appropriate pin length to ensure a smooth and secure pinning process.
Choosing the right pin length can make a significant difference in the ease and success of pinning a dress.
Pin Material
To ensure secure and effective pinning when working on dresses, it is essential to carefully select the right pins based on the fabric type and thickness. Different pins serve specific purposes based on the material being worked on. Here's a quick guide to help you choose the appropriate pin for your dressmaking needs:
| Pin Type | Ideal Use |
|---|---|
| Dressmaker Pins | Securing fabric effectively, especially on lighter materials |
| T-pins | Heavy fabrics or multiple layers for secure pinning |
| Safety Pins | Temporary adjustments or fittings requiring frequent changes |
| Hijab Pins | Delicate or thin fabrics, leaving minimal marks |
| Straight Pins | Colorful heads for visibility, great for intricate designs |
Preparing Your Dress for Pinning
Before pinning your dress, it's essential to wear it, assess the fit, and identify areas for adjustments. Here's how to prepare your dress for pinning:
- Put on the dress: Wearing the dress allows you to see how it fits on your body and pinpoint areas that need tweaking. Make sure the fabric hangs properly and smooth out any wrinkles for an accurate assessment.
- Secure with pins: To make alterations easier, use safety pins or straight pins to temporarily secure the dress in key areas. Pin along the side seams or darts to adjust the fit according to your desired silhouette.
- Adjust the hemline: Pin the hemline to the desired length for alterations or styling purposes. This step helps you visualize the final look and ensures the hem is even before making any permanent changes.
Pinning Techniques for Different Fabrics
After preparing your dress for pinning by wearing it and securing key areas with pins, it's crucial to adapt your pinning techniques based on the fabric type to achieve the best results.
For delicate fabrics like silk or chiffon, using fine and sharp dressmaker pins is essential to avoid damaging the material. These pins will slide through the fabric smoothly without leaving visible holes.
When dealing with stretchy fabrics such as jersey, opt for ballpoint pins to prevent snags and maintain the fabric's elasticity. These pins have a rounded tip that glides between the fibers instead of piercing them.
Thick fabrics like denim or wool require sturdy T-pins to securely hold the layers together during pinning without bending or breaking. Be cautious when pinning intricate or beaded fabrics to prevent snagging or displacing embellishments.
Lastly, when pinning a dress with a pattern, align the print at the seams to ensure continuity and cohesion in the design. By adjusting your pinning techniques to suit the fabric type, you'll achieve professional results without any damage.
Pinning a Fitted Dress
When fitting a dress snugly, it's essential to pin along the side seams to achieve the desired fit. Here are some key steps to consider when pinning a fitted dress:
- Use the Right Pins: Opt for dressmaker pins as they provide a secure hold without causing damage to the delicate fabric. These fine pins are ideal for keeping the garment in place while you make adjustments.
- Pinch and Tailor: To create a tailored look, pinch any excess fabric at the waist or bust and then pin it in place. This technique helps in achieving a more form-fitting silhouette that enhances your figure.
- Focus on Sleeves: When pinning a fitted dress, pay attention to the sleeves. Pin them at the arm seams to ensure a better fit around the shoulders, allowing for ease of movement and comfort.
Pinning a Flowy Dress
Curiously, how can we expertly pin a flowy dress to achieve the perfect fit without compromising its airy design?
When dealing with a flowy dress, it's essential to maintain its loose and breezy feel while ensuring it flatters your figure. To do this, start by pinning the dress at the side seams. This will allow you to adjust the fit without losing the overall flowy silhouette.
Opt for dressmaker pins to secure the fabric gently. Delicate materials require extra care to avoid damage. When shortening a flowy dress, pin the hemline evenly to preserve its fluidity. Additionally, consider pinning the straps or shoulders for a customized fit that complements the overall look.
Experiment with pinning different areas of the dress to find the most flattering and comfortable adjustments. By strategically placing pins, you can achieve a tailored fit that enhances your shape without sacrificing the effortless charm of a flowy dress.
Pinning a Strapless Dress
Alright, let's talk about pinning a strapless dress.
First off, make sure to put the dress on to check the fit before pinning.
Use straight pins at the sides and back to secure the dress snugly without any puckering.
Strapless Dress Preparation
To achieve a personalized fit for a strapless dress, it's best to pin the garment while wearing it. This method allows for adjustments that cater specifically to your body shape.
Here's how to prepare your strapless dress for pinning:
- Secure the Back: Use safety pins to secure the fabric at the back. This will help you make any necessary adjustments while ensuring a snug fit.
- Tailor Along the Side Seams: Pin along the side seams to tailor the dress according to your body shape. This step ensures that the dress complements your curves beautifully.
- Adjust the Length: Fold and pin the hem to your desired length. This technique allows you to customize the dress to the perfect level for your height.
Pinning Technique Tips
When adjusting a strapless dress for a personalized fit, the key is to strategically pin the garment while wearing it to ensure a tailored look that complements your body shape.
Start by wearing the dress to assess the fit accurately. Use dressmaker pins to secure the fabric at the sides and back, ensuring a snug fit that enhances your silhouette. Pinch and adjust the top of the dress to keep it comfortably in place.
To prevent slipping or gaping, pin horizontally across the bodice. Remember to secure the pins firmly but gently to avoid damaging the fabric, allowing for a seamless finish.
Mastering the art of pinning a strapless dress will give you a customized and polished appearance.
Securing Dress Properly
After ensuring the strapless dress fits properly, begin by pinning along the side seams to achieve a snug and comfortable fit that enhances your silhouette.
- Wear the dress: Put on the strapless dress to assess the fit before pinning.
- Pin strategically: Use safety pins or dressmaker pins along the side seams to adjust the dress for a perfect fit.
- Customize the fit: Pin the dress at the bust, waist, and hips levels to tailor it to your body shape.
Pinning a Dress With Darts
For achieving a perfect fit when pinning a dress with darts, start by identifying the dart markings on the fabric to guide your pin placement accurately. These markings are crucial as they indicate where the fabric needs to be taken in to create shape and contour, ensuring a tailored look.
Once you've located the dart lines, gently pinch the fabric along these lines to form the desired shape. Use straight pins to secure the folded dart in place, making sure it lies flat and smooth without any puckering or pulling. Repeat this process for all the darts on the dress to guarantee a consistent and well-fitted garment.
Pinning darts may seem like a small detail, but it plays a significant role in achieving a professional finish. Taking the time to pin each dart accurately will make a noticeable difference in how the dress drapes and fits your body. Mastering this technique will elevate your sewing skills and result in a beautifully tailored dress that flatters your figure.
Pinning a Hem or Seam
As we move from pinning the darts to focusing on pinning a hem or seam, the next step is to prepare the fabric by folding it to the desired length. Once you have the fabric folded just right, it's time to secure it in place using straight pins.
Here's a quick guide to pinning a hem or seam:
- Fold and Secure: Begin by folding the fabric to the desired length for your hem or seam. Use straight pins to secure the folded fabric in place along the entire length.
- Pin Placement: Make sure to insert the pins perpendicular to the fabric. This will help hold the fabric securely and prevent any shifting while you sew.
- Even Spacing: Space the pins evenly and close together along the hem or seam. This will ensure that the fabric stays in place and results in a smooth and even finish.
Final Tips for a Secure and Comfortable Fit
To ensure a secure and comfortable fit for your dress, remember to adjust the pins as needed for a perfect finish. When pinning your dress, using high-quality dressmaker pins is essential for both security and precision. Pin along the seam lines to avoid creating visible holes or damaging the fabric. Spacing the pins evenly will distribute the tension, ensuring a balanced fit throughout the garment. When pinning, always follow the direction of the garment's seams to maintain the intended shape and silhouette.
Here's a helpful table summarizing the key points for achieving a secure and comfortable fit:
| Tip | Description |
|---|---|
| Use high-quality pins | Ensures secure and precise pinning |
| Pin along seam lines | Prevents visible holes or fabric damage |
| Space pins evenly | Distributes tension for a balanced fit |
| Pin in the direction of seams | Maintains the garment's shape and silhouette |
Remember to test the pinned dress by moving and sitting to confirm comfort and mobility before finalizing any alterations.
Frequently Asked Questions
How Do You Pin a Dress Without It Showing?
Pinning a dress discreetly is an art. I choose small, thin dressmaker pins that match my fabric. I pin along seams or under layers in inconspicuous spots. This way, my pins stay hidden, and my dress looks flawless.
What Do You Use to Pin a Dress?
When pinning a dress, I use different types of pins based on the fabric and purpose. Straight pins are great for alterations, T-pins for thicker fabrics, safety pins for quick fixes, and hijab pins for delicate fabrics.
How Do You Pin a Dress That Is Too Big?
When my dress is too big, I adjust the fit by pinning along the seams for a more tailored look. Safety pins help hold the fabric in place for easy modifications. Pinching and securing at the waist and bust areas refine the fit.
How Do You Safety Pin the Bottom of a Dress?
I secure the bottom of a dress with safety pins by folding the excess fabric to my desired length and pinning it in place. Multiple pins ensure a straight hemline. It's simple and effective, allowing me to adjust with ease.