As I discovered, did you know that over 30% of people have tried to remove embroidery with backing at some point?
It's an intricate process that requires patience and precision.
Starting from the back of the garment, carefully identifying the stabilizer is crucial, but the real challenge lies in safely removing it without harming the fabric.
Stay tuned to uncover the step-by-step guide that will help you master this delicate art of undoing embroidery with backing.
Key Takeaways
- Identify embroidery backing type and stitches for appropriate removal.
- Trim excess threads and stabilizer carefully before starting removal.
- Use suitable techniques to loosen stitches without damaging the fabric.
- Manage residue effectively by cleaning the area and following fabric care instructions.
Assess the Embroidery and Backing
Before beginning the process of removing embroidery with backing, it's essential to thoroughly assess the type of backing used and the stitches of the embroidery to determine the most suitable removal method.
Start by identifying the type of backing, whether it's tear away, cut away, or water-soluble. This will guide you in choosing the right technique for removal without causing damage to the fabric.
Next, examine the embroidery stitches closely. Are they tightly packed or loosely done? The density of the stitches can impact how easily the embroidery can be removed. Also, check the fabric of the garment to ensure it can withstand the removal process without tearing or stretching.
Look out for any additional stabilizers or adhesive used in the embroidery process, as these can complicate the removal. If the embroidery is complex or you're unsure about the best course of action, consider seeking professional help to avoid any mishaps.
Gather Necessary Tools and Materials
I've gathered all the necessary tools and materials for removing embroidery with backing:
- a seam ripper
- a razor
- tweezers
- stabilizer
- a lint roller for cleaning up loose threads
- sharp scissors for cutting through larger embroidery strings
Having a clean workspace with good lighting will make the process easier and help avoid any damage to the fabric.
Tools Needed
To effectively remove embroidery with backing, gather essential tools such as a seam ripper, razor, tweezers, and a lint roller. Having the right tools is crucial for a successful removal process. Here are some key items you'll need:
- Seam Ripper: Essential for carefully cutting and removing stitches without damaging the fabric.
- Razor: Useful for gently cutting through threads and backing material.
- Tweezers: Perfect for picking up and removing small bits of backing or thread.
- Lint Roller: Helps to clean up any leftover residue or threads after removing the embroidery.
- Stabilizer: Have a seam ripper on hand to effectively remove stabilizer when taking off embroidery backing.
With these tools in your arsenal, you can confidently tackle removing embroidery with backing.
Materials Required
For efficient removal of embroidery with backing, it's essential to gather the necessary tools and materials such as a seam ripper, razor, tweezers, and stabilizer. Additionally, having a lint roller can aid in cleaning up loose threads and remnants post-removal.
Utilize a combination of tools like nips, scissors, and tweezers for a safe detachment process. Identifying the type of stabilizer used is crucial as it dictates the removal method to prevent fabric damage. Approach the task with care and patience to maintain the fabric's integrity throughout the process.
Start by Removing Excess Threads
Examine the embroidery carefully and trim any excess threads found on both the front and back of the design. This step is crucial to ensure a clean removal process without damaging the fabric.
Here are some tips to effectively remove excess threads:
- Cut with Precision: Use sharp scissors or nips to carefully cut through the top threads of the design. Precision is key to avoid causing any harm to the underlying fabric.
- Snip Larger Strings: Look out for any larger strings that are part of the design and snip them off with precision. This will make the removal process smoother.
- Gently Rub the Area: After trimming excess threads, gently rub the area to loosen the stitches. This will make it easier to pull them away from the fabric.
- Check for Loose Pieces: Use a lint roller to pick up any loose pieces of thread or fabric left behind after removing the embroidery design. This helps in achieving a clean finish.
Loosen the Embroidery Stitches
After trimming the excess threads, the next step is to gently loosen the embroidery stitches by carefully pulling the thread on the backside of the fabric using a seam ripper. It's crucial not to pull too hard to prevent damaging the fabric or creating holes.
I recommend working methodically around the design, loosening stitches in small sections at a time. This approach ensures you maintain control and minimize the risk of any unintended damage. Additionally, be cautious not to stretch the fabric excessively, especially if it's delicate or prone to stretching.
Gradually progress around the entire design, taking your time to ensure all stitches are properly loosened. By following this systematic approach, you'll prepare the embroidery for the next step of removing the backing material with precision and care. Remember, patience and attention to detail are key when loosening embroidery stitches to achieve the best results.
Carefully Cut the Backing Material
I find that carefully cutting the backing material is crucial in the embroidery removal process. Using sharp scissors, I trim the backing close to the stitches while being cautious not to damage the garment.
Removing excess backing ensures a clean finish, and double-checking both sides for any remaining material is a must for a polished result.
Backing Material Removal
To remove the backing material from embroidery, carefully trim it close to the stitches using small, sharp scissors to avoid garment damage.
Here are some tips for efficiently removing the backing material:
- Use precise cutting motions to avoid cutting into the fabric.
- Trim as close to the stitches as possible without touching them.
- Periodically check the front side to ensure a clean removal process.
- Gently pull away any remaining backing material after cutting.
- Be patient and take your time to ensure the embroidery design remains intact.
Safe Cutting Technique
When carefully cutting through the backing material of embroidery, it's essential to use a sharp razor to maintain the integrity of the garment and preserve the design.
By ensuring that you only cut through the backing material and not the fabric itself, you can safely remove the embroidery without causing any damage. The backing material provides crucial stability to the design, so precision is key when making these cuts.
A clean cut through the backing allows for the easy removal of the embroidery with no leftover traces. Remember to take your time and keep a steady hand while cutting to guarantee a smooth and successful removal process.
Mastering this safe cutting technique will help you effectively remove embroidery without compromising the garment.
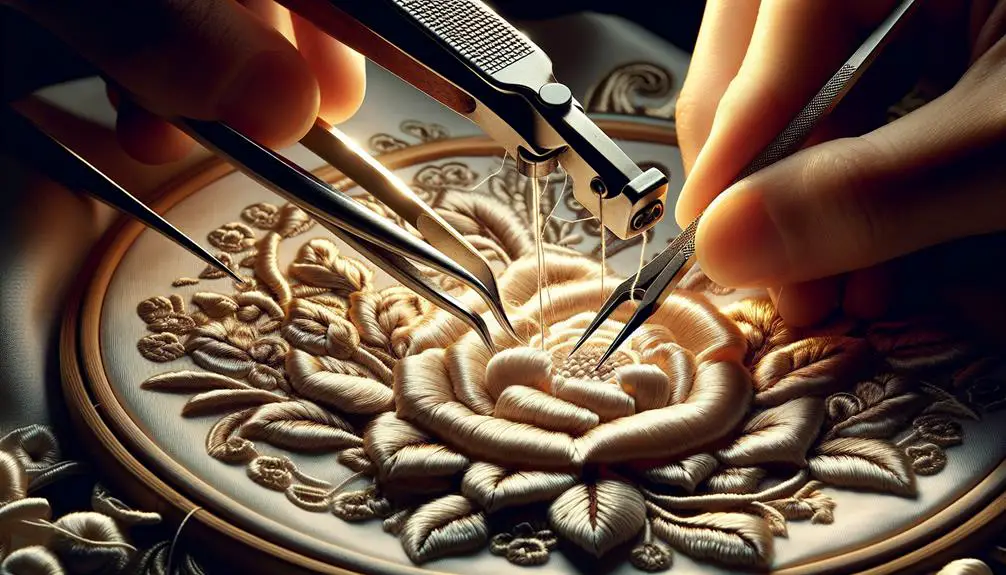
Use a Seam Ripper for Precision
Using a seam ripper allows for precise removal of embroidery stitches without damaging the fabric or backing. Seam rippers are invaluable tools for meticulously dissecting embroidery from its backing, especially in intricate designs.
Here are some tips for utilizing a seam ripper effectively:
- Position the seam ripper: Place the tip of the seam ripper under the stitches you want to remove.
- Gently lift the stitches: Carefully lift the stitches with the seam ripper to avoid pulling or tearing the fabric.
- Work slowly and attentively: Take your time to ensure you only cut the necessary stitches without harming the fabric or backing.
- Use a magnifying glass: For detailed work, a magnifying glass can help you see the stitches clearly.
- Practice on scrap fabric: If you're new to using a seam ripper, practice on scrap fabric first to gain confidence and precision in your technique.
Address Any Remaining Residue
I recommend gently brushing the area with a soft-bristled brush to remove any remaining stabilizer residue. This step helps loosen any leftover bits of stabilizer that may be clinging to the fabric.
If some residue persists, use a damp cloth or sponge to dab at the area and lift off any stubborn remnants. For adhesive stabilizer residue, a small amount of rubbing alcohol or adhesive remover can be applied, followed by gentle blotting to remove the residue effectively.
It's important to be cautious and avoid harsh chemicals or vigorous scrubbing, as these can damage the fabric. Once you've addressed the residue, allow the area to air dry completely before assessing if any remains.
Taking these careful steps will ensure that your fabric is clean and free of any lingering embroidery backing residue.
Finish With Fabric Care Tips
To ensure the longevity and quality of your fabric post-embroidery removal, it's essential to follow these fabric care tips.
- Wash the garment inside out in cold water to prevent any remaining stabilizer from causing irritation.
- Avoid using bleach or harsh detergents when cleaning the fabric to preserve its color and texture.
- Dry the garment on a low heat setting or air dry to prevent any shrinkage or damage to the fabric.
- Check the garment for any loose threads or pieces before wearing it again to ensure a clean finish.
- Consider storing the garment in a cool, dry place to maintain its quality and prevent any potential damage to the embroidery or fabric.
Frequently Asked Questions
How Do You Remove Embroidery Without Damaging Fabric?
Removing embroidery without damaging fabric requires precision. I use a sharp seam ripper to delicately separate the stabilizer from the design. Gently pulling away the tear away stabilizer and cutting threads with care ensure the fabric remains intact.
Will Removing Embroidery Leave Holes?
Removing embroidery will likely leave holes in the fabric, varying in size based on the fabric type and embroidery density. Careful removal can minimize damage. Consider using fabric glue or a patch to cover any remaining marks for a seamless finish.
Does Embroidery Backing Dissolve?
Embroidery backing often dissolves, especially water-soluble types, leaving a clean finish. It's crucial to match the backing type to your fabric. Some heat-activated backings can be peeled off with heat. Quick removal without residue is a bonus.
Can Embroidery Be Removed and Redone?
Embroidery can be removed and redone with care. It involves cutting and unpicking stitches to detach the design from the fabric. The process ensures a clean surface for a new design or leaves the fabric ready for use.