Start by gathering quality bleach or dye, developer, gloves, and sectioning clips. Choose ombre colors that complement your base. Prep your dry, detangled hair and protect your skin with petroleum jelly. Section hair into quadrants for controlled application. Apply dye starting 2-3 inches from the tips and blend upward with light strokes, softening shifts with a wide-tooth comb. Let dye process as directed, then rinse with cool water and condition. Style to highlight your gradient; soon, you’ll master expert techniques for flawless results.
Key Takeaways
- Prepare hair by washing a day before, detangling, and ensuring it is completely dry for even dye application.
- Section hair into four quadrants using clips for organized and controlled ombre dyeing.
- Apply dye starting 2-3 inches above the tips, blending upwards with light strokes for a natural gradient.
- Use a wide-tooth comb to soften transitions between colors and avoid harsh lines.
- Rinse with lukewarm water, condition with color-safe products, and style to highlight the ombre effect.
Gather Your Materials and Tools
To get started with ombre dyeing, you’ll need a handful of essential materials and tools. First, grab a good quality hair bleach or lightener, as this is key to achieving that smooth gradient effect.
Starting with ombre dyeing? A quality bleach or lightener is essential for that perfect gradient look.
You’ll also want a developer, usually 20 or 30 volume, depending on how light you want to go. Have a mixing bowl and brush on hand for easy application.
Don’t forget gloves to protect your hands and a comb or sectioning clips to divide your hair. A timer will help you track the processing time accurately.
Finally, keep a deep conditioner nearby to nourish your hair post-dye. Having these ready will set you up for a smooth, professional ombre experience without interruptions or mistakes.
Choose the Right Ombre Colors for Your Hair
Once you have your materials ready, the next step is picking the perfect colors for your ombre look.
Consider your natural hair color first; choose shades that complement or enhance it rather than clash. For dark hair, warm caramel or honey tones create a natural gradient, while lighter hair pairs beautifully with pastel or bold colors.
Think about maintenance too—lighter shades may require more touch-ups. Decide whether you want a subtle, blended shift or a striking contrast. Use a color wheel if you’re unsure, selecting complementary or analogous colors for harmony.
Finally, test your chosen dyes on a small hair section to see how they interact with your base color. This guarantees your ombre will look seamless and professional once complete.
Prepare Your Hair for Dyeing
Three key steps will get your hair ready for dyeing and guarantee the best ombre results.
First, start with clean hair; wash it a day before to remove oils and buildup but avoid shampooing right before dyeing, as natural oils protect your scalp.
Next, gently detangle your hair to facilitate even application and prevent patchiness. Use a wide-tooth comb for this.
Finally, make certain your hair is completely dry before you begin—wet hair can dilute the color and cause uneven fading.
If your hair is damaged or overly dry, apply a deep conditioning treatment a few days prior to strengthen it.
Protect Your Skin and Clothing
After preparing your hair, you’ll want to shield your skin and clothing from dye stains. Start by draping an old towel or a dye cape around your shoulders to protect your clothes.
Wear gloves to keep your hands clean and prevent skin irritation. Apply a thin layer of petroleum jelly or a thick moisturizer along your hairline, ears, and neck to create a barrier that stops dye from staining your skin.
Wear gloves and apply petroleum jelly along edges to prevent dye stains and skin irritation.
Make sure the barrier is evenly applied but not too thick, so it doesn’t interfere with the dye. Keep some cotton pads or makeup remover wipes nearby to quickly clean any accidental smudges.
Taking these simple precautions helps keep your skin and clothes spotless, making the dyeing process smoother and more enjoyable.
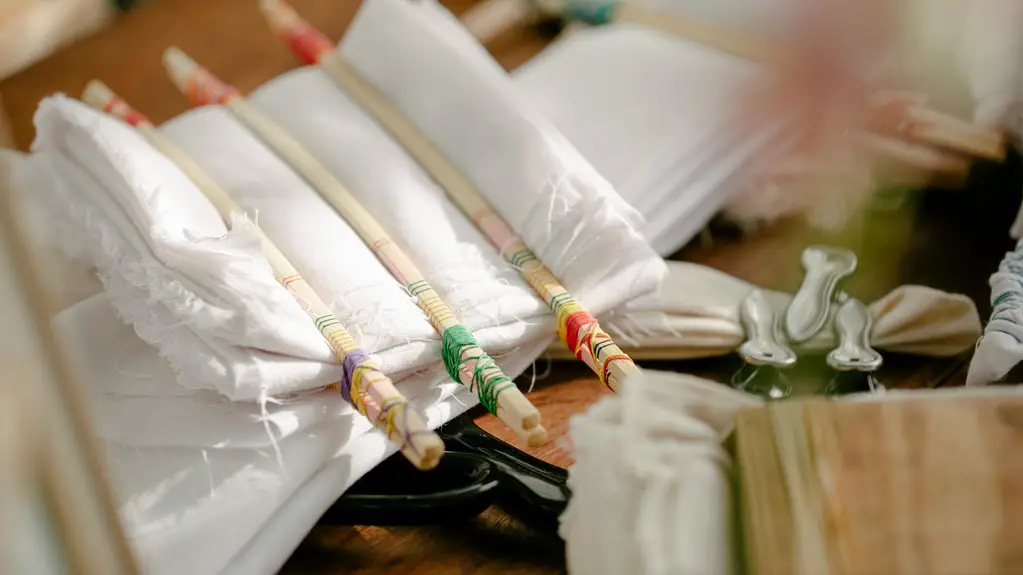
Section Your Hair for Easy Application
Start by dividing your hair into four equal quadrants to keep things organized.
Use clips to hold each section in place, so you can work more efficiently.
This setup makes applying the ombre color much easier and cleaner.
Divide Hair Into Quadrants
Dividing your hair into four sections makes the ombre dyeing process much easier and more precise. Start by creating a middle part from your forehead to the nape of your neck.
Then, part your hair horizontally from ear to ear, forming four distinct quadrants: two in the front and two in the back. This setup helps you work systematically and guarantees even dye distribution.
By focusing on one quadrant at a time, you avoid missing spots and control the shift between colors better. Keep the sections neat and separate to maintain clarity throughout the application.
This simple division sets the foundation for a smooth, professional ombre look, making the next steps in your dyeing process more manageable and efficient.
Use Clips for Control
Although you’ve already separated your hair into quadrants, using clips will give you even better control during the dyeing process. Clip each section firmly to keep hair out of the way, preventing any accidental color overlap.
Smaller clips work best for holding thin subsections, letting you focus on one part at a time. This way, you can apply dye precisely where you want the ombre effect to shift smoothly.
Clips also help maintain clean lines between sections, which is essential for a professional finish. By managing your hair in neat, clipped sections, you reduce the chance of mistakes and speed up the application.
Mix the Dye According to Instructions
You’ll want to measure your dye components carefully to get the right color intensity.
Follow the instructions closely to mix the dye and developer in the recommended ratio.
Make sure the consistency isn’t too thick or too runny for smooth application.
Measuring Dye Components
Accurately measuring your dye components is essential to achieving the perfect ombre effect. Start by gathering precise measuring tools like graduated cylinders or digital scales. Follow the manufacturer’s instructions carefully, noting the exact ratios of dye to developer or mixing solution.
Use separate containers for each dye concentration to avoid cross-contamination. Measure liquids at eye level for accuracy, and avoid guessing or estimating quantities. Keep your workspace clean to prevent spills or mix-ups.
If you’re creating multiple dye shades for the change, measure each batch individually to maintain consistency throughout the application. Remember, even small deviations can alter color intensity and blending, so take your time and double-check your measurements before mixing.
This step guarantees your ombre dye will look seamless and professional.
Adjusting Consistency Properly
Once you’ve measured your dye components precisely, the next step is to adjust the consistency by mixing the dye according to the instructions. Proper consistency guarantees smooth application and even color shift. Use a non-metallic bowl and stir gently to avoid bubbles. If the dye seems too thick, add small amounts of developer; if too thin, add more dye powder. Follow the recommended ratios closely to avoid uneven results.
| Step | Action | Tip |
|---|---|---|
| 1 | Pour dye powder | Use exact measured amounts |
| 2 | Add developer | Add gradually, mix as you go |
| 3 | Stir thoroughly | Avoid air bubbles |
| 4 | Check consistency | Should be creamy, not runny |
| 5 | Adjust if necessary | Add powder or developer slowly |
Apply Dye to the Tips of Your Hair
Dip the tips of your hair into the dye carefully, ensuring even coverage without oversaturating the strands.
Carefully dip hair tips into dye for even coverage without oversaturating strands.
Hold your hair just above the tips and submerge only the ends into the dye mixture. Use your fingers or a brush to coat the tips evenly, making sure every strand is covered for a consistent color.
Avoid dipping too high to prevent harsh lines. If needed, gently squeeze out excess dye to prevent dripping. Work quickly but steadily to maintain an even application.
Once the tips are coated, set them aside and let the dye process according to the product instructions. Proper application at the ends is essential for a vibrant ombre effect, setting the stage for seamless blending in the next step.
Blend the Dye Upwards for a Gradient Effect
While the dye on your hair tips sets, you’ll want to start blending the color upward to create that smooth gradient effect. This step is essential for achieving the seamless shift that defines a professional ombre look.
Begin by applying a small amount of dye slightly above the tips. Then, gently feather the dye upward with your fingers or a brush to soften the edges.
Here’s how to blend effectively:
- Apply dye about 2-3 inches above the tips.
- Use light, upward strokes to feather the color.
- Gradually decrease the dye amount as you move up.
- Focus on creating a natural fade, avoiding harsh lines.
This technique guarantees a flawless gradient before you soften the shift further.
Use a Comb or Brush to Soften the Transition
You’ll want to grab a wide-tooth comb or a soft brush to gently blend the dye where the colors meet.
This helps create a smooth, natural shift without harsh lines.
Using these tools carefully lets you control the gradient and achieve that perfect ombre look.
Blending Techniques
Three key tools can help you achieve a flawless ombre: a comb, a brush, and your hands. Blending is essential to avoid harsh lines and create a seamless color gradient.
Start by applying dye where you want the lightest and darkest shades. Then, use your comb or brush to gently soften the boundary by lightly brushing back and forth. Your hands can help feather the dye, ensuring a natural blend.
Here’s how to perfect your blending technique:
- Apply dye in sections for control.
- Use the comb or brush to gently blend at the shift.
- Feather with your fingers to soften further.
- Check in natural light to spot any harsh lines.
Master these steps to get that professional ombre finish.
Tools for Softening
Although blending by hand can work, using a comb or brush lets you soften the shift between colors with greater control and precision.
After applying your dye, gently run a wide-tooth comb or a soft-bristle brush through the area where the two shades meet. This action breaks up harsh lines and creates a seamless gradient.
Be careful not to overblend; you want a smooth change, not a muddy mix. For best results, comb or brush in small sections, moving from the darker shade into the lighter one.
This technique helps distribute the dye evenly and guarantees the colors meld naturally.
Using these simple tools, you’ll achieve a professional-looking ombre finish that’s soft, subtle, and visually appealing.
Let the Dye Process for the Recommended Time
Once the dye is applied, allow it to sit undisturbed for the recommended time to guarantee vibrant and even color absorption.
This waiting period is essential for the ombre effect to develop smoothly from roots to tips. Avoid touching or disturbing your hair during this phase to prevent uneven patches.
Keep these points in mind:
- Follow the time instructions on your dye package precisely.
- Use a timer to track the process—don’t guess or rush.
- Longer processing doesn’t always mean better results; stick to the recommended duration.
- Check your hair periodically through the foil or plastic wrap to monitor color progression.
Patience here guarantees a flawless, professional-looking ombre finish.
Rinse and Condition Your Hair Thoroughly
After letting the dye process for the recommended time, the next step is to rinse your hair thoroughly.
Use lukewarm water and avoid hot water, which can strip color and dry your hair. Rinse until the water runs clear to guarantee all excess dye is removed. Be gentle to prevent tangling or damage.
Once rinsed, apply a color-safe conditioner generously. This will restore moisture and seal the cuticle, locking in your new shade.
Apply a color-safe conditioner generously to restore moisture and lock in your vibrant new shade.
Leave the conditioner on for the time suggested on the product label, then rinse it out with cool water to add shine and smoothness.
Proper rinsing and conditioning are vital to maintain your ombre’s vibrancy and keep your hair healthy after dyeing.
Style Your Hair to Showcase the Ombre Effect
To really make your ombre stand out, you’ll want to style your hair in ways that highlight the gradient effect.
Focus on styles that allow the color change to be visible and dynamic. Here are four styling tips to showcase your ombre:
- Loose Waves: Use a curling iron to create soft waves that reveal the color shift naturally.
- Half-Up Styles: Pull back the top half of your hair to contrast the darker roots with the lighter ends.
- Side Part: A deep side part adds dimension and exposes more of the color gradient.
- Braids: Braiding your hair mixes the shades creatively, making the ombre more noticeable.
Frequently Asked Questions
How Often Should I Touch up My Ombre Dye?
Like the tide returning to shore, you should touch up your ombre dye every 6 to 8 weeks. This timing keeps colors vibrant and your look fresh without overloading your hair with chemicals.
Can I Ombre Dye Over Previously Colored Hair?
Yes, you can ombre dye over previously colored hair, but you’ll need to assess your hair’s condition first. Be cautious to avoid damage, and consider consulting a professional for the best results and color blending.
What Are the Best Aftercare Products for Ombre Hair?
Your ombre hair is a canvas; nourish it with color-safe shampoos, hydrating conditioners, and UV protectants. Don’t forget deep conditioning masks—they’re the gentle rain that keeps your vibrant hues blooming beautifully.
Is Ombre Dyeing Safe for Damaged or Weak Hair?
Ombre dyeing can be risky for damaged or weak hair since it involves bleaching. You should strengthen your hair first and consult a professional. If you proceed, use gentle products and proper aftercare to minimize damage.
Can I Achieve Ombre Effects on Very Short Hair?
You might think very short hair can’t pull off ombre, but it absolutely can! With the right technique and color placement, you’ll create a stunning gradient that adds depth and style, no matter the length.