To achieve the perfect ombre, start by selecting complementary colors and gather your dyeing tools like gloves, applicator brush, and high-quality bleach. Prepare your clean, detangled hair, then mix dye with developer in the right ratio. Section hair and apply lightest color at ends or roots, blending carefully for a seamless gradient. Monitor timing closely, rinse with lukewarm water, and condition to seal color. Keep your hair vibrant with proper care and styling; upcoming tips will help you master every step.
Key Takeaways
- Choose complementary colors and consider seasonal trends for a seamless and stylish ombre gradient.
- Prepare clean, product-free hair 24-48 hours before dyeing for optimal color absorption.
- Mix dye and developer in precise ratios using a non-metallic bowl and applicator brush for consistent results.
- Section hair, apply dye from roots or tips, and blend with fingers or a comb to avoid harsh lines.
- Rinse with lukewarm water, apply color-safe conditioner, and finish with cool water to lock in color and shine.
Understanding Ombre Hair and Its Variations
Ombre hair is a popular coloring technique where your hair gradually shifts from one shade to another, typically from dark roots to lighter ends.
Ombre hair blends colors seamlessly, fading from darker roots to lighter tips for a natural yet striking look.
You’ll notice this smooth shift creates depth and dimension, making your hair look fuller and more dynamic.
There are several variations to explore, like the classic ombre with a clear contrast or the subtle balayage, which blends shades more softly.
You can also try reverse ombre, where the lighter shade starts at the roots and darkens toward the ends.
Each style offers a unique way to express yourself, depending on how bold or natural you want the look.
Understanding these variations helps you envision the effect that suits your personality and lifestyle best before you immerse yourself in the coloring process.
Choosing the Right Colors for Your Ombre
When choosing colors for your ombre, think about combinations that naturally complement each other to create a seamless blend.
You can also consider seasonal color trends to keep your look fresh and stylish. Matching your shades to your skin tone and current fashion can make all the difference.
Complementary Color Combinations
Although selecting colors might seem challenging, choosing complementary shades can make your ombre truly stand out.
Complementary colors sit opposite each other on the color wheel, creating vibrant contrast that draws attention. When picking your hues, consider these key points:
- Pair warm tones like fiery red with cool greens for a bold, energetic look.
- Combine deep blues with bright oranges to achieve a striking yet balanced gradient.
- Use soft purples alongside sunny yellows to create a playful and eye-catching effect.
Seasonal Color Trends
Since colors shift with the seasons, choosing hues that reflect current trends can elevate your ombre’s impact.
In spring, pastel shades like soft pinks, lilacs, and mint greens bring a fresh, light feel.
Summer calls for vibrant tones—think fiery reds, golden blondes, or ocean blues that capture the sun’s energy.
When fall arrives, warm colors like rich auburns, deep coppers, and caramel browns blend perfectly with the season’s earthy vibe.
Winter suits cooler, icy shades such as silver, ash blondes, and deep plums, creating a striking contrast.
Pay attention to fashion and beauty forecasts to stay ahead.
Tools and Materials Needed for Ombre Dyeing
To get started with ombre dyeing, you’ll need some essential tools like gloves, brushes, and mixing bowls.
Choosing the right hair products, such as quality bleach and toner, will make a huge difference in your results.
Let’s go over what you’ll need to create that flawless gradient effect.
Essential Dyeing Equipment
Achieving a flawless ombre starts with having the right tools at your fingertips. Without essential dyeing equipment, you’ll struggle to blend colors smoothly and protect your hair and workspace. Here’s what you need:
- Applicator Brush and Bowl – These let you mix your dye evenly and apply precise strokes for a seamless gradient.
- Sectioning Clips – Use clips to divide your hair into manageable parts, ensuring even coverage and control.
- Gloves and Protective Cape – Protect your skin and clothes from stains while you work confidently.
Having these items ready streamlines the process, helping you achieve that perfect fade with ease.
Make sure your workspace is prepped and all tools are clean before you start for the best results.
Recommended Hair Products
Several key hair products will make your ombre dyeing process smoother and more effective.
Start with a high-quality lightening bleach to lift your hair evenly without causing excessive damage. Choose a developer volume suited to your hair’s texture and desired lift—usually 20 or 30 volume.
You’ll also need a toner to neutralize any unwanted brassiness after bleaching. Pick a color-safe shampoo and conditioner formulated for color-treated hair to maintain vibrancy.
A deep conditioning mask is essential to restore moisture and strength post-dyeing. Don’t forget gloves to protect your hands and a wide-tooth comb for gentle detangling.
Finally, have an oil or serum on hand to add shine and smoothness once your ombre is complete. These products will help you achieve a flawless, healthy-looking ombre.
Preparing Your Hair Before Dyeing
Before you plunge into dyeing, you’ll want to make sure your hair is clean and free of any heavy products that could interfere with the color absorption.
Ensure your hair is clean and product-free for the best color absorption before dyeing.
Start by washing your hair 24 to 48 hours before dyeing; this allows natural oils to protect your scalp during the process. Avoid deep conditioning right before dyeing, as it can create a barrier to the dye.
Next, gently detangle your hair to prevent uneven application. Here’s a quick checklist to prepare your hair:
- Shampoo with a residue-free formula to remove buildup without stripping moisture.
- Let your hair air dry or blow dry gently to avoid damage.
- Avoid styling products or heat tools for at least a day before dyeing to keep your strands healthy and ready.
Sectioning Your Hair for Ombre Application
Once your hair is clean, dry, and detangled, you’re ready to section it for the ombre application. Start by parting your hair down the middle from your forehead to the nape of your neck using a rat-tail comb.
Then, divide each half into two sections—top and bottom—so you end up with four manageable parts. Clip each section securely to keep them separate. This organization helps you apply the dye evenly and guarantees you don’t miss any strands.
For thicker or longer hair, create more subsections as needed. Keep the sections tight but comfortable, so the dye applies smoothly without tangling.
Proper sectioning is essential—it sets the foundation for a seamless gradient and simplifies the dyeing process, so take your time here before moving on.
Mixing the Hair Dye Properly
To get the perfect ombre, you need to mix your hair dye with the right ratio of developer and color.
Use proper tools like a bowl and brush to blend the mixture evenly. This helps you achieve consistent color and avoid patchy results.
Choosing the Right Ratio
Although mixing hair dye might seem straightforward, choosing the right ratio is crucial for achieving a smooth, natural ombre effect. You want the colors to blend seamlessly without harsh lines or uneven tones. Here’s how to nail the ratio:
- Follow the dye instructions exactly—most dyes recommend a 1:1 or 1:2 ratio of color to developer.
- Adjust based on hair porosity—more porous hair might need a slightly stronger developer mix for even color absorption.
- Consider the lightening level—if you’re aiming for a lighter ombre, increase the developer slightly but don’t exceed recommended limits to avoid damage.
Getting this balance right guarantees your ombre fades gently, creating that perfect gradient you’re after.
Mixing Tools and Techniques
When you mix your hair dye, having the right tools and technique makes all the difference in achieving a flawless ombre.
Start with a non-metallic bowl and a tint brush to prevent any chemical reactions and guarantee smooth application. Use a whisk or the brush’s tip to blend the dye and developer thoroughly, mixing until the consistency is creamy and even.
Avoid shaking the bottle or stirring too vigorously, as this can introduce air bubbles and affect application. Mixing small batches at a time helps maintain freshness and control.
Keep your workspace clean and organized, so you can focus on blending without distractions. Proper mixing guarantees the color applies evenly, setting the foundation for your perfect ombre look.
Achieving Consistent Color
Once you’ve mixed your dye with care, the next step is ensuring the color stays consistent throughout your application. Consistency means your ombre will blend smoothly without patchy or uneven tones.
To achieve this, follow these key steps:
- Stir thoroughly – Use a whisk or applicator brush to mix the dye and developer until the texture is uniform with no streaks or lumps.
- Measure precisely – Always use the same ratio of dye to developer as instructed to maintain the same chemical reaction and color result.
- Mix fresh batches – If your dye runs low mid-application, mix a new batch rather than topping off the old one, to prevent color variations.
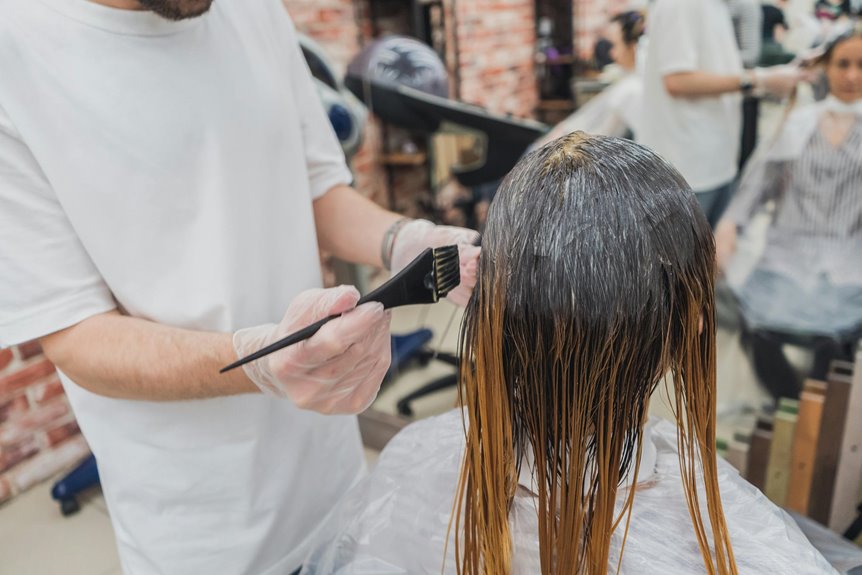
Applying the Dye to Achieve a Seamless Gradient
To achieve a seamless gradient, you need to apply the dye carefully and methodically, blending the colors where they meet.
Start by sectioning your hair and applying the lightest color at the roots or tips, depending on your desired look. Use a brush or your fingers to gently feather the dye inward toward the blending zone.
When you apply the second color, overlap slightly onto the first to avoid harsh lines. Use a comb or your fingers to blend the two colors where they meet, working quickly but gently.
Keep your strokes consistent and avoid over-saturating any one area to prevent patchiness. This careful blending creates the smooth transition that defines a perfect ombre, ensuring your colors meld naturally without abrupt edges.
Timing and Monitoring the Dye Process
Although applying the dye carefully sets the foundation, you need to time and monitor the process closely to guarantee the colors develop perfectly.
Keep a close eye on your hair as the dye sets because each section will absorb color at a different rate. Follow these steps to manage timing effectively:
- Check every 5-7 minutes — Watch how the gradient deepens, ensuring the lighter roots don’t over-process.
- Use a timer — Set reminders to avoid leaving the dye on too long, which can cause uneven results.
- Adjust based on hair texture — Porous hair absorbs dye faster, so be ready to rinse sooner if needed.
Rinsing and Conditioning After Dyeing
After the dye has processed to your satisfaction, you’ll want to rinse your hair thoroughly with lukewarm water to remove all excess color without stripping the shade.
Start by gently massaging your scalp and lengths to help wash out the dye evenly. Avoid hot water, as it can fade your new color faster.
Once the water runs clearer, apply a color-safe conditioner to restore moisture and seal the hair cuticle. Leave the conditioner on for at least five minutes to maximize hydration and smoothness.
Rinse with cool water to lock in shine and enhance color longevity.
Finally, gently towel-dry your hair without rubbing, and prepare for your next step. Proper rinsing and conditioning guarantee your ombre stays vibrant and your hair remains healthy.
Styling Tips to Enhance Your Ombre Look
Once your hair is properly rinsed and conditioned, you can focus on styling techniques that highlight your ombre’s depth and dimension.
To make your color pop, try these:
- Loose Waves: Use a curling wand to create soft waves. This movement catches light differently, showcasing the gradient beautifully.
- Half-Up Styles: Pull back the top section of your hair. This contrasts the darker roots with the lighter ends, emphasizing the ombre shift.
- Braids: Incorporate loose braids to mix the shades naturally. The intertwining colors add texture and visual interest.
These styles enhance your ombre without overpowering it, letting the color do the talking.
Experiment with them to find what suits your vibe best!
Maintaining and Caring for Ombre Hair Color
To keep your ombre looking fresh and vibrant, you’ll need to adjust your hair care routine to protect both the color and the health of your strands.
Use sulfate-free shampoos designed for color-treated hair to prevent fading. Wash your hair with lukewarm or cool water since hot water can strip color and moisture.
Deep condition regularly to maintain softness and prevent dryness, especially on the lighter ends. Limit heat styling and always apply a heat protectant when you do.
Protect your hair from sun exposure by wearing hats or using UV-protectant sprays, as sunlight can dull your color.
Finally, schedule touch-ups every 6 to 8 weeks to keep the gradient smooth and vibrant. Consistent care guarantees your ombre stays gorgeous longer.
Frequently Asked Questions
Can I Achieve Ombre Hair on Short Haircuts?
You can definitely achieve ombre on short hair. The gradient effect works well regardless of length, but shorter hair means less blending space. Be sure to use a skilled stylist to get a smooth changeover.
How Often Should I Touch up My Ombre Roots?
Don’t let your roots get out of hand—touch them up every 6 to 8 weeks to keep your ombre looking fresh. This timing helps you avoid a patchy look and maintain that smooth color shift.
Is Ombre Hair Safe for Chemically Treated Hair?
You can do ombre on chemically treated hair, but you’ve got to be careful. Your hair’s already fragile, so use gentle dyes and deep conditioners. Consult your stylist to avoid damage and keep your hair healthy.
Can I Do an Ombre Dye at Home Without Professional Help?
You could easily turn your bathroom into a color studio—ombre at home is doable! Just follow detailed guides, use quality products, and prepare for some trial and error to avoid hair disasters.
What Are the Common Mistakes to Avoid When Dyeing Ombre?
Don’t rush the blending, avoid harsh lines, and don’t apply dye to dry hair. Also, don’t skip the strand test or use too much bleach. Taking your time guarantees a smooth, natural-looking ombre.