To create a spider tie-dye with bold black and vibrant colors, start by choosing a plain white cotton shirt and pre-washing it. Pinch the fabric’s center and fold it into quarters, then bind tightly with rubber bands for crisp lines. Use fiber-reactive dyes, applying black around folds for contrast and bright colors in sections with squeeze bottles. Let the dye set overnight, then rinse and fix with soda ash. Keep going to discover how to perfect your technique and care for your design.
Key Takeaways
- Use plain white cotton fabric for best dye absorption and vibrant colors in the spider tie-dye technique.
- Fold fabric with a center pinch and secure tightly with rubber bands for crisp spider patterns.
- Apply deep black dye first around folds to create strong contrast with bright colors like red or blue.
- Use fiber-reactive dyes and squeeze bottles for precise application and lasting, vivid hues.
- Set dye by letting it sit overnight, rinse with cold water, fix colors with soda ash, then air dry away from sunlight.
Materials Needed for Spider Tie-Dye
Before you begin your spider tie-dye project, you’ll need to gather a few essential materials.
Start with a plain white cotton shirt or fabric, as natural fibers absorb dye best. You’ll also need fiber-reactive dyes in your chosen colors and black dye to create that signature spider effect.
Grab rubber bands to secure your folds tightly, and squeeze bottles for precise dye application. Don’t forget gloves to protect your hands and plastic table covers to avoid stains.
A large plastic bag or plastic wrap will help keep your project moist while the dye sets. Finally, have some water and mild detergent ready for rinsing and washing your fabric once the dyeing is complete.
With these materials on hand, you’re ready to plunge into spider tie-dye!
Preparing Your Fabric for Dyeing
Before you start spider tie-dyeing, choose a fabric that absorbs dye well, like cotton or rayon.
Make sure to pre-wash and dry your fabric to remove any sizing or chemicals that could block the dye.
This step helps your colors come out vibrant and last longer.
Fabric Selection Tips
Choosing the right fabric is essential to achieving vibrant and lasting results with the spider tie-dye technique.
Natural fibers like cotton, rayon, and silk absorb dye better, giving you brighter colors and sharper contrasts. Avoid synthetic fabrics because they often resist dye and may produce dull or uneven patterns.
Opt for lightweight to medium-weight fabrics, as heavier materials can be harder to manipulate into the spider design. Also, check the fabric’s color—white or light-colored fabric works best to showcase both the black and colored dyes clearly.
Finally, make sure your fabric is free from any coatings or finishes that might block dye absorption. Picking the right fabric sets the foundation for your spider tie-dye’s striking black and color effect.
Pre-Wash and Dry
Although it may seem like a simple step, pre-washing your fabric is essential to remove any sizing, dirt, or oils that can prevent the dye from adhering properly.
Start by washing your fabric in warm water with a mild detergent, skipping fabric softeners. This cleanses the fibers and opens them up to absorb dye evenly.
After washing, dry the fabric completely, either by air drying or using a dryer on a low setting. Avoid using high heat, which can shrink or damage the fabric.
Ensuring your fabric is clean and dry creates the perfect canvas for vibrant spider tie-dye colors and sharp black contrasts. Taking this step seriously helps you achieve professional-looking results every time you dye.
Folding and Binding Techniques for the Spider Pattern
Mastering three essential folding and binding techniques will help you create the distinctive spider pattern in tie-dye. Start by pinching the fabric’s center and folding it into quarters. Next, accordion fold the fabric from the center outwards to form tight pleats. Finally, use rubber bands to bind the folds securely, creating distinct sections where dye won’t penetrate fully, forming the spider legs.
| Technique | Description | Tip |
|---|---|---|
| Center Pinch | Pinch and fold fabric into quarters | Keep folds tight for sharp lines |
| Accordion Fold | Fold fabric in pleats | Align pleats evenly for symmetry |
| Rubber Band Bind | Wrap bands tightly around folds | Use multiple bands for control |
Practice these steps to get crisp spider patterns every time.
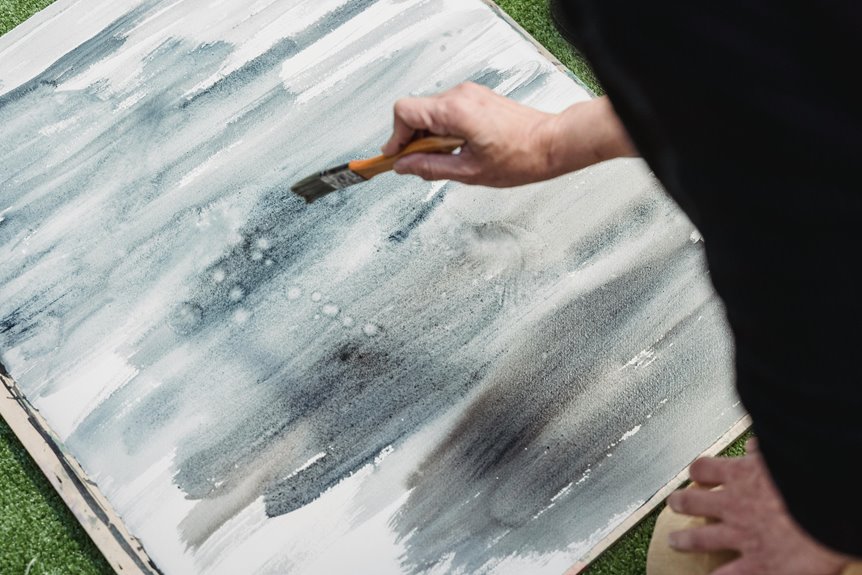
Choosing and Applying Dyes for Black and Color Contrast
When you want your spider tie-dye to really pop, selecting the right dyes is essential. Start by choosing a deep black dye that provides strong contrast against vibrant colors.
Use fiber-reactive dyes for cotton fabrics, as they bond well and offer bright, lasting hues. Pick a few bright colors—reds, blues, or yellows—that complement the black.
Apply the black dye first around the folded sections to emphasize the spider pattern’s lines. Then, carefully add your chosen colors in the remaining spaces, avoiding overlap to keep the contrast sharp.
Use squeeze bottles for precise application, ensuring the black areas stay distinct. By thoughtfully selecting and applying your dyes this way, you’ll create a striking spider tie-dye with bold black outlines and vivid color bursts.
Setting the Dye and Fixing the Colors
After applying your dyes, you’ll want to set them properly to guarantee the colors stay vibrant and don’t fade or wash out. Start by letting the dye sit for 6-8 hours, preferably overnight, wrapped in plastic to keep moisture. Then rinse the fabric with cold water until it runs clear. To fix the colors, soak your piece in a soda ash solution for 15 minutes before washing with mild detergent. Finally, air dry away from direct sunlight.
| Step | Action | Purpose |
|---|---|---|
| Wait & Wrap | Let sit 6-8 hours | Allow dye absorption |
| Rinse | Cold water till clear | Remove excess dye |
| Soda Ash Soak | 15 minutes | Fix colors & enhance fastness |
Tips for Care and Maintenance of Your Spider Tie-Dye Creation
Once your spider tie-dye piece has been properly set and rinsed, caring for it correctly will keep those vibrant patterns looking fresh.
Always wash your tie-dye garment separately in cold water to prevent colors from bleeding onto other clothes. Use a gentle detergent without bleach or harsh chemicals, as they can fade the colors.
Turn your item inside out before washing to protect the design. Avoid using a dryer; instead, air dry your piece to maintain fabric integrity and color vibrancy.
If you must iron, place a cloth over the design and use a low heat setting. Finally, store your tie-dye creation in a cool, dry place away from direct sunlight to prevent fading over time.
Following these tips guarantees your spider tie-dye stays bold and beautiful.
Frequently Asked Questions
Can Spider Tie-Dye Be Done on Synthetic Fabrics?
You want vibrant patterns, but synthetic fabrics often resist dyes. Luckily, you can use special dyes designed for synthetics to get spider tie-dye effects. Just remember, results may vary, so test a small piece first.
How Long Does the Spider Tie-Dye Process Typically Take?
You’ll usually spend about 1 to 2 hours on the spider tie-dye process, including tying, dyeing, and setting the dye. Drying time can add several hours, so plan accordingly for best results.
Is Spider Tie-Dye Safe for Children’s Clothing?
Did you know 85% of parents say tie-dye dyes are safe? You can confidently use non-toxic, kid-friendly dyes for children’s clothes. Just avoid harsh chemicals, and always supervise the process to keep it safe and fun!
Can I Use Natural Dyes for the Spider Tie-Dye Technique?
You can definitely use natural dyes for your spider tie-dye projects. They’re eco-friendly and safe, but remember natural dyes may produce more subtle colors compared to synthetic ones. Just prep your fabric properly for best results!
What Are Common Mistakes to Avoid in Spider Tie-Dye?
You’ll want to avoid over-saturating the fabric, which can blur patterns. Don’t twist too tightly or too loosely—both ruin the design. Also, be careful with dye placement to keep colors vibrant and distinct.