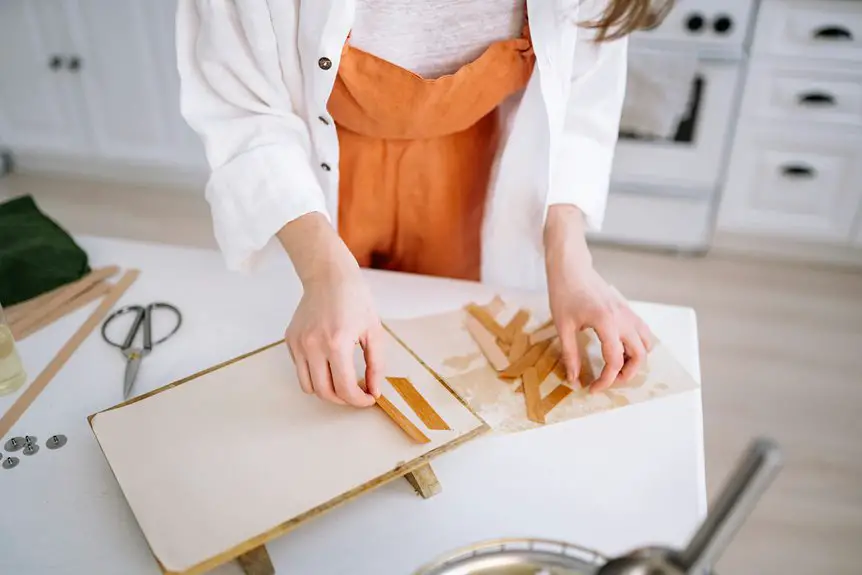
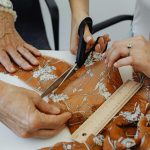
When working with Kevlar fabric strips for your DIY projects, you’ll want sharp scissors or a rotary cutter to guarantee clean, precise cuts without fraying. Always wear protective gloves, goggles, and masks since fibers can irritate skin and eyes. Measure and mark your fabric carefully, then cut slowly on a flat surface. Use heavy-duty thread or strong adhesives to join strips securely. Proper handling keeps your project durable and safe. Keep going to discover expert tips and creative uses.
Table of Contents
Key Takeaways
- Use sharp scissors or rotary cutters and a stable cutting mat to cut Kevlar strips cleanly and prevent fraying.
- Wear protective gloves, goggles, and masks to avoid fiber irritation and inhalation during cutting and handling.
- Measure and mark Kevlar fabric accurately with fabric chalk before cutting to ensure precise strip dimensions.
- Join strips by sewing with heavy-duty thread or using specialized adhesives designed for Kevlar to maintain strength and flexibility.
- Clean Kevlar strips gently with mild soap and cold water, air dry away from direct sunlight, and store in a cool, dry place.
Understanding the Properties of Kevlar Fabric
Although you mightn’t be familiar with all its details, Kevlar fabric offers exceptional strength and durability that make it ideal for various DIY projects.
When you work with Kevlar, you’ll notice its remarkable resistance to cuts, abrasions, and heat. This means your projects will endure tough conditions without wearing down quickly.
Kevlar is also lightweight, so your creations won’t become bulky or heavy. Its high tensile strength allows it to absorb impacts effectively, which is why it’s used in protective gear.
Kevlar’s lightweight nature and high tensile strength make it perfect for durable, impact-resistant creations.
Keep in mind, Kevlar doesn’t stretch much, so you’ll want to handle it carefully to avoid fraying. Understanding these core properties helps you choose the right applications and treatments to get the best performance from your Kevlar fabric strips.
Essential Tools for Cutting Kevlar Strips
You’ll need the right tools to cut Kevlar strips cleanly and safely, like sharp scissors or a rotary cutter.
Don’t forget safety gear like gloves and eye protection to keep yourself safe during the process.
Plus, mastering a few cutting techniques will help you get precise, hassle-free results every time.
Best Cutting Tools
When working with Kevlar fabric strips, choosing the right cutting tools can make all the difference in achieving clean, precise edges. You’ll want sharp, strong scissors designed for heavy fabrics or specialty rotary cutters with durable blades.
Standard scissors often struggle with Kevlar’s toughness, so opt for heavy-duty shears made for cutting thick materials. Rotary cutters work well if you use a cutting mat underneath, giving you smooth, straight cuts without fraying.
Utility knives with replaceable blades are another option, especially for thicker strips, but make certain you cut slowly and steadily. Avoid dull blades—they’ll cause jagged edges and damage the fabric.
Investing in quality cutting tools not only makes your work easier but also guarantees your Kevlar strips maintain their strength and integrity for your DIY projects.
Safety Equipment Needed
Cutting Kevlar strips demands more than just sharp tools; proper safety equipment is essential to protect yourself from potential hazards. Kevlar fibers can irritate your skin and eyes, so you’ll want to gear up accordingly. Always wear protective gloves to shield your hands from cuts and fiber irritation. Safety goggles prevent stray fibers from getting into your eyes. A dust mask is also key, as cutting Kevlar fabric can release tiny particles you don’t want to breathe in.
| Safety Gear | Purpose | Tip |
|---|---|---|
| Gloves | Protect hands from cuts | Use cut-resistant gloves |
| Safety Goggles | Shield eyes from fibers | Choose snug-fitting goggles |
| Dust Mask | Prevent inhaling fibers | Use a mask rated for fine particles |
Cutting Techniques Explained
Mastering three key tools will make slicing Kevlar strips cleaner and safer.
First, use a sharp rotary cutter or heavy-duty scissors designed for tough fabrics. These tools provide precise cuts without fraying edges.
Second, a self-healing cutting mat protects your work surface and helps maintain blade sharpness.
Third, a metal ruler or straightedge guarantees straight, accurate cuts, preventing uneven edges that compromise your project’s integrity.
Always cut slowly and steadily to avoid jagged lines. Before cutting, secure the fabric with clips or weights to keep it from shifting.
With these tools and techniques, you’ll achieve professional results with minimal effort, making your DIY Kevlar projects both efficient and high-quality.
Preparing Kevlar Fabric for Cutting
Before you start cutting, make certain you’re wearing proper safety gear to protect yourself.
Take accurate measurements and mark your Kevlar fabric carefully to guarantee clean cuts.
Finally, stabilize the fabric edges so they don’t fray or shift while you work.
Safety Gear Essentials
Three essential pieces of safety gear will protect you when preparing Kevlar fabric for cutting: gloves, eye protection, and a dust mask.
Kevlar fibers can be sharp and irritating, so wearing sturdy gloves prevents cuts and skin irritation. Eye protection, such as safety goggles, shields your eyes from loose fibers and debris that might fly during cutting.
A dust mask is vital because cutting Kevlar can release tiny particles that irritate your respiratory system. Make sure your mask fits snugly to filter out these fibers effectively.
Always work in a well-ventilated area to further reduce inhalation risks. By using this gear, you’ll keep yourself safe and comfortable, allowing you to focus on your DIY project without unnecessary hazards.
Measuring and Marking
Although cutting Kevlar fabric requires precision, measuring and marking it correctly makes the process much easier and more accurate.
Start by using a flexible measuring tape or a clear ruler to get exact dimensions for your strips. Lay the fabric flat on a clean, smooth surface to avoid any wrinkles or folds that could distort your measurements.
Use a pencil or a fabric chalk marker that won’t damage the fibers to make your marks. Draw light, straight lines along the desired cutting path, double-checking measurements before proceeding.
Stabilizing Fabric Edges
After marking your Kevlar fabric, you’ll want to stabilize the edges to keep them from shifting or unraveling during cutting.
Start by applying a thin line of fabric glue or fray-preventing solution along the edge. This creates a firm barrier that holds the fibers together.
Alternatively, you can use heat-sealing tools designed for synthetic fabrics, but test on a scrap first to avoid damage.
If you’re sewing, a zigzag stitch near the edge works well to lock the threads in place.
Avoid pulling or stretching the fabric as you work, since Kevlar can distort under tension.
Stabilizing guarantees cleaner cuts and more accurate strips, making your DIY project easier and more professional-looking.
Always handle the fabric gently to maintain integrity.
Techniques for Cutting Kevlar Fabric Strips Accurately
Cutting Kevlar fabric strips accurately requires the right tools and steady hands to maintain clean edges and prevent fraying.
First, use sharp, fine scissors or a rotary cutter designed for fabric to achieve precise cuts. Place your Kevlar on a flat, stable surface and use a ruler or straight edge to mark cutting lines clearly with a fabric pen or chalk.
Cut slowly and steadily along your marks, avoiding jagged edges. If you’re working with multiple layers, pin or clamp them securely to prevent shifting.
For curved cuts, go slowly and follow the line carefully. Finally, consider taping the edges lightly before cutting to reduce fraying.
These techniques help you get clean, accurate strips ready for your DIY projects.
Safety Precautions When Handling Kevlar Material
Handling Kevlar fabric strips carefully goes beyond cutting them accurately. You need to protect yourself and your workspace to work safely with this tough material.
Follow these key precautions:
- Wear gloves to avoid skin irritation from tiny fibers that may shed during handling.
- Use eye protection since small fibers or dust can irritate your eyes.
- Cut Kevlar on a stable surface with sharp tools to prevent slips and accidental injuries.
- Clean your workspace thoroughly after cutting to remove any loose fibers that could cause irritation or damage.
Methods for Joining Kevlar Strips in DIY Projects
You’ll find several effective methods to join Kevlar strips, each suited to different project needs and materials.
Sewing is a common choice; use a heavy-duty needle and strong polyester or Kevlar thread to securely stitch strips together.
For a no-sew option, high-strength adhesive tapes or specialized fabric glues designed for aramid fibers work well, especially for lightweight applications.
When you need a more permanent bond, heat bonding or ultrasonic welding can fuse strips without compromising strength, but these require specific equipment.
Avoid standard glues that may degrade Kevlar’s fibers.
Whichever method you pick, guarantee the joint maintains flexibility and durability to preserve the fabric’s performance.
Ensure your joint stays flexible and durable to keep Kevlar’s strength intact.
Test your chosen technique on scrap pieces before committing to your final project for the best results.
Cleaning and Maintaining Kevlar Fabric Strips
After joining your Kevlar strips, keeping them clean and well-maintained guarantees they hold up over time. Proper care preserves their strength and appearance, so make it part of your routine.
- Gentle Cleaning: Use mild soap and cold water to clean the strips. Avoid harsh chemicals that can weaken the fibers.
- Air Drying: Lay them flat in a shaded area to dry. Never use direct heat or sunlight, which can degrade Kevlar.
- Storage: Store strips in a cool, dry place away from UV exposure and moisture to prevent damage.
- Inspection: Regularly check for frayed edges or damage. Address issues early to maintain the strips’ integrity.
Following these steps keeps your Kevlar strips durable and ready for your next project.
Common Mistakes to Avoid When Working With Kevlar
Although Kevlar is incredibly strong, working with it requires care and attention to avoid common pitfalls that can compromise your project. One major mistake is using improper cutting tools, which can fray edges and weaken the fabric. Another is neglecting safety measures—Kevlar fibers can irritate your skin and eyes. Also, don’t overlook precise measurements; Kevlar’s rigidity leaves little room for error.
| Mistake | Impact |
|---|---|
| Using dull cutting tools | Frayed edges, compromised strength |
| Ignoring safety gear | Skin irritation, eye injury |
| Poor measurement | Wasted material, ill-fitting parts |
Avoid these errors to guarantee your Kevlar project turns out durable and professional-looking.
Creative DIY Projects Using Kevlar Fabric Strips
Mastering the basics of working with Kevlar sets the stage for exploring its creative potential.
You can use Kevlar fabric strips in projects that require durability and flexibility. Here are four ideas to get you started:
- Protective Gear: Reinforce gloves or aprons to enhance safety during heavy-duty tasks.
- Custom Tool Holsters: Craft sturdy holders that resist wear and tear.
- Outdoor Accessories: Make weather-resistant straps or handles for bags and camping gear.
- Home Repairs: Use Kevlar strips to patch or reinforce weak spots in furniture or upholstery.
These projects let you harness Kevlar’s strength while adding a unique, functional touch to your DIY creations.
Harness Kevlar’s strength to create durable, functional, and uniquely stylish DIY projects.
Don’t hesitate to experiment and combine Kevlar with other materials for innovative results!
Frequently Asked Questions
Can Kevlar Fabric Strips Be Recycled or Repurposed After Use?
You can’t easily recycle Kevlar fabric strips through regular means because of their strong fibers. However, you can repurpose them creatively in crafts, reinforcement projects, or protective gear, extending their useful life instead of discarding them.
How Does Kevlar Fabric React to Extreme Temperatures or UV Exposure?
You probably don’t plan to bake your Kevlar or sunbathe it, but just so you know, Kevlar hates extreme heat above 500°F and fades under UV like a bad sunburn. So, keep it cool and shady!
Are There Eco-Friendly Alternatives to Kevlar for Similar DIY Projects?
You can try eco-friendly alternatives like hemp, flax, or recycled polyester fabrics. These materials offer decent strength and durability for DIY projects while reducing environmental impact. Just remember, they might not match Kevlar’s extreme performance.
What Are the Best Adhesives Compatible With Kevlar Fabric Strips?
Picture a bond as strong as a spider’s silk—epoxy and polyurethane adhesives grip Kevlar like nature’s own glue. You’ll want these for lasting strength, ensuring your project stays tight under pressure and time.
Can Kevlar Fabric Strips Be Dyed or Customized With Colors?
You can dye Kevlar fabric strips, but it’s tricky since they resist most dyes. You’ll need specialized fabric dyes and proper prep. Customizing colors is possible, but results might vary, so test on a small piece first.
- How to Style Selvedge Denim: Outfit Ideas for Men - June 24, 2025
- Can You Tailor Selvedge Jeans? Everything to Know About Alterations - June 24, 2025
- How to Properly Hem Selvedge Jeans (Without Losing the Chainstitch) - June 24, 2025


