To make batik fabric with crayons, start by pre-washing and ironing a plain cotton fabric. Sketch your design lightly, then color it using vibrant crayons, pressing firmly so the wax sticks well. Dip the fabric into dye, which will resist where wax covers it. After dyeing, remove excess wax by ironing with absorbent paper or freezing and scraping. Finally, dry and iron your fabric for a polished look. Keep going to discover tips for sharper designs and color effects.
Table of Contents
Key Takeaways
- Pre-wash and iron cotton fabric to ensure smooth, clean surface for crayon wax application.
- Sketch your batik design lightly on fabric using a pencil or fabric marker.
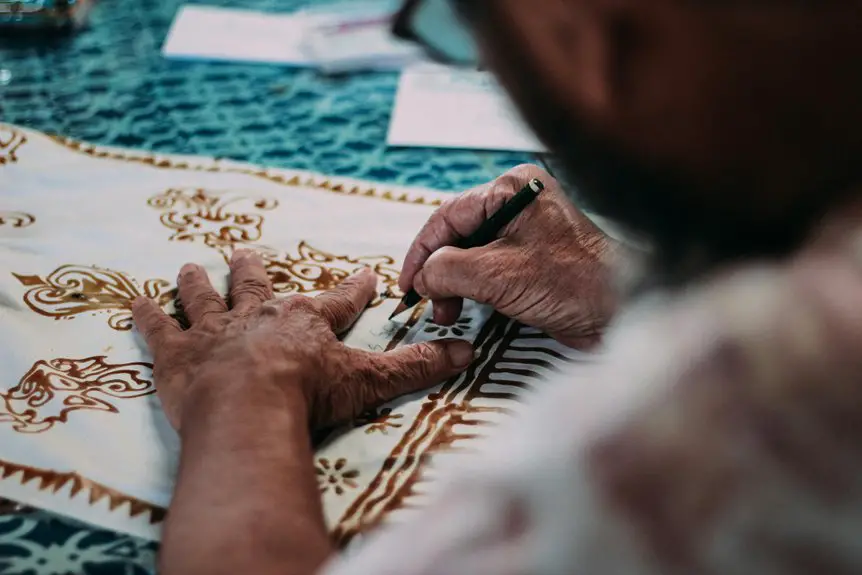
- Apply vibrant crayon colors by drawing firmly on fabric, layering wax for stronger resist.
- Submerge fabric in a prepared dye bath, stirring gently for even color absorption.
- Remove excess wax by ironing with absorbent paper or freezing and scraping, then wash and dry fabric.
Materials Needed for Crayon Batik
To create crayon batik fabric, you’ll need a few essential materials that set the foundation for your project.
First, grab plain white cotton fabric since it absorbs wax and dye well. You’ll also need a box of crayons—choose vibrant colors to make your design pop.
Start with plain white cotton fabric and vibrant crayons to ensure your crayon batik design really stands out.
A hot iron is vital to melt the wax, so have one handy with a low-to-medium heat setting. Keep some plain paper or parchment sheets nearby to place between the iron and fabric, preventing wax buildup on your iron.
Finally, have a pair of scissors for trimming your fabric and some old newspapers or a plastic sheet to protect your workspace from wax drips.
With these materials ready, you’re all set to start your crayon batik adventure!
Preparing Your Fabric for Batik
To get the best results, you’ll want to choose a natural fabric like cotton or silk that holds wax well.
Make sure to pre-wash your fabric to remove any sizing or chemicals that could resist the wax.
After it’s dry, iron the fabric smooth so your design goes on clean and even.
Choosing the Right Fabric
Fabric choice plays an essential role in achieving vibrant and lasting batik designs with crayons. You’ll want natural fibers like cotton, silk, or linen because they absorb wax and dye better, giving your colors rich depth. Avoid synthetic fabrics as they repel wax and won’t hold the crayon color well. Here’s a quick guide to help you pick:
| Fabric Type | Texture | Best For |
|---|---|---|
| Cotton | Soft, smooth | Beginners, vibrant hues |
| Silk | Smooth, shiny | Elegant, detailed work |
| Linen | Coarse, strong | Durable, bold designs |
| Polyester | Slick, synthetic | Not recommended |
Choosing the right fabric upfront guarantees your batik art stays bright and beautiful for years. Now, you’re ready to start creating!
Pre-washing and Ironing
Once you’ve selected the perfect natural fabric, the next step is to prepare it properly by pre-washing and ironing.
Pre-washing removes any sizing, dirt, or chemicals that might prevent the waxy crayon from adhering well. Run your fabric through a gentle cycle with mild detergent, then air-dry or tumble dry on low heat. Avoid fabric softeners, as they can leave residues.
Once dry, iron the fabric on a medium setting to smooth out wrinkles and create an even surface for your design. Make certain the fabric is completely dry before you start drawing with crayons.
Proper pre-washing and ironing not only improve crayon adhesion but also guarantee your batik design lasts longer and looks vibrant after dyeing or washing.
Choosing the Right Crayons for Your Design
Selecting the right crayons plays an essential role in achieving vibrant and lasting batik designs. You’ll want crayons that melt smoothly and resist washing out during the dyeing process. Here’s what to look for:
Choosing crayons that melt well and resist washing out ensures vibrant, lasting batik designs.
- Quality and Pigmentation: Choose high-quality crayons with rich, vivid pigments. The more saturated the color, the more striking your batik will appear.
- Wax Content: Opt for crayons with a higher wax content. This helps create a stronger resist effect, preventing dye from seeping through your design.
- Color Variety: Pick a set with a broad color range. This allows you to express your creativity fully and produce intricate, colorful patterns.
Sketching Your Batik Pattern
Start by choosing a design that inspires you and fits your fabric size.
Then, transfer your sketch onto the fabric using a light pencil or fabric marker.
Finally, refine your pattern details to make sure every line and shape stands out clearly before you begin coloring.
Choosing Your Design
How do you decide on the perfect design for your batik fabric? Start by considering what inspires you most—nature, geometric shapes, or cultural motifs.
Your design should resonate with your personal style and the story you want to tell through your fabric. Don’t worry about complexity; sometimes simple patterns create the most striking results.
To guide your choice, think about:
- Emotional Connection: Pick designs that make you feel excited or peaceful.
- Visual Impact: Choose patterns that will stand out once colored.
- Practicality: Consider how detailed your design can be, given your comfort with sketching.
Transferring Sketch to Fabric
Once you’ve settled on a design that speaks to you, it’s time to bring it to life on your fabric. Begin by placing your fabric on a flat surface, smoothing out any wrinkles.
If your fabric is translucent, you can place your sketch underneath and trace it lightly with a pencil or fabric-safe marker. Otherwise, use a lightbox or a window with good natural light to help guide your drawing.
Sketch gently to avoid indenting the fabric, as deep marks may show through after waxing and dyeing. Focus on outlining the main shapes and motifs without adding too much detail—that comes later.
Refining Pattern Details
Although you’ve outlined your design, refining the pattern details brings your batik to life by adding depth and personality. This step invites you to connect more deeply with your work, enhancing both the visual impact and emotional resonance of your fabric.
Focus on these three key actions to sharpen your batik pattern:
- Enhance Line Work: Go over your initial lines with a sharper, finer tool or crayon tip to make the design crisp and clear.
- Add Texture: Include small dots, dashes, or crosshatches to create visual interest and mimic traditional batik intricacies.
- Balance Elements: Adjust spacing and shapes to guarantee your pattern feels harmonious and intentional, capturing your unique artistic voice.
Applying Crayon Wax to the Fabric
Start by selecting the crayons in your desired colors and sharpening them to create fine points for detailed work.
Hold the fabric taut on a flat surface to guarantee smooth application. Gently draw your design onto the fabric with the crayon, pressing firmly enough to lay down wax but not so hard that you damage the material.
Use the sharpened tips for intricate details and the broader side of the crayon for filling larger areas. Remember, the wax acts as a resist, so the more wax you apply, the more the fabric beneath will resist dye later.
Work patiently, layering wax where you want stronger resist lines. Avoid smudging by letting each section dry slightly before moving on to adjacent areas.
Setting the Wax With Heat
When you apply heat to the waxed fabric, the crayon wax melts slightly and bonds firmly to the fibers, creating a strong resist for the dye. This step is essential because it locks in your design and prevents colors from bleeding.
You can use an iron or a hairdryer to gently warm the fabric. Be careful not to overheat or scorch it.
Here’s why setting the wax with heat matters:
- It deepens the vibrancy of your design, making your artwork pop.
- It guarantees your pattern stays crisp during washing and handling.
- It gives you confidence that your creative effort won’t fade away.
Take your time with this step—it’s the key to a beautiful, lasting batik fabric.
Dyeing the Fabric for Color Contrast
Two key factors will make your batik fabric truly stand out: the choice of dye and the way you apply it.
Start by selecting a dye color that contrasts well with your waxed design, ensuring the patterns pop. Use fabric dye suitable for cotton or your fabric type. Prepare the dye bath according to package instructions.
Submerge the fabric evenly, stirring gently to avoid uneven coloring. You can also experiment with dipping sections for a gradient effect or use brushes for added detail.
Remember, the wax resists the dye, preserving your crayon patterns beneath. After achieving the desired color intensity, remove the fabric promptly to prevent over-dyeing.
Rinse it under cold water carefully to remove excess dye without disturbing the wax. Let it dry completely before moving on to the next step.
Removing Excess Wax After Dyeing
Once your fabric is dyed, you’ll need to remove the excess wax to reveal the vibrant patterns beneath.
You can use techniques like ironing between absorbent papers or gently scraping with a blunt tool to lift the wax.
Having the right tools on hand makes this step easier and guarantees a clean finish.
Techniques for Wax Removal
After dyeing your batik fabric with crayons, you’ll want to carefully remove the excess wax to reveal the vibrant colors beneath. This step is essential to bring out the beauty of your design without damaging the fabric.
Here are three effective techniques for wax removal:
- Ironing with Absorbent Paper: Place absorbent paper (like newspaper or brown paper) over the fabric and gently iron on a low setting. The heat melts the wax, which the paper soaks up, leaving your fabric clean.
- Freezing and Scraping: Chill the fabric in the freezer until the wax hardens, then gently scrape it off with a dull knife or credit card.
- Boiling Water Bath: Submerge the fabric in boiling water briefly; the wax melts and floats on the surface, allowing you to skim it away carefully.
Use these methods to keep your batik vibrant and wax-free!
Tools for Wax Cleanup
You’ll frequently find that having the right tools makes wax cleanup much easier and more effective after dyeing your batik fabric.
Start with a clean, dry cloth or paper towels to gently blot any surface wax. A hairdryer set on low heat helps soften stubborn wax spots, making them easier to remove. Use a plastic scraper or old credit card to carefully lift wax flakes without damaging the fabric.
For deeper wax removal, place the fabric between sheets of absorbent paper and press with a warm iron; the wax will melt and transfer onto the paper. Avoid harsh scrubbing tools that could harm your design.
These simple tools and techniques will help you keep your batik fabric vibrant and wax-free.
Drying and Finishing Your Batik Fabric
Allow your batik fabric to dry completely in a well-ventilated area to prevent smudging and guarantee the wax sets properly.
Once dry, you’ll want to finish your piece to enhance its beauty and durability.
Here’s how to finish your fabric with care:
- Gently peel off any remaining wax flakes – this reveals your crisp design and feels satisfying.
- Iron your fabric on low heat with a protective cloth to set the colors and smooth wrinkles, making your work look polished.
- Wash your fabric in cold water with mild detergent to remove leftover wax and bring out vibrant colors, ensuring your creation lasts.
Taking these steps will give you a stunning batik fabric you’ll be proud to display or use.
Tips for Creating Stunning Crayon Batik Designs
Completing your batik fabric sets the stage for elevating your design skills. To create stunning crayon batik designs, start by choosing high-quality, vibrant crayons—these deliver richer colors that stand out.
Use wax-resistant techniques deliberately; apply crayons with varying pressure to create texture and depth. Experiment with layering colors, blending them softly while the wax is warm, but avoid over-saturating the fabric to prevent bleeding.
Incorporate fine details using sharpened crayons or crayons peeled to a point. After drawing, carefully melt the wax with a hot iron covered by parchment paper to fuse colors smoothly.
Finally, don’t shy away from combining bold shapes with delicate patterns; contrast enhances visual interest. These tips will help you craft eye-catching, professional-looking batik fabrics every time.
Frequently Asked Questions
Can I Use Other Types of Wax Instead of Crayon Wax?
You can use other wax types like beeswax or paraffin, but they might behave differently. Crayons blend color and wax well, so alternatives may need testing to achieve similar effects and ease of use in your project.
How Durable Is Crayon Batik Fabric After Washing?
You might wonder if the colors will hold up after washing. Well, crayon wax isn’t as durable as traditional batik wax, so expect some fading or cracking. To preserve it, wash gently and air dry.
Is Crayon Batik Safe for Children’s Clothing?
You can use crayon batik for children’s clothing, but be cautious. Some crayons contain chemicals that might irritate sensitive skin, so choose non-toxic crayons and wash the fabric thoroughly before use to guarantee safety for kids.
Can I Use Fabric Paint Instead of Dye?
You can use fabric paint instead of dye, but it may not create the same resist effect typical of batik. Fabric paint sits on top, so expect a different texture and design outcome. Adjust your technique accordingly.
How Do I Fix Mistakes Made During Crayon Application?
If you make a mistake, don’t worry! You can gently scrape off the crayon with a dull knife or use a warm iron with a paper towel to lift some wax. Reapply crayon if needed and blend carefully.

- Tetron Fabric for Marine Applications: Durability and Use Cases - June 18, 2025
- Tetron Fabric for Outdoor Furniture: Weather Resistance and Care - June 18, 2025
- Tetron Fabric for Wall Coverings: Style and Application Tips - June 18, 2025


