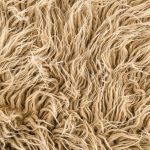
Are you interested in learning how to felt wool fabric? In this article, we will guide you through the process step by step.
You’ll discover the techniques and methods for wet felting and needle felting, as well as how to add texture and design to your felted wool fabric.
Plus, we’ll share tips on choosing the right wool and caring for your finished creations.
Get ready to dive into the world of felted wool fabric and unleash your creativity!
Table of Contents
Understanding Wool Fabric Felting
Understanding how wool fabric felts is essential for successfully working with it. When it comes to wool felting techniques, there are a few key aspects to consider.
First, the felting process involves applying moisture, heat, and agitation to the wool fibers. This combination causes the fibers to interlock and shrink, creating a dense and sturdy fabric.
It is important to note that not all wool fabrics are suitable for felting. Only natural, untreated wool fibers will felt, so avoid fabrics that contain synthetic materials.
Additionally, the thickness and density of the wool fabric will affect the felting process. Thicker fabrics will require more time and effort to felt, while thinner fabrics will felt more quickly.
It is also important to consider the type of project you are working on. Different felting techniques may be used for flat pieces, three-dimensional shapes, or even embellishments.
Choosing the Right Wool for Felting
When it comes to felting wool, it’s important to understand the different types of wool fibers and their characteristics.
This knowledge will help you choose the right wool for your felting projects.
Wool Fiber Types
To identify the different types of wool fiber, you can feel the texture and observe the length and thickness. Wool fiber properties vary depending on the breed of sheep it comes from.
Merino wool, for example, is known for its softness and fine texture, making it ideal for garments that will be in direct contact with the skin. On the other hand, coarser wools like Shetland or Icelandic have a more rustic feel and are often used for outerwear or blankets.
Wool fiber processing also plays a role in determining the final texture and appearance of the fabric. Shearing, sorting, and scouring are some of the steps involved in preparing the wool for spinning or felting.
Felting Wool Characteristics
The characteristics of felting wool vary depending on the breed of sheep it comes from. Here are four key factors that affect the felting properties of different wool types:
-
Crimp: Wool with a high crimp, like Merino, is excellent for felting. The crimp allows the fibers to interlock easily, creating a strong felted fabric.
-
Fiber length: Longer fibers, such as those found in Romney or Lincoln sheep, can be more challenging to felt. They require more agitation to achieve a solid felted texture.
-
Micron count: Finer wool, with a lower micron count, felts more easily. Fibers from Shetland or Rambouillet sheep, for example, have a smaller diameter and felt quicker.
-
Lanolin content: Wool with a higher lanolin content, like in Icelandic or Jacob sheep, tends to felt faster due to the natural oils present in the fibers.
Understanding these characteristics can help you choose the right wool for your felting techniques and achieve successful felting projects.
Preparing the Wool Fabric for Felting
When preparing wool fabric for felting, it’s important to choose the right type of wool. Look for wool that’s labeled as suitable for felting, such as merino or Corriedale.
Once you have the right wool, wash the fabric gently in lukewarm water with a mild detergent to remove any dirt or oils. After washing, be sure to remove excess moisture by gently squeezing or rolling the fabric in a towel before beginning the felting process.
Choosing the Right Wool
First, you’ll want to consider the type of wool that best suits your project. Different wool breeds have varying fiber properties, such as softness, strength, and elasticity. To help you make an informed decision, here is a table comparing some popular wool breeds:
| Wool Breed | Softness | Strength | Elasticity |
|---|---|---|---|
| Merino | Very soft | Medium | High |
| Shetland | Soft | High | Medium |
| Bluefaced | Soft | Medium-High | Medium-High |
| Romney | Medium | High | Medium-High |
Merino wool, known for its softness and high elasticity, is ideal for delicate projects like scarves or baby blankets. Shetland wool, while soft, offers a higher level of strength, making it suitable for durable items like bags or rugs. Bluefaced wool combines softness and strength, making it versatile for a range of projects. Romney wool falls in the middle, providing a balance of softness, strength, and elasticity. Consider these wool fiber properties when selecting the right wool for your felting project.
Washing the Fabric
Now that you’ve chosen the right wool fabric, it’s time to learn how to properly wash it before felting. Follow these washing techniques to ensure the best results:
- Fill a basin or sink with lukewarm water and add a gentle wool detergent.
- Submerge the wool fabric in the water and gently agitate it by swirling it around.
- Avoid scrubbing or wringing the fabric as this can cause it to stretch or lose its shape.
- Once the fabric is clean, carefully squeeze out the excess water without twisting or squeezing too hard.
After washing, you’ll need to dry the fabric using the appropriate methods:
- Lay the fabric flat on a clean towel or sweater drying rack.
- Gently reshape the fabric if necessary and smooth out any wrinkles.
- Allow the fabric to air dry in a well-ventilated area away from direct sunlight or heat sources.
- Avoid hanging the fabric, as this can cause it to stretch.
Removing Excess Moisture
To remove excess moisture from your washed wool, gently press the fabric between clean towels. This simple technique helps to absorb the moisture without damaging the fabric.
After pressing, lay the wool fabric flat on a clean, dry surface. Avoid hanging it to dry, as this can cause the fabric to stretch or lose its shape. Instead, allow it to air dry naturally.
If you’re in a hurry, you can speed up the drying process by using a fan or opening windows to increase air circulation. However, avoid direct sunlight or heat sources, as they can cause the wool to shrink or become distorted.
Wet Felting Techniques for Wool Fabric
Begin by soaking your wool fabric in warm, soapy water to prepare it for wet felting. Wet felting is a technique used to transform wool fibers into a dense, matted fabric.
Here are four wet felting techniques that will help you achieve the desired results in the felting process:
-
Agitation: Gently agitate the wool fabric in the soapy water by rubbing, rolling, or pressing it with your hands. This helps the wool fibers to entangle and bind together.
-
Rinsing: After agitating the wool fabric, rinse it thoroughly with clean water to remove any excess soap. Rinse until the water runs clear, indicating that all soap has been removed.
-
Fulling: Fulling is the process of shrinking and matting the wool fibers together. To full the fabric, continue agitating it vigorously by rubbing, rolling, or even tossing it in a washing machine. The more agitation, the tighter the fibers will bind.
-
Shaping: While the wool fabric is still wet, shape it into the desired form. You can shape it by stretching, folding, or molding it with your hands. Take care not to distort the fabric too much, as it may lose its intended shape.
Needle Felting Methods for Wool Fabric
Take your needle and gently poke it into the wool fibers to begin the process of needle felting. Needle felting is a technique that allows you to create 3D shapes using wool fabric. It involves repeatedly jabbing the needle into the wool fibers, causing them to entangle and compact together. The more you poke, the more the fibers will mesh, creating a solid and firm structure.
To create 3D shapes, start by shaping a small amount of wool into the desired form. Place it on a foam pad to protect your work surface and hold it in place. Then, begin poking the needle into the wool, focusing on the areas that need more definition or shaping. As you continue to poke, the wool fibers will intertwine and tighten, gradually transforming the shape into a solid object.
Be mindful of the direction and angle of your needle. By changing the angle, you can control the depth and density of the felting. Poking straight down will create a shallow indentation, while angling the needle will result in deeper sculpting.
Remember to take breaks and step back to assess the shape’s progress. Needle felting is a gradual process, so be patient and keep refining until you achieve the desired 3D form.
Adding Texture and Design to Felted Wool Fabric
When adding texture and design to felted wool, it’s important to experiment with different needle angles and depths to achieve the desired effect.
By varying the angles and depths of your needle, you can create dimension and depth in your felted wool fabric.
For example, if you want to create a raised texture, you can use a slightly angled needle and apply more pressure to the wool. This will push the fibers closer together, creating a raised surface.
On the other hand, if you want to create a pattern, you can use a straight needle and apply different depths of pressure to different areas of the fabric. This will create variations in the density of the fibers, resulting in a patterned effect.
Remember to take your time and experiment with different techniques to find what works best for you. With practice, you’ll be able to add beautiful texture and design to your felted wool fabric.
Finishing and Caring for Felted Wool Fabric
To maintain the quality and longevity of your felted wool creations, it’s essential to properly finish and care for them. Here are some caring techniques to prevent shrinkage and keep your wool fabric in great condition:
-
Handwash with care: Fill a basin with lukewarm water and add a mild detergent specifically designed for wool. Gently agitate the fabric in the water, being careful not to stretch or twist it. Rinse thoroughly and squeeze out excess water, then lay flat to dry.
-
Avoid machine washing: Machine washing can cause agitation and shrinkage, so it’s best to avoid it altogether. Stick to handwashing for the safest and most effective cleaning method.
-
Store properly: When not in use, store your felted wool fabric in a cool, dry place away from direct sunlight. This will help prevent fading and damage caused by heat and moisture.
-
Handle with care: When handling your felted wool creations, be mindful of sharp objects that could snag or tear the fabric. Additionally, avoid excessive rubbing or friction, as this can cause pilling or wear and tear.
Conclusion
In conclusion, felting wool fabric is a fun and creative way to add texture and design to your projects. By understanding the process and choosing the right wool, you can achieve beautiful results.
Whether you prefer wet felting or needle felting, both techniques offer unique methods to transform your fabric.
Don’t forget to finish and care for your felted wool properly to maintain its beauty and longevity.
So go ahead, unleash your creativity and start felting!
- Does Lyocell Wrinkle? How to Prevent and Remove Creases - July 14, 2025
- What Is Tencel Lyocell? The Ultimate Guide to This Eco-Friendly Fabric - July 14, 2025
- Is Tencel Lyocell Natural or Synthetic? The Surprising Answer - July 14, 2025


