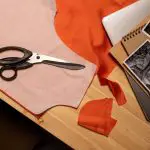
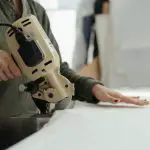
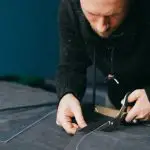
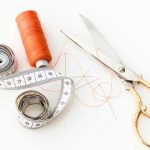
To cut upholstery foam perfectly, gather sharp tools like a utility or electric carving knife and use a fresh blade for smooth edges. Work on a clean, flat surface with good lighting, then measure and mark foam accurately using a straightedge and fabric marker. Cut slowly and steadily, especially on curves, to avoid jagged lines. After cutting, refine edges with fine sandpaper and reinforce them if needed. Follow these steps, and you’ll soon master advanced techniques for flawless results.
Table of Contents
Key Takeaways
- Use a sharp utility or electric carving knife with fresh blades for clean, precise cuts and to avoid tearing the foam.
- Measure and mark foam accurately using a tape measure, straightedge, and fine contrasting marker before cutting.
- Prepare a clean, flat workspace with good lighting to support the foam fully and ensure visibility of markings.
- Cut slowly and steadily, especially for curves, using flexible or serrated blades and practicing on scrap foam.
- Smooth edges post-cutting with fine-grit sandpaper and reinforce with foam tape or fabric wraps for durability and a professional finish.
Essential Tools for Cutting Upholstery Foam
To cut upholstery foam cleanly and accurately, you’ll need a few essential tools on hand. First, a sharp utility knife or an electric carving knife works best for smooth, precise cuts. Make sure your blades are fresh; dull blades tear the foam instead of slicing through it.
A straightedge or metal ruler helps guide your cuts, ensuring they’re perfectly straight. For curved or intricate shapes, a flexible curve ruler or a stencil can be invaluable. You’ll also want a measuring tape or a yardstick to mark exact dimensions before cutting.
Finally, use a marker or chalk pencil to outline your cut lines clearly on the foam. With these tools ready, you’ll save time and get professional-quality results every time you cut upholstery foam.
Preparing Your Workspace for Accurate Cuts
Having the right tools is only part of cutting upholstery foam accurately. You also need to prepare your workspace to guarantee clean, precise cuts.
Start by clearing a flat, stable surface large enough to support the foam without it hanging over edges. This prevents uneven cuts and damage to the foam.
Next, gather your materials within reach to avoid interruptions. Good lighting is essential so you can see your markings clearly and maintain accuracy.
Here’s what you should focus on:
- A flat, stable cutting surface
- Ample lighting for clear visibility
- Organizing tools and materials nearby
Measuring and Marking Foam for Precision
To get clean, precise cuts, you’ll need accurate measuring tools like a ruler or tape measure.
Mark your foam carefully with a fabric marker or chalk to avoid smudging.
Taking time to measure and mark correctly sets you up for success in every cut.
Accurate Measuring Tools
Although cutting upholstery foam might seem straightforward, using accurate measuring tools secures your cuts are precise and fit perfectly.
You want to avoid guesswork and guarantee every dimension matches your project’s requirements. Here are essential tools to keep handy:
- Tape Measure: Flexible and easy to handle, perfect for measuring foam thickness and length.
- Ruler or Straight Edge: Provides a firm guide to help you make straight lines before cutting.
- Calipers: Ideal for measuring foam thickness with high accuracy, especially for detailed projects.
Marking Techniques for Foam
Marking foam accurately sets the foundation for clean, precise cuts. Start by using a ruler or measuring tape to determine your dimensions carefully.
Choose a fine, contrasting marker or a pencil to draw your lines—sharp, thin lines won’t smudge or obscure details. When marking large pieces, use a straightedge to guide your markings, ensuring straight lines without wobble.
For curved cuts, trace templates or use flexible curve rulers to replicate shapes precisely. Avoid pressing too hard, which can compress the foam and lead to inaccurate cuts.
Double-check your measurements before marking to prevent errors. By taking time with your markings, you’ll make cutting easier and your upholstery projects will look professional and sharp every time.
Choosing the Right Cutting Method
You’ll want to pick the right tools to get clean, accurate cuts on your upholstery foam.
Different cutting methods, like using a serrated knife or an electric carving knife, each have their pros and cons.
Let’s compare these techniques so you can choose the best one for your project.
Tools for Foam Cutting
Choosing the right tool for cutting upholstery foam can make the process faster and more precise. You want a tool that suits your foam’s thickness and your cutting style.
Here are some common tools to contemplate:
- Electric carving knife: Offers smooth, straight cuts and works well with thick foam.
- Upholstery scissors: Perfect for thinner foam or quick trims but may struggle with dense materials.
- Hot wire cutter: Melts through foam cleanly, ideal for detailed shapes but requires caution and ventilation.
Each tool has its strengths, so pick one that matches your project needs and comfort level.
Using the right tool helps reduce foam tearing and guarantees cleaner edges, setting you up for a professional finish every time.
Cutting Techniques Comparison
Although many tools can cut upholstery foam, the method you use greatly affects the cleanest result and ease of work.
For straight, precise cuts, a sharp electric carving knife or an electric foam cutter offers smooth edges with minimal effort. If you’re tackling smaller pieces or intricate shapes, a sharp serrated knife provides control but requires steady hands to avoid jagged lines.
Hot wire cutters excel at producing clean, professional cuts without compressing the foam, ideal for detailed shapes but less practical for thick or dense foam.
Avoid using dull blades or scissors, as they crush and tear the foam, resulting in uneven edges.
Ultimately, choose a cutting method based on your project’s complexity and foam type to guarantee the best finish.
How to Use a Utility Knife Effectively
When handling a utility knife, maintaining control and applying steady pressure are key to achieving clean, precise cuts on upholstery foam.
First, confirm your blade is sharp; dull blades tear foam instead of slicing it. Next, use a straight edge or ruler to guide your cut, preventing wobbly lines. Finally, make several light passes rather than one deep cut to avoid compressing or damaging the foam.
Ensure your blade is sharp, guide cuts with a ruler, and make multiple light passes for clean foam slicing.
Keep these tips in mind:
- Hold the knife at a consistent angle, usually around 45 degrees.
- Use a cutting mat or protective surface underneath.
- Always retract the blade when not in use for safety.
Cutting Foam With an Electric Knife
Cutting upholstery foam with an electric knife lets you achieve smooth, even slices quickly and with minimal effort.
To start, verify your foam is on a stable, flat surface. Use a ruler or straight edge as a guide to keep your cuts precise.
Turn on the electric knife and gently lower it onto the foam, letting the blade do the work without forcing it. Move steadily along your marked line, maintaining consistent pressure. This method reduces the chance of jagged edges compared to manual knives.
Remember to keep your hands clear of the blade and wear protective gloves if necessary. After cutting, inspect the edge for any uneven spots and trim lightly if needed.
An electric knife is excellent for thick foam pieces, saving time and energy.
Tips for Cutting Curves and Complex Shapes
Using an electric knife makes slicing straight lines easier, but shaping curves and complex patterns requires a bit more finesse.
To cut curves smoothly, you’ll want to slow down and guide the blade steadily, avoiding sudden turns that can create jagged edges.
Here are some tips to help:
- Use a flexible blade or fine-toothed serrated knife for better control on curves.
- Mark your pattern clearly with a fabric marker or chalk to follow the shape accurately.
- Practice on scrap foam first to get a feel for the movement and pressure needed.
Avoiding Common Mistakes When Cutting Foam
Although foam is a forgiving material, you’ll want to avoid common mistakes that can ruin your project. First, don’t rush your cuts. Hurrying leads to jagged edges and uneven shapes. Always measure twice and mark clearly before cutting.
Avoid using dull knives or blades—they tear the foam instead of slicing cleanly. Instead, use a sharp, fresh blade for smooth cuts. Don’t press too hard; let the blade do the work to prevent crushing the foam.
Also, avoid cutting foam on unstable surfaces; a firm, flat base keeps your cuts accurate. Finally, don’t skip cleaning your blade regularly—foam debris dulls it quickly, causing rough cuts.
Following these tips will save you time and frustration while ensuring neat, professional results.
Finishing Touches for Clean Edges
Once you’ve made your cuts, refining the edges secures a polished, professional look. To achieve clean edges, start by gently sanding the foam with fine-grit sandpaper. This smooths out any roughness or uneven spots.
Next, consider wrapping the edges with a lightweight fabric or foam tape to protect and reinforce them. Finally, use a sharp utility knife to trim any frayed or uneven fibers carefully.
Here are key finishing touches for clean edges:
- Sanding: Smooths and evens out rough cuts without damaging the foam.
- Edge Wrapping: Adds durability and a clean, finished appearance.
- Precision Trimming: Removes loose fibers for a neat, sharp edge.
These steps guarantee your upholstery foam looks professional and lasts longer.
Frequently Asked Questions
How Do I Clean Upholstery Foam After Cutting?
Don’t worry about leftover foam bits; you can easily clean upholstery foam after cutting by gently vacuuming or brushing off debris. If needed, use a damp cloth to spot clean without soaking the foam, keeping it fresh and ready.
Can Upholstery Foam Be Recycled or Reused?
You can definitely recycle or reuse upholstery foam. Many recycling centers accept it, and you can repurpose scraps for cushions, pet beds, or craft projects. Just clean it well before reuse to guarantee quality and hygiene.
What Thickness of Foam Is Best for Different Furniture Types?
Choosing foam thickness for furniture is like picking the perfect cloud! For chairs, go 2-4 inches; sofas need 4-6 inches, and mattresses demand 6-8 inches. Trust your comfort, and don’t settle for less!
How Long Does Upholstery Foam Typically Last?
You can expect upholstery foam to last around 5 to 10 years, depending on quality and usage. Higher-density foam typically holds up longer, but frequent use or exposure to moisture will shorten its lifespan.
Are There Any Health Precautions When Cutting Foam?
You should wear a mask and work in a well-ventilated area when cutting foam to avoid inhaling dust or fumes. Also, use gloves to protect your skin from irritation and always cut away from your body for safety.
- The Role of Nonwoven Geotextiles in Soil Stabilization - July 11, 2025
- Meltblown Nonwovens: The Heart of High-Filtration Masks - July 11, 2025
- A Beginner’s Guide to Nonwoven Fabric Types - July 11, 2025


