To batik dye fabric, start by gathering plain cotton or silk, wax, a tjanting tool or brush, and fiber-reactive dyes. Wash and stretch your fabric taut, then melt wax to draw your design, blocking dye from those areas. Dip the fabric in dye until you get the color you want, rinse it, and remove the wax by ironing with absorbent paper or boiling. Hang to dry and press to finish. Keep going to uncover tips for perfecting each step.
Table of Contents
Key Takeaways
- Start with clean, natural-fiber fabric like cotton or silk, washed and ironed for a smooth surface.
- Apply melted wax using a tjanting tool or brush to create your batik design on the stretched fabric.
- Prepare and submerge fabric in fiber-reactive dye baths, allowing color to penetrate exposed areas evenly.
- Rinse dyed fabric under cold water to stop the dyeing process and remove excess dye.
- Remove wax by ironing fabric between absorbent paper or boiling, then dry and press to finish.
Gathering Your Batik Dyeing Supplies
Before you begin your batik dyeing project, you’ll need to gather the essential supplies. Start with plain, natural-fiber fabric like cotton or silk, as these absorb wax and dye well.
Next, get quality batik wax or a mixture of beeswax and paraffin, plus tools for applying it—traditionally a canting tool or brushes. You’ll also need fiber-reactive dyes in your chosen colors, along with containers for mixing and dyeing.
Use quality batik wax or beeswax-paraffin mix and fiber-reactive dyes with proper application tools.
Don’t forget gloves to protect your hands and aprons to keep your clothes clean. Have a heat source ready for melting wax, like a double boiler or a wax pot.
Finally, prepare some scrap paper or newspapers for drying and protecting your workspace. With these supplies ready, you’ll be set to start your batik adventure confidently.
Preparing and Stretching the Fabric
Once you have all your batik dyeing supplies ready, it’s time to prepare your fabric for the wax application.
Start by washing the fabric without fabric softener to remove any sizing or chemicals that could affect dye absorption. After it dries, press it with an iron to guarantee a smooth surface.
Next, stretch the fabric tightly over a wooden frame or secure it on a flat surface using masking tape or clamps. This tension helps prevent wrinkles and puckering while you apply wax and dye.
Make certain the fabric is taut but not overly stretched to avoid distortion. Properly preparing and stretching your fabric guarantees clean, crisp designs and even dye penetration, setting the stage for a successful batik project.
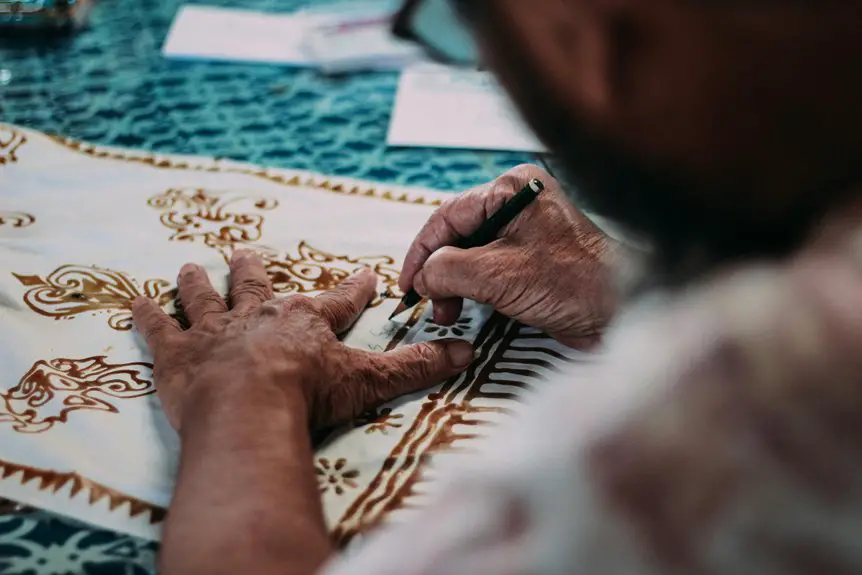
Applying Wax to Create Your Design
Although applying wax requires patience and a steady hand, it’s the key step in defining your batik design.
Start by melting your wax in a double boiler to keep it at the right temperature—warm enough to flow smoothly but not so hot it drips uncontrollably. Use a tjanting tool or a brush to carefully draw your pattern onto the stretched fabric. The wax acts as a resist, preventing dye from penetrating those areas.
Work steadily, allowing the wax to cool and harden slightly before moving on to avoid smudging. If you make a mistake, you can quickly wipe the wax off while it’s still warm.
Dyeing the Fabric With Color
After applying the wax and letting it set, you’re ready to add vibrant color to your fabric.
Begin by preparing your dye bath according to the manufacturer’s instructions, ensuring the water is at the correct temperature. Submerge your fabric slowly, allowing the dye to penetrate the exposed areas not covered by wax. Stir gently to avoid uneven coloring.
Keep the fabric in the dye until you achieve your desired hue, usually several minutes. Remember, darker shades require longer soaking.
Once dyed, carefully remove the fabric and rinse it under cold water to stop the dyeing process and rinse out excess dye. Pat it dry with a towel or hang it up to air dry, making sure not to disturb the wax-covered sections.
This step brings your batik design to life with rich, vibrant colors.
Removing Wax and Finishing Your Batik Piece
Before you can fully appreciate your batik piece, you’ll need to remove the wax that protected the fabric during dyeing.
Start by placing your fabric between sheets of absorbent paper or newspaper. Use a warm iron to gently press the fabric, allowing the wax to melt and transfer onto the paper. Replace the paper as it becomes saturated to avoid smudging.
Place fabric between absorbent paper and press with a warm iron to lift melted wax safely.
Alternatively, you can boil the fabric in hot water for a few minutes to melt the wax completely, then rinse thoroughly.
Once all the wax is gone, hang your fabric to dry. Finally, iron your batik piece to set the colors and smooth out wrinkles.
Now, your vibrant, wax-resist design is ready to be admired or used as you like.
Frequently Asked Questions
What Types of Fabric Work Best for Batik Dyeing?
Think of fabric as a thirsty canvas craving vibrant colors; you’ll want natural fibers like cotton, silk, or rayon because they absorb dye beautifully. These materials let your batik designs pop with rich, vivid hues every time.
Can Batik Designs Be Created Without Traditional Wax?
You can create batik designs without traditional wax by using alternatives like fabric glue, gutta, or resists made from soy wax or rubber. These options still help you achieve the characteristic crackled patterns and resist effects.
How Long Does Batik Dyeing Typically Take From Start to Finish?
Wondering how long batik dyeing takes? It usually spans several hours to a full day, depending on design complexity and drying times. You’ll apply wax, dye, dry, and repeat until your masterpiece is complete.
Is Batik Dyeing Safe for Children to Try at Home?
You can let kids try batik dyeing at home, but you’ll need to supervise closely. Some dyes and wax can be hot or toxic, so choose child-safe materials and teach safety rules to keep it fun and safe.
How Do You Fix Mistakes Made During the Wax Application?
If you mess up applying wax, you can carefully reheat the area to soften the wax, then gently scrape it off with a blunt tool. Just be patient, and avoid damaging the fabric while fixing the mistake.


