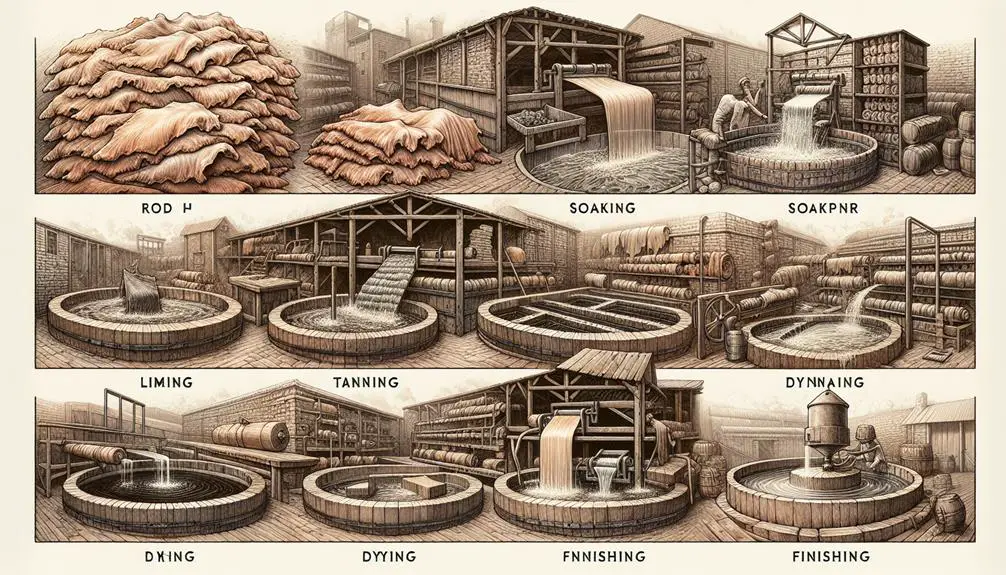
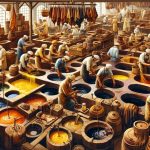
I've always found it fascinating how leather is made, starting off with high-quality raw hides. After picking the best ones, mostly from places like Italy and Denmark, they're cleaned and soaked thoroughly. This prep is crucial before the actual tanning, which can be done using chrome for flexibility or vegetable tannins for a natural look. After tanning, the leather is dyed, softened, and finished with protective coats to enhance durability and aesthetics. Imagine all the detailed steps—like milling and embossing—that give leather its unique touch. There's a bit more to the craft than just this overview, and knowing it makes the final product even more special.
Table of Contents
Key Takeaways
- Leather production starts with selecting quality hides, often from Italy, Southern Germany, or Denmark.
- The hides are cleaned, soaked, and split into segments in a Beam House.
- Hair is removed through processes like painting with sulphides and liming, followed by fleshing to eliminate excess tissue.
- Tanning, using methods like chrome or vegetable tanning, stabilizes and colors the hides for durability and aesthetics.
- The leather undergoes retanning, dyeing, and finishing, including milling and applying protective coats, to enhance texture and resistance.
Raw Material Selection
Choosing the right hide is crucial for making quality leather. Let me walk you through the essentials of selecting the best raw material, which sets the foundation for the entire leather manufacturing process. The hide structure is paramount; ideally, you want to source hides from regions known for their superior quality, such as Italy, Southern Germany, and Denmark. The climate and cattle management in these areas contribute to hides with higher yields—typically between 80-90%, compared to the lower 60% yield from less ideal sources.
To ensure high quality leather, the upper segments of the hides, which include the reticular and papillary layers, are pivotal. These segments are prized for creating full grain leathers, renowned for their durability and fine appearance. Before these hides even approach the tanning process, they're meticulously preserved with rock salt and stored carefully in a Beam House. This initial treatment is critical to prepare the hides for the effective absorption of tanning agents, which will define the quality and characteristics of the finished leather product. Remember, the choices made at this stage heavily influence the final outcome, so it's not something to take lightly!
Preparatory Processes
Before we get into how leather is actually made, let's talk about the first steps: selecting the right raw hides, and getting them ready for transformation.
We start by cleaning and soaking the hides to prepare them for hair removal. This process is crucial because it ensures the leather will be clean and uniform, ready for the next stages of production.
Selecting Raw Hides
I often start by selecting the best raw hides, as they're crucial for high-quality leather production. You'll find that good hides typically have an 80–90% yield, which really matters if you're aiming for top-notch leather. The best sources? Think Italy, Southern Germany, and Denmark—places known for excellent climate and cattle management, which directly impact hide quality.
In the Beam House, hides are split into reticular and papillary segments. The upper segments are what you want for those luxurious full-grain leathers. Remember, the selection process isn't just about the aesthetics; it's about maximizing the hide yield and ensuring the leather maintains its integrity throughout the tanning process and beyond.
Cleaning and Soaking
After selecting the right hides, we move on to cleaning and soaking them, which are essential steps to prepare for the tanning process. First up, we clean the hides to get rid of any salt, dirt, and bits of flesh. This part of the beamhouse process is crucial. Then, it's time for soaking. This step rehydrates the pelts, making sure they're properly prepped for all the tanning action that comes next.
Here's a quick breakdown of what goes on:
| Process | Purpose |
|---|---|
| Cleaning | Removes salt, dirt, flesh |
| Soaking | Rehydrates hides |
| Beamhouse | Initial processing phase |
| Split | Adjusts thickness (not for skins) |
| Pelts | Name for hides before tanning |
These steps ensure the hides are ready to be transformed into high-quality leather.
Hair Removal Methods
Several methods are used to remove hair from hides, including painting, liming, and fleshing. Each method targets the hair removal process in a unique way, ensuring the hide is prepped and clean for the tanning process.
- Painting: This involves the use of sulphides for wool removal, specifically from sheepskins. It's pretty effective in stripping off the wool without damaging the hide underneath.
- Liming: An alkali solution is used here to break down hair on the hide. This method not only removes hair but also helps in the swelling of the hide, making it easier to work with later.
- Fleshing: This method gets rid of excess flesh and tissue, sometimes even splitting the pelt into layers for a cleaner product.
Tanning Techniques
Tanning techniques transform raw hides into durable, wear-resistant leather. There's a lot going on in this process, so let's dive right in. Primarily, we've got a few methods like chrome tanning and using vegetable tannins. Chrome tanning is pretty widespread because it's fast and the leather it produces, known as wet-blue due to its color, is really flexible. On the other hand, vegetable tanning, which uses natural materials like tree bark, gives the leather that classic, earthy look.
Now, these methods aren't just about making the leather tough. They also set the stage for what comes next – retanning, dyeing, and fatliquoring. This is where the leather's unique properties are dialed in. Think of it like a base coat of paint that needs further customization to fit specific needs, like extra softness or a particular color.
But here's the kicker, I'm not diving into the details of retanning and dyeing right now. We'll save that for another discussion. For now, just remember that the initial tanning step is crucial. It's all about getting that hide stable and ready for the next phase where it really starts to come to life.
Retanning and Dyeing
After we've tanned the leather, the next steps are retanning and dyeing, which really bring out the leather's final qualities.
I'll walk you through how we tweak the leather during retanning, choose the right dyes, and apply the final colors.
It's fascinating how these steps transform plain hides into vibrant, flexible leather ready for use.
Retanning Process Explained
During the retanning process, we modify the leather's characteristics for its final use by adding dyes and other treatments. Post the initial tanning process, this step ensures the leather not only meets aesthetic requirements but also functional ones.
Here's how we ensure top-notch quality:
- Dyeing Process: We use computer-formulated recipes to add colors, ensuring precise, vibrant results with high-quality dyes.
- Softening Process: After dyeing, leather undergoes specific treatments to become softer, enhancing its texture and flexibility.
- Re-moisturizing Process: Essential to prevent the leather from drying out, this step reintroduces moisture lost during the earlier stages, securing the leather's durability and comfort.
Each step is crucial to transforming raw hides into beautiful, durable leather products.
Dye Selection Criteria
Selecting the right dyes is key to ensuring our leather products meet the expected color standards and quality. I always lean on computer-formulated recipes to nail that precise shade. It's all about the high-quality dyes, which are crucial for achieving deep saturation and that rich, luscious color we all love in leather.
Here's a quick breakdown of why each aspect matters in dye selection:
| Factor | Importance |
|---|---|
| Color Consistency | Ensures uniform appearance across batches |
| Saturation | Achieves deep, vivid colors |
| Quality of Dyes | Impacts durability and visual appeal |
| Softening & Re-moisturizing | Essential for the leather's feel and flexibility |
Final Color Application
I move on to retanning and dyeing, where we meticulously apply colors to transform the leather's final appearance. The retanning process tailors leather characteristics specifically for its final use, ensuring it meets the exact needs of the end product.
During the dyeing process, I use high-quality dyes and precise, computer-formulated recipes to achieve consistent and vibrant colors. This step is crucial as it significantly impacts the leather's final look and feel.
- Retanning Process: Adjusts leather characteristics; prepares it for specific end uses.
- Dyeing Process: Uses high-quality dyes for color saturation and consistency.
- Softening and Re-moisturizing: Follows dyeing to enhance texture and feel, ensuring the leather remains supple and luxurious.
Softening Through Milling
Milling further softens the leather by tumbling it dry, enhancing its natural grain and texture. This part of leather making is essential to ensure that the material isn't just durable but also comfortable and visually appealing. When I talk about milling, I'm referring to the process where the leather is placed in a large drum and physically tumbled. This action is somewhat similar to a dryer, but instead of drying clothes, it works to relax the tight fibers of the leather.
Because of milling, the leather becomes what we know as 'tumbled' leather. This type of leather is recognized for its exceptionally soft handle and distinct grainy appearance. It's the milling that accentuates the natural grain structure of the leather, making each piece unique. The texture, too, undergoes a transformation; it becomes more pliable and inviting to touch.
As someone looking to understand the nuances of leather crafting, grasping the importance of milling is crucial. It's not just about making the leather soft; it's about refining its quality and enhancing its natural beauty, ensuring it meets the high standards required for various high-end applications.
Surface Finishing
Surface finishing transforms leather by adding protective layers and aesthetic touches that enhance both its appearance and durability. When I dive into the specifics of surface finishing, I'm looking at how various treatments like dyes, waxes, and oils not only protect but also define the final look of the leather. It's about turning something good into something great, making sure it's ready for whatever product it's destined to become.
Here's a quick breakdown of what happens during surface finishing:
- Protective Coats: These are crucial. They shield the leather from wear and tear, and environmental damage, ensuring longevity.
- Embossed Patterns: Adding unique textures and designs, embossing elevates the tactile and visual appeal, especially on top grain and split leathers.
- Effect Range: From glossy to matte finishes, the choice affects not just the look but also the feel of the leather, enhancing visual appeal massively.
Quality Inspection
After exploring how surface finishing enhances leather, let's now examine the quality inspection process that ensures each hide meets high standards. Quality inspection isn't just a quick once-over. It's a rigorous process where each hide is scrutinized to ensure it meets specific criteria.
First off, there are the color tests. It's crucial that the colors are consistent and match the expected outcomes, especially after the hides have been through the tanning solution. Abrasion resistance is next on the list. I need to make sure the leather can handle wear and tear, so it's tested to see how well it can resist getting scratched or worn down.
Fading and dimensions stability are also tested. The leather shouldn't lose its color when exposed to sunlight or stretch and distort out of shape over time. Every parameter is carefully checked before moving to the final inspection. Here, I ensure that only the best hides are marked and approved for distribution.
Here's a quick breakdown of the inspection stages in a table:
| Test Type | Purpose |
|---|---|
| Color Tests | Ensure color consistency and match |
| Abrasion Resistance | Test durability and wear resistance |
| Fading | Check color stability under light exposure |
| Dimensions Stability | Verify structural integrity and size consistency |
This thorough quality inspection guarantees that each piece of leather crafted meets your exact standards.
Environmental Considerations
As we consider the environmental impact of leather production, it's crucial to focus on sustainable practices that minimize harm to our planet. Embracing these practices isn't just good ethics; it's essential for the longevity of both the industry and our environment.
Here's how we can make a difference:
- Choosing Sustainable Tanneries and Chemicals: Opting for LWG Gold rated tanneries that use ZDHC certified chemicals helps reduce the toxic output into our environment, making the process safer and more sustainable.
- Sourcing and Efficiency: Using regionally sourced hides cuts down on transportation emissions and supports local economies. Additionally, implementing water efficiency practices in tanneries ensures that the precious resource is conserved, reducing the overall water footprint of leather production.
- Innovative Tanning and Materials: Switching to chrome-free tanning methods and using natural finishing materials can significantly decrease the harmful effects on both workers and the surrounding ecosystems. Moreover, by utilizing by-product leather, we avoid unnecessary waste and make the most out of existing resources.
Frequently Asked Questions
How Is Leather Made Step by Step?
I'll break down the leather-making process: It starts in the beamhouse, moves to tanning, then retanning, milling, and finally, finishing. Each step ensures durability, color, softness, and the perfect texture and appearance.
What Is the Raw Material of Leather?
The raw material of leather is primarily animal hides, mainly from cows. These hides are by-products of the meat industry, making leather production a resource-efficient method that helps minimize waste.
How Is Leather Taken From Animals?
Leather's taken from animals by removing their hides post-slaughter. It's a by-product of the meat industry, with various animal types providing different leather qualities, influenced by their health and upbringing.
How Is Genuine Leather Made?
I'm not sure how genuine leather is crafted from start to finish. I know it involves tanning hides and applying finishes, but the detailed steps and methods used are beyond my current knowledge.
- Camouflage Kevlar Fabric: Military-Grade Tactical Gear - June 21, 2025
- Buying Kevlar Fabric in Europe: A Buyer’s Checklist - June 21, 2025
- Boston Whaler Kevlar Fabric: Why It’s Used for Boat Chines - June 21, 2025

