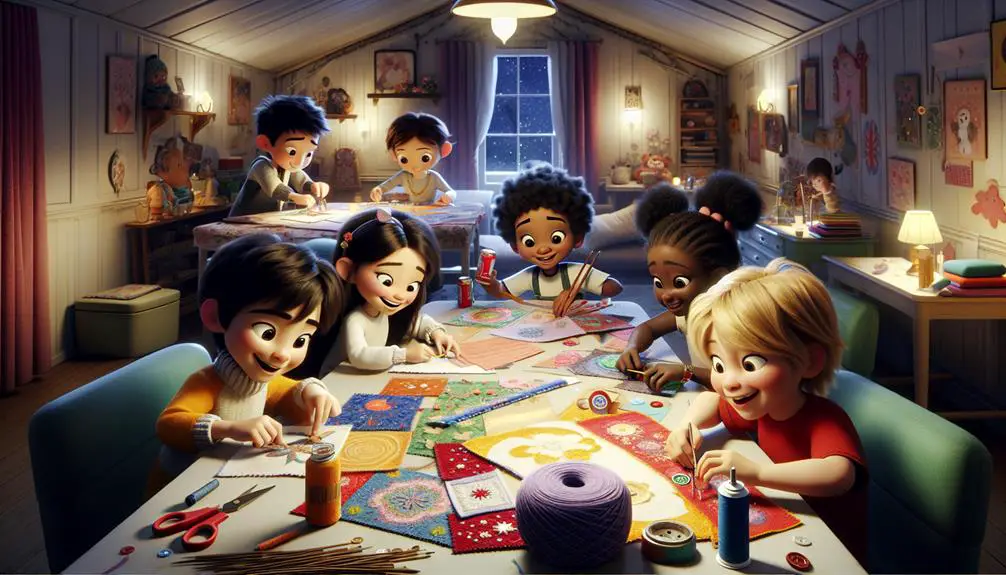
Think of fabric crafts as a canvas where children's imaginations can paint vivid stories. When you introduce kids to projects like no-sew fabric creations or easy felt crafts, you're not just keeping them entertained; you're helping them build essential skills. Imagine the satisfaction they'll feel after creating their own DIY fabric dolls or custom accessories. These activities are more than just fun; they're opportunities for hands-on learning and self-expression. Curious about how to guide young crafters through these delightful projects? Let's explore some creative ideas that will spark their interest.
Table of Contents
Key Takeaways
- Create colorful felt bookmarks to develop fine motor skills.
- Design playful, no-sew fleece scarves through simple knotting techniques.
- Craft vibrant fabric collage art using various textures and patterns.
- Make easy fabric hand puppets for imaginative play.
- Paint custom fabric dolls with unique facial features and accessories.
No-Sew Fabric Projects
There are plenty of fun no-sew fabric projects that kids can easily create with just a few simple materials. One of the most engaging activities is fabric painting. By using fabric paints and some plain fabric, you can transform old T-shirts, tote bags, or pillowcases into unique works of art. This activity not only allows you to express your creativity but also encourages creative upcycling, giving new life to items that might otherwise be discarded.
Another enjoyable project involves knot tying. Creating no-sew fleece blankets or scarves is a perfect example. By cutting strips along the edges of two layers of fleece and tying them together, you can craft a cozy piece without a single stitch. Knot tying is a skill that, once mastered, opens up a plethora of other crafting possibilities.
Textile printing is another fantastic no-sew project. Using stencils and fabric ink, you can print custom designs onto fabric. This method can be applied to anything from T-shirts to tablecloths. The precision and creativity required for textile printing make it a satisfying and rewarding craft.
Easy Felt Crafts
If you're looking for another simple and enjoyable fabric craft, felt projects offer an array of creative possibilities that kids will love. Felt is easy to work with, vibrant in color, and forgiving for little hands.
One of the most delightful projects you can try is creating a felt ornament. Whether it's for a holiday or just a fun decoration, kids can cut out shapes like stars, hearts, or animals. Add buttons, sequins, or embroidery for that extra touch of creativity. You can even sew a loop on top for easy hanging.
Another fantastic felt project is making fabric bookmarks. These are practical and allow kids to express their creativity while crafting something useful. Cut a piece of felt into a rectangular shape, then let kids decorate it with felt cutouts, googly eyes, or even their initials. Adding a small ribbon to the top can make it easy to find in a book.
Both felt ornaments and fabric bookmarks are excellent ways to introduce children to the joys of fabric crafts. They'll not only develop fine motor skills but also take pride in their colorful, creative achievements.
DIY Fabric Dolls
Creating DIY fabric dolls is both fun and educational for kids.
Start by choosing the right fabric types.
Then move on to sewing basic shapes.
Choosing Fabric Types
When making DIY fabric dolls, selecting the right fabric type is important for both appearance and durability. Fabric texture plays a vital role in how your doll feels and looks. Opt for soft, smooth textures like cotton or linen, which are easy to sew and handle. Velvet and felt can add a unique touch but might require more skill due to their thicker nature.
Fabric prints can bring your dolls to life with patterns that reflect their personality. Choose small-scale prints for detailed areas like faces and larger prints for the doll's clothing. Be mindful of how the print aligns with the doll's shape to avoid mismatched designs.
Fabric durability should be a top priority, especially if the dolls are for young children who'll play with them often. Cotton and linen aren't only soft but also sturdy. Avoid fabrics that fray easily or are too delicate.
Lastly, consider fabric cost. While high-end materials like silk can be tempting, they're not always practical. Balance quality and affordability by selecting durable, attractive fabrics within your budget. This careful consideration guarantees your DIY fabric dolls are both beautiful and lasting.
Sewing Basic Shapes
Now that you've selected the ideal fabric, let's get started on sewing the basic shapes for your DIY fabric dolls. Begin by outlining your doll's shape on the fabric using a fabric pencil. Precision in fabric cutting is vital; sharp scissors will guarantee clean edges. Once cut, pair the fabric pieces with their corresponding sides facing each other.
Next, use simple stitching techniques like the backstitch or running stitch to sew along the outline, leaving a small gap for stuffing. Practice sewing safety by keeping your fingers clear of the needle's path and always store needles securely when not in use.
Consider these tips for mastering the basics:
- Use pins to hold fabric pieces together while stitching.
- Practice needle handling to improve accuracy and avoid pricking your fingers.
- Choose appropriate thread that matches your fabric's weight and color.
- Maintain even stitches to make sure the doll's shape holds well.
- Test stitches on a fabric scrap to perfect your technique before sewing the actual shapes.
Adding Final Details
With your basic doll shape complete, it's time to add final details that will bring your DIY fabric doll to life. Start by using fabric painting to create facial features. Simple tools like fabric markers or paintbrushes can help you craft expressive eyes, a charming smile, and even rosy cheeks. Make sure to practice on a fabric scrap first to perfect your technique.
Next, explore embellishment techniques to add personality to your doll. Sew on small buttons for eyes or use embroidery floss to create intricate hairstyles. Don't hesitate to incorporate mixed media techniques. For example, you can combine felt, lace, or even small beads to give your doll a unique flair.
Consider using fabric scraps to add clothing or accessories. Tiny dresses, hats, or scarves can all be crafted from leftover materials. This not only adds character but also teaches resourcefulness.
Fabric Collage Art
Creating fabric collage art is a fun way for kids to express their creativity.
Start by choosing colorful fabric pieces that catch your eye.
Then, arrange them into an interesting design.
Choosing Fabric Pieces
Choosing the right fabric pieces is vital for crafting a vibrant and cohesive fabric collage. First, focus on fabric selection and color coordination. Carefully pick fabrics that complement each other, creating a harmonious blend of colors. Think about the overall mood you want to convey. Bright colors can make the collage lively, while softer hues can evoke calmness.
Texture variety and pattern mixing play a pivotal role in adding depth and interest to your collage. Incorporate fabrics with different textures—smooth silk, rough burlap, or soft cotton—to create a tactile experience. Mixing patterns like stripes, polka dots, and florals can make the collage more visually compelling.
Here's a quick checklist to guide your fabric choices:
- Color Harmony: Select a color palette that works well together.
- Texture Diversity: Use a mix of textures to add dimension.
- Pattern Variety: Combine different patterns for a dynamic look.
- Fabric Quality: Choose fabrics that are easy to cut and glue.
- Theme Consistency: Make sure all pieces fit the intended theme or story.
Arranging the Design
When arranging your fabric collage, begin by laying out the larger pieces to establish the foundational design. This creates a structured base upon which you can build more intricate elements. Pay close attention to color coordination, as a harmonious palette will guarantee your collage is visually appealing. Use complementary colors to create a dynamic and engaging composition.
Next, focus on pattern placement. Arrange patterned fabrics in a way that balances the overall look, avoiding clutter or overwhelming sections. Distribute patterns evenly to maintain a cohesive design. To achieve design symmetry, mirror some elements on either side of your collage. Symmetry brings balance and can make your artwork more pleasing to the eye.
Consider fabric texture as you add smaller pieces. Mixing different textures can add depth and interest to your collage. Smooth fabrics can contrast beautifully with rougher textures, creating a tactile experience.
Gluing and Finishing
To secure your fabric pieces in place, start by applying a thin layer of fabric adhesive on the back of each piece, pressing them firmly onto your base material. This guarantees they stay put as you move on to the finishing touches. Once everything is glued down, let the collage dry for a few hours.
Now, it's time to add some flair with fabric painting and embellishment techniques. Use fabric paint to outline shapes, add details, or create patterns. Want more texture? Try adding sequins, beads, or buttons as embellishments. Make sure everything is firmly attached by using the right adhesive for each item.
For additional creativity, ponder fabric dyeing and stamping ideas. Dye small sections of your collage for a tie-dye effect or use fabric stamps to add unique patterns and designs. These techniques can elevate your fabric collage to a true piece of art.
Here are some final touches to contemplate:
- Seal the edges: Use fabric adhesive along the edges to prevent fraying.
- Frame it: Place your collage in a frame for a polished look.
- Add a backing: Attach felt or another fabric to the back for stability.
- Personalize: Add names or dates with fabric markers.
- Hang it up: Attach a hanging loop for easy display.
Handmade Fabric Toys
Creating handmade fabric toys is a fun and rewarding activity that sparks creativity and provides endless hours of play for kids. You can start with simple projects like fabric hand puppets and fabric play food. These projects are perfect for fabric puppet shows, where children can let their imaginations run wild. By making a variety of puppets and food items, you create a miniature world that's both educational and entertaining.
Next, consider making fabric dress up costumes. These costumes can transform kids into their favorite characters, fostering imaginative play. From superheroes to fairytale characters, the possibilities are endless. Plus, this activity helps develop sewing skills and attention to detail.
Here's a quick guide to get you started:
| Project Type | Materials Needed | Skill Level |
|---|---|---|
| Fabric Hand Puppets | Felt, yarn, buttons | Beginner |
| Fabric Play Food | Cotton fabric, stuffing | Intermediate |
| Dress Up Costumes | Various fabrics, trim | Advanced |
| Puppet Stage | Cardboard, fabric | Intermediate |
| Toy Animals | Plush fabric, thread | Intermediate |
Custom Fabric Accessories
Custom fabric accessories let kids personalize their belongings and express their unique style. By crafting these items, they can explore creativity and develop fine motor skills. One popular project is making fabric jewelry. Kids can use embellishment techniques like adding beads, sequins, or embroidery to create one-of-a-kind pieces. This not only enhances their artistic abilities but also gives them a sense of accomplishment.
Fabric hair accessories provide another avenue for creative expression. Imagine designing colorful headbands, scrunchies, or hair clips. These projects are simple yet allow for endless customization. Kids can experiment with different fabrics, patterns, and embellishments to create something truly unique.
Here are some creative ideas to get you started:
- Fabric Bracelets: Use strips of fabric, beads, and elastic to craft stylish bracelets.
- Embroidered Hair Clips: Add embroidered designs to fabric-covered hair clips.
- Patchwork Headbands: Combine different fabric scraps to create a vibrant headband.
- Beaded Fabric Necklaces: Thread beads onto fabric strips for a chic necklace.
- Personalized Scrunchies: Sew scrunchies from favorite fabric patterns and add small charms.
These projects not only foster creativity but also teach valuable skills like sewing and design.
Frequently Asked Questions
What Types of Fabric Are Best for Children's Crafts?
When thinking about fabric selection, safety, and fun, age-appropriate fabric choices are essential. Opt for cotton, felt, or fleece. They're easy to handle, non-toxic, and perfect for sparking creativity in young crafters.
How Can I Safely Store Fabric Scraps for Future Projects?
You can master fabric scrap organization by using clear bins or labeled bags. Try creative storage solutions like hanging shoe organizers or mason jars. Keep scraps sorted by color or size for easy access during future projects.
Are There Any Eco-Friendly Fabric Options for Kids' Crafts?
Imagine crafting with the earth in mind. You can opt for sustainable materials like organic cotton or bamboo. These eco-conscious fabric choices guarantee your projects are both enjoyable and environmentally friendly, making you a master of eco-conscious crafting.
What Are Some Tips for Teaching Young Children Basic Sewing Skills?
When teaching young children basic sewing skills, use child-friendly tools and start with simple, creative projects. Show them how to thread a needle, make basic stitches, and always supervise to guarantee safety and success.
How Can I Remove Fabric Glue From Clothes or Surfaces?
To remove fabric glue, create a DIY fabric glue remover using equal parts white vinegar and water. Apply the solution, let it sit, and gently scrub. For future projects, consider fabric glue alternatives like sewing or fusible tape.
- The Use of Nonwovens in Construction and Civil Engineering - July 11, 2025
- The Use of Nonwovens in Construction and Civil Engineering - July 11, 2025
- The Use of Nonwovens in Construction and Civil Engineering - July 11, 2025


