To transfer images to pillowcases at home, start by choosing a breathable cotton fabric for easy handling. Print your high-quality design in reverse on iron-on transfer paper, then firmly iron it onto the fabric, letting it cool before peeling. Alternatively, use fabric markers or paints to hand-draw or stencil your design, setting it with heat for durability. For crisp patterns, try freezer paper stencils. Keep designs vibrant with gentle care. Keep exploring to discover creative twists and care tips.
Table of Contents
Key Takeaways
- Print your design on iron-on transfer paper, place it face down on pillowcase fabric, then iron firmly following package instructions for best results.
- Use fabric markers or acrylic paints mixed with fabric medium to hand-paint designs, then heat-set with an iron to ensure durability and washability.
- Create stencils using freezer paper by cutting your design, adhering it shiny side down to fabric, and applying fabric paint with a dabbing motion for crisp lines.
- Choose high-quality digital images or simple line designs for clearer transfer and consider mirroring images if using iron-on transfer paper.
- Let the transferred design cool completely before peeling backing or handling to avoid smudging and ensure a clean, lasting image on your pillowcase.
Choosing the Right Fabric for Your Pillowcase
Before you start sewing, consider the fabric carefully since it affects your pillowcase’s comfort and durability.
Choosing the right fabric is key to ensuring your pillowcase is both comfortable and long-lasting.
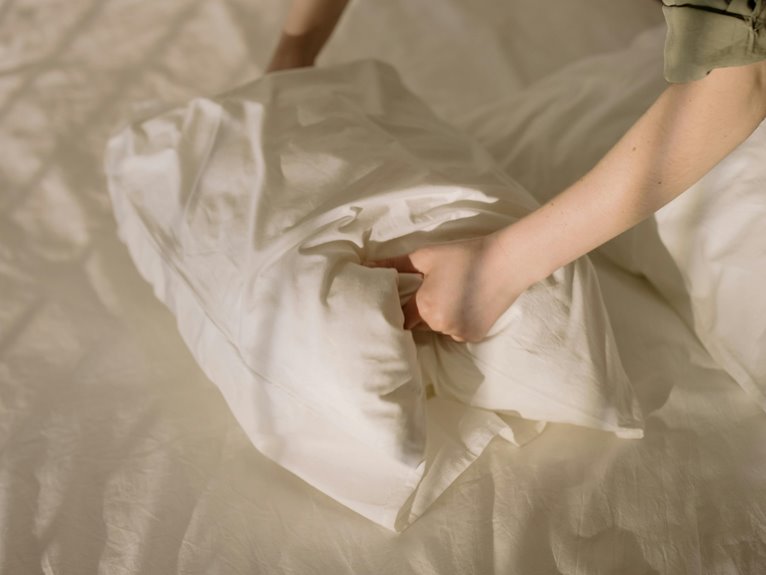
You’ll want to choose a material that feels soft against your skin and stands up to regular washing. Cotton is a popular choice because it’s breathable, easy to handle, and machine washable.
If you prefer something smoother, sateen or silk blends offer a luxurious feel but may require more delicate care.
Avoid fabrics that wrinkle easily or are too stiff, as they can make sewing tricky and reduce comfort.
Also, check the fabric’s weight—medium-weight fabrics balance durability and softness well.
Selecting Images and Preparing Your Design
Now that you’ve picked your fabric, it’s time to choose images that match your style and vision.
Make certain your digital files are high-quality and properly formatted for the best print results.
Preparing your design carefully will guarantee your pillowcase looks exactly how you want it.
Choosing Image Styles
How do you choose the perfect images for your pillowcase design? Start by considering the vibe you want—playful, elegant, or bold. Simple designs with clean lines transfer better and look crisp on fabric. Think about colors too; vibrant hues pop, but subtle tones create softness. Also, decide if you want patterns, illustrations, or photographs. Each style brings a unique feel.
| Image Style | Best For |
|---|---|
| Minimalist Icons | Modern, clean designs |
| Watercolor | Soft, artistic looks |
| Bold Graphics | Eye-catching, vibrant designs |
| Photographs | Realistic, personal images |
| Hand-drawn Sketches | Unique, whimsical touches |
Choose styles that match your pillowcase’s purpose and the mood you want to convey.
Preparing Digital Files
Once you’ve picked the image styles that fit your pillowcase design, it’s time to get your digital files ready.
Start by selecting high-resolution images to guarantee clear, crisp transfers. Avoid pixelated or low-quality pictures since they won’t print well on fabric.
Use editing software to crop, resize, and adjust colors if needed—this helps your design fit perfectly on the pillowcase. Convert your images to the appropriate file format, typically PNG or JPEG, depending on your transfer method.
If your design includes text or intricate details, consider simplifying or vectorizing it for cleaner results.
Finally, mirror your image before printing if you’re using iron-on transfer paper, so it appears correctly once applied.
Preparing your files carefully sets you up for a successful, professional-looking pillowcase design.
Using Iron-On Transfer Paper for Image Transfer
Although it may seem tricky at first, using iron-on transfer paper is a straightforward way to add personalized images to your pillowcase. First, print your design on the transfer paper, ensuring you mirror the image if needed. Then, place the paper face down on the fabric and iron firmly according to the instructions. Let it cool before peeling off the backing to reveal your design.
| Step | Key Tip |
|---|---|
| Mirror the image for text | |
| Position | Align carefully on fabric |
| Iron | Use steady pressure and heat |
| Peel | Wait until cool for best result |
Following these steps guarantees a crisp, lasting image on your pillowcase.
Creating Designs With Fabric Markers and Paints
If you want more control over your pillowcase design, fabric markers and paints offer a hands-on approach that lets you customize every detail.
Start by choosing high-quality fabric markers or acrylic paints mixed with fabric medium to guarantee durability. Sketch your design lightly with a pencil, then fill in with markers or paint, working in thin layers to avoid bleeding.
Use stencils or freehand your artwork for a personal touch. Let each layer dry completely before adding more color or details.
Once finished, heat-set your design with an iron to make it washable and long-lasting.
This method is perfect for intricate patterns, lettering, or vibrant color blends that transfer techniques mightn’t capture as well, giving your pillowcase a unique, handcrafted look.
Applying the Freezer Paper Technique for Stencils
You’ll start by selecting the right freezer paper to create crisp stencils for your pillowcase.
Next, you’ll carefully cut out your design and prepare the stencil for application.
Finally, you’ll press the stencil onto the fabric, making sure it sticks well before adding your paint.
Choosing Freezer Paper
When selecting freezer paper for your stencil, focus on its adhesive side and weight, as these factors determine how well your design will transfer and hold during painting. The adhesive side should be smooth and tacky enough to stick firmly to fabric without leaving residue. Weight affects durability; heavier paper resists tearing but might be harder to cut.
Here’s a quick comparison:
| Feature | Light Weight | Medium Weight |
|---|---|---|
| Adhesive Strength | Moderate | Strong |
| Ease of Cutting | Very Easy | Moderate |
| Durability | Tears Easily | Holds Well |
Choose what suits your design complexity and fabric type to guarantee crisp, clean stencils.
Cutting and Preparing Stencils
Although choosing the right freezer paper is essential, cutting and preparing your stencils properly guarantees your design transfers sharply onto the pillowcase.
Start by printing or drawing your design on the non-shiny side of the freezer paper. Use a sharp craft knife or precision scissors to cut out the areas where you want the paint or ink to show through. Be careful to make clean, smooth cuts—jagged edges can cause bleeding.
Remember to keep the stencil stable by taping it onto a cutting mat. After cutting, peel away the unwanted sections gently without stretching the paper.
Finally, double-check your stencil for any loose bits or incomplete cuts. This prep work guarantees your design stays crisp and clear when you apply it to the fabric.
Applying Stencils on Fabric
Press the freezer paper stencil shiny-side down onto your pillowcase to create a temporary adhesive bond.
Use a warm iron without steam to press firmly, ensuring the stencil sticks smoothly without wrinkles or gaps. This seal prevents paint from bleeding under edges, giving you crisp, clean lines.
Once the stencil is securely in place, apply fabric paint with a sponge or brush using a dabbing motion. Avoid brushing side to side to reduce smudging.
Let the paint dry slightly before carefully peeling away the freezer paper. If you need to reposition the stencil for multiple prints, simply re-iron it on.
After finishing, wash the pillowcase according to fabric paint instructions, and your custom design will last through many washes.
Tips for Heat Setting and Washing Your Custom Pillowcase
To guarantee your custom pillowcase design stays vibrant and intact, you’ll need to heat set the fabric properly before washing.
Use a dry iron on the highest setting safe for your fabric, placing a thin cloth between the iron and the design to avoid damage. Press firmly for about 3-5 minutes, moving the iron continuously to prevent scorching.
After heat setting, wait at least 24 hours before washing. When washing, turn the pillowcase inside out and use cold water with a gentle cycle to preserve colors.
Avoid bleach and fabric softeners, which can degrade your design. Finally, air dry or tumble dry on low heat to maintain the print’s longevity and keep your custom pillowcase looking fresh for longer.
Creative Ideas to Personalize Your Pillowcase Designs
When you want to make your pillowcase truly one-of-a-kind, adding personal touches can transform a simple design into a cherished keepsake. Try incorporating monograms, favorite quotes, or hand-painted accents to reflect your style. Mixing textures like embroidery or fabric paint adds depth and uniqueness. You can also use stencils or stamps for crisp, repeatable patterns.
| Personal Touch | Technique | Effect |
|---|---|---|
| Monograms | Embroidery | Elegant and classic look |
| Favorite Quotes | Fabric Markers | Inspirational and personal |
| Stencils/Patterns | Fabric Paint | Bold and creative design |
Experiment with these ideas to craft pillowcases that truly speak to your personality.
Frequently Asked Questions
Can I Use a Regular Printer for Transfer Paper?
You might find a regular printer isn’t quite the ideal companion for transfer paper, as it often prefers specific ink types. For best results, using an inkjet printer will help you achieve a flawless design transfer.
How Do I Fix Mistakes on Fabric Markers?
If you make mistakes with fabric markers, don’t worry. You can try dabbing a small amount of rubbing alcohol on a cotton swab to lift the ink gently. Test first, and act quickly before it sets permanently.
What Is the Best Pillowcase Size for Standard Pillows?
Think of pillowcases as tailored suits for your pillows; for standard pillows, you’ll want a 20×26 inch pillowcase. This size fits snugly, ensuring comfort without excess fabric bunching or sagging during sleep.
Can I Transfer Images Onto Dark-Colored Fabrics?
You can transfer images onto dark-colored fabrics, but you’ll need special transfer paper designed for dark materials or use a white ink printer. Otherwise, colors might not show up well or appear faded on dark fabric.
How Long Does the Transfer Image Last After Multiple Washes?
You’ll be thrilled to know your image lasts forever—except it doesn’t. After multiple washes, expect some fading or cracking unless you’re super gentle. Using proper care, your design should hold up for months, not eternity.

- Does Chiffon Fabric Stink - July 15, 2025
- Does Chiffon Fabric Affect the Economy - July 15, 2025
- Does Cotton Fabric Have a Nap - July 15, 2025


