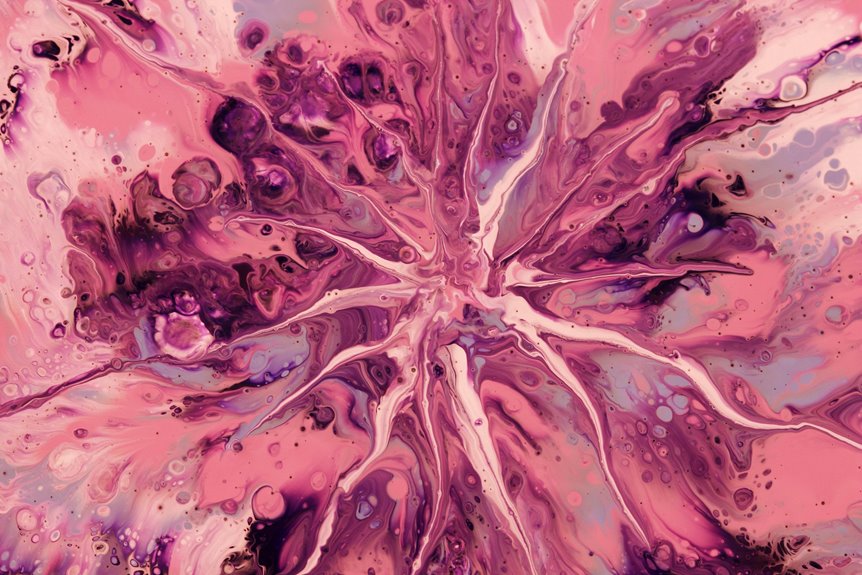
You can create bold graphic patterns with dry tie-dye by applying fiber-reactive dye directly onto dry, tightly folded fabric. Start by selecting natural fibers like cotton for better absorption and use rubber bands to bind precise shapes. Apply the dye minimally with fine-tipped tools to avoid bleeding and keep colors sharp. Avoid oversaturating and let colors dry between layers. Careful preparation and technique produce striking designs that really pop. Keep going to uncover tips and tricks for mastering this method.
Key Takeaways
- Fold and tightly bind dry fabric using techniques like accordion or spiral to create crisp graphic patterns with defined resist areas.
- Apply fiber-reactive powdered or paste dyes sparingly using fine brushes or squeeze bottles for precise, bold color placement without bleeding.
- Keep fabric dry or only lightly damp during application to maintain sharp edges and prevent dye spread between pattern sections.
- Use rubber bands or string to secure folds firmly, enhancing pattern contrast and preventing dye from seeping into tied areas.
- Allow each dyed section to dry slightly before adding adjacent colors to preserve clear, layered graphic designs.
Understanding the Basics of Dry Tie-Dye
Before you begin creating your graphic patterns, it’s important to understand the basics of dry tie-dye. Unlike traditional tie-dye, dry tie-dye doesn’t rely on soaking fabric in dye baths or water-heavy techniques.
Instead, you apply dye directly onto dry, folded, or twisted fabric, which allows for sharper, more defined patterns. You’ll use folding, twisting, and tying methods to create resist areas where the dye won’t penetrate, giving you control over the design’s shapes and lines.
This method suits creating bold, graphic patterns since the dye stays where you place it, minimizing the bleed effect common in wet tie-dye. Mastering these principles will help you confidently experiment with your own graphic designs using dry tie-dye.
Materials Needed for Dry Tie-Dye Projects
To get started with dry tie-dye, you’ll need the right supplies like fabric dyes, rubber bands, and protective gloves.
Choosing the best fabric and preparing it properly will make a big difference in your final design.
Plus, having the right tools for creating patterns will help you achieve sharp, graphic results.
Essential Tie-Dye Supplies
Gathering the right supplies sets the foundation for successful dry tie-dye projects. You’ll need fiber-reactive dyes in powder form, which offer vibrant, long-lasting colors.
Have squeeze bottles ready for precise dye application, allowing you to control patterns easily. Rubber bands or string are essential for securing fabric folds and creating defined designs.
Don’t forget protective gloves to keep your hands clean and a plastic-covered workspace to prevent staining. A spray bottle filled with water helps you dampen fabric areas selectively.
Additionally, keep paper towels or cloth rags nearby for quick cleanup. Finally, wear an apron or old clothes since tie-dye can get messy.
With these essentials, you’re well-equipped to bring your graphic dry tie-dye patterns to life efficiently and creatively.
Fabric Choices and Preparation
Once you have your supplies ready, focusing on the right fabric can make all the difference in your dry tie-dye results. Choose natural fibers like cotton, linen, or rayon since they absorb dye better and yield vibrant, lasting patterns.
Avoid synthetic fabrics, as they won’t hold dye well and can frustrate your efforts. Before starting, wash your fabric to remove any sizing or finishes that might resist dye. Don’t use fabric softener—it can interfere with absorption.
After washing, let your fabric dry completely; dry tie-dye works best on dry material to control dye placement precisely. If needed, iron your fabric to smooth out wrinkles, giving you a clean canvas for crisp, graphic patterns.
Proper fabric choice and prep set you up for success.
Tools for Pattern Making
A few essential tools will help you create sharp, eye-catching patterns with the dry tie-dye method.
First, you’ll need rubber bands or string to tightly bind your fabric and form distinct shapes. Use clips or clothespins if you want to secure folds without marks.
Sharp fabric scissors help you trim and shape your material precisely. A spray bottle filled with dye solution lets you control the application, ensuring patterns stay crisp.
You’ll also want gloves to protect your hands and a plastic sheet or tarp to keep your workspace clean.
Finally, a flat surface for folding and tying your fabric will make the process easier and more accurate. Having these tools ready sets you up for successful, vibrant designs.
Preparing Your Fabric for Dry Tie-Dye
Before you start, pick a fabric that soaks up dye well, like cotton or rayon.
Make sure to pre-wash and dry it to remove any finishes that might block the dye.
Then, mark the spots where you’ll tie your fabric to create sharp, graphic patterns.
Choosing the Right Fabric
Choosing the right fabric sets the foundation for successful dry tie-dye projects. You’ll want to pick natural fibers like cotton, linen, or rayon because they absorb dye better and show vibrant colors.
Avoid synthetic materials such as polyester, which resist dye and can lead to dull results. Look for fabrics with a tight weave to guarantee your patterns come out crisp and clear.
Thicker fabrics mightn’t absorb dye as evenly, so opt for medium-weight materials. Keep in mind the fabric’s color too; white or light shades will let your graphic patterns pop.
Pre-Washing and Drying
Since any dirt or sizing on your fabric can block dye absorption, you’ll need to pre-wash it thoroughly before starting your dry tie-dye project. Use a mild detergent and avoid fabric softeners, which can leave residues. After washing, dry the fabric completely, as moisture affects dye placement in the dry tie-dye method.
Here’s a quick guide for pre-washing and drying:
| Step | What to Use | Tips |
|---|---|---|
| Wash | Mild detergent | Avoid fabric softeners |
| Rinse | Cold water | Guarantee all soap is gone |
| Dry | Air dry or low heat | Fabric must be fully dry |
| Inspect | Visual check | Remove any stains or spots |
Following these steps guarantees your fabric is ready for vibrant, crisp patterns.
Marking Tie Points
Now that your fabric is clean and dry, it’s time to mark the tie points that will shape your dry tie-dye patterns. Use a washable fabric marker or tailor’s chalk to pinpoint where you’ll bind the fabric.
Think about the design you want—dots, lines, or geometric shapes—and mark accordingly. Keep your marks light but visible enough to guide your tying. Remember, precision here controls the final pattern, so take your time.
Avoid overcrowding tie points; spacing them evenly guarantees clear, bold designs. Once marked, you’re ready to fold and bind the fabric tightly at these points.
This step sets the foundation for your graphic patterns, so don’t rush it. Proper marking makes the difference between a chaotic mess and a striking dry tie-dye masterpiece.
Selecting the Right Dye for Dry Application
To achieve crisp, vibrant results in dry tie-dye, you’ll want to pick dyes specifically formulated for minimal moisture use. Fiber-reactive dyes work best because they bond directly with natural fibers like cotton without needing much water.
Choose powdered dyes that you can mix with just enough water to create a thick paste—this helps prevent bleeding and maintains sharp edges. Avoid liquid dyes designed for wet applications, as they tend to spread too easily in dry methods.
Also, consider dyes with good colorfastness to guarantee your patterns stay bright after washing. When selecting colors, opt for contrasting shades to highlight your graphic designs.
Techniques for Folding and Binding Fabric
When you fold and bind fabric carefully, you control how the dye interacts with the material, creating sharp, graphic patterns.
Start by choosing a folding technique that suits your design—accordion folds produce stripes, while spirals create circular patterns. Use firm, even folds to guarantee crisp lines.
Select a folding method like accordion for stripes or spirals for circles, ensuring firm folds for sharp patterns.
Next, bind the fabric tightly with rubber bands, string, or clips. The tighter the binding, the more distinct the pattern edges will be, as dye won’t penetrate those areas.
Experiment with multiple bindings to combine shapes and layers. Keep your folds consistent in thickness to avoid uneven dye absorption.
Applying Dye With Minimal Moisture
To get crisp graphic patterns, you’ll want to pick fabrics that absorb dye well without soaking through.
Using powdered or paste dye helps you control how much moisture touches the fabric.
Focus on precise application techniques to keep your designs sharp and clean.
Choosing the Right Fabric
Fabric choice plays an essential role in achieving crisp, graphic patterns with the dry tie-dye method. You want a fabric that soaks up dye without bleeding or smudging, especially since you’re applying dye with minimal moisture.
Natural fibers like cotton work best because they absorb dye efficiently and hold sharp designs.
Consider these fabric features when selecting:
- Fiber content: Choose 100% cotton or linen for vibrant, well-defined patterns.
- Weave tightness: Tighter weaves prevent dye from spreading, keeping lines clear.
- Color: Start with light or white fabrics to make colors pop.
- Finish: Avoid pre-washed or heavily treated fabrics; they can resist dye absorption.
Picking the right fabric sets the foundation for your graphic dry tie-dye masterpiece.
Using Powdered or Paste Dye
Applying powdered or paste dye lets you control moisture precisely, which is key for dry tie-dye’s sharp, graphic patterns.
When you use powdered dye directly, you apply it sparingly on fabric folds or tied sections, avoiding excess wetness that can blur designs.
Paste dye, thicker and less runny than liquid, offers similar control—you can dab it onto specific areas with a brush or your fingers to keep edges crisp.
Both forms limit dye spread because they contain little to no added water, preventing unwanted bleeding. This means your patterns stay well-defined and bold.
Techniques for Precise Application
Master your control over dye placement by using tools like fine brushes, cotton swabs, or squeeze bottles to apply color exactly where you want it.
Since the dry tie-dye method relies on minimal moisture, these tools help you avoid bleeding and maintain sharp edges in your graphic patterns.
Work slowly and steadily, applying just enough dye to saturate the fabric without soaking it.
To enhance precision, consider these techniques:
- Use a fine-tipped brush for detailed lines and small shapes.
- Dab with cotton swabs to add or correct tiny spots.
- Employ squeeze bottles with narrow nozzles for controlled dye flow.
- Let each section dry slightly before applying adjacent colors to prevent blending.
Creating Sharp Lines and Bold Contrasts
When you want your dry tie-dye designs to stand out, focusing on sharp lines and bold contrasts is essential.
Start by folding or tying your fabric carefully to create clear boundaries. Use stencils or tape to block off sections where you want crisp edges. Apply dye sparingly, targeting specific areas to maintain clean separation between colors.
Fold and tie fabric precisely; use stencils or tape to achieve sharp, clean dye lines.
Choose high-contrast hues—like black and white or complementary colors—to emphasize your pattern’s graphic quality. Keep your brush or applicator controlled and steady to avoid bleeding.
Also, work in thin layers, allowing each to dry slightly before adding more. This approach helps preserve the integrity of your lines and keeps colors vivid.
Tips for Preventing Dye Bleeding
Preventing dye bleeding is essential to keeping your dry tie-dye patterns crisp and vibrant. When colors bleed, your hard work can quickly lose its sharpness and impact.
To avoid this, you need to control moisture and handle the fabric carefully throughout the process. Here are some tips to help you maintain clean edges:
- Use minimal liquid when applying dye to prevent spreading.
- Work on dry or lightly damp fabric instead of soaking wet material.
- Apply dye in thin layers to avoid oversaturation.
- Allow each color to dry slightly before adding the next to reduce mingling.
Setting the Dye and Fixing Colors
Controlling moisture and dye application helps keep your patterns sharp, but locking those colors in place guarantees your design lasts.
Once you’ve applied your dye, let the fabric sit for at least 24 hours in a warm, dry area. This resting period allows the dye to fully bond with the fibers.
Next, rinse the fabric gently in cold water to remove any excess dye without disturbing your pattern. To fix the colors, soak the fabric in a solution of water and a fixative like soda ash or a commercial dye fixer for about 10-15 minutes. This step stabilizes the dye molecules, preventing fading and bleeding.
Finally, air-dry your fabric away from direct sunlight to preserve the vibrancy of your graphic dry tie-dye design.
Caring for Your Dry Tie-Dyed Fabric
Proper care is essential to keep your dry tie-dyed fabric vibrant and intact over time. To maintain the bold colors and sharp patterns, handle your fabric gently and avoid harsh treatments.
Here are some key tips to help you preserve your design:
- Wash your fabric inside out in cold water to reduce color fading.
- Use mild detergent without bleach or fabric softeners to protect dye integrity.
- Air dry your fabric rather than using a dryer to prevent shrinking and color loss.
- Store your fabric away from direct sunlight to avoid fading caused by UV rays.
Following these simple steps lets you enjoy your eye-catching dry tie-dyed pieces longer, keeping their graphic patterns fresh and bold.
Inspiring Project Ideas Using Dry Tie-Dye
Looking for creative ways to showcase your dry tie-dye skills? Try transforming plain tote bags into vibrant art pieces by applying bold graphic patterns.
You can also personalize t-shirts with striking geometric designs, making your wardrobe stand out. Home décor is another great avenue—think pillowcases or curtains featuring your unique tie-dye motifs.
For a fun twist, customize fabric bookmarks or reusable face masks with eye-catching shapes and lines. These small projects let you experiment without committing to large surfaces.
By focusing on sharp contrasts and clear patterns, you’ll highlight the dry tie-dye method’s strengths. Each project becomes a canvas for your creativity, turning everyday items into personalized statements.
Immerse yourself, and let your imagination guide your next dry tie-dye adventure!
Frequently Asked Questions
Can Dry Tie-Dye Be Done on Synthetic Fabrics?
You can dye synthetic fabrics, but dry tie-dye works best on natural fibers like cotton. Synthetic materials might not absorb dye evenly, so you’ll want to use special dyes designed for synthetics to get good results.
How Long Does Dry Tie-Dye Fabric Take to Fully Dry?
Think of your fabric as a sunlit field—drying usually takes 4 to 6 hours at room temperature. You’ll want to let it fully dry before handling to keep those vibrant colors sharp and lasting.
Is Dry Tie-Dye Safe for Children to Try?
You can definitely let kids try dry tie-dye since it’s generally safe and uses less water and mess. Just make sure they use kid-friendly dyes and supervise to avoid any accidental stains or ingestion.
Can You Layer Colors in Dry Tie-Dye for New Effects?
Did you know 75% of DIY crafters enjoy experimenting with colors? You can definitely layer colors in dry tie-dye to create new effects—just apply lighter shades first, then add darker ones for vibrant, unique patterns.
What Are Common Mistakes to Avoid With Dry Tie-Dye?
You’ll want to avoid over-saturating fabric, using too much dye, or not securing folds tightly. Also, don’t skip pre-washing your fabric or rushing drying times; these mistakes can blur your patterns and reduce vibrancy.