To master the wig-wag tie-dye technique for zig-zag patterns, start with natural cotton fabric and pre-wash it to boost dye absorption. Fold your damp shirt accordion-style with narrow pleats, then fold again to create sharp zig-zag creases. Use rubber bands to hold the folds tight and apply fiber-reactive dyes carefully with squeeze bottles, alternating colors to prevent bleeding. After dyeing, set colors by letting the fabric sit wrapped in plastic. Keep exploring and you’ll create vibrant, precise zig-zag designs.
Key Takeaways
- Use accordion folding with narrow pleats and fold the fabric in halves or thirds to create sharp zig-zag crease lines.
- Choose fiber-reactive dyes and high-contrast colors for vibrant, lasting zig-zag patterns on natural cotton fabric.
- Apply dye carefully with squeeze bottles to avoid oversaturation and color bleeding between zig-zag folds.
- Secure folds tightly with rubber bands to maintain distinct zig-zag sections and prevent color bleeding.
- Set dye by wrapping fabric in plastic and letting it sit 6-8 hours, then rinse and wash separately to preserve pattern clarity.
What You Need for Wig-Wag Tie-Dye
To get started with wig-wag tie-dye, you’ll need a few essential supplies: fiber-reactive dyes, a plain white cotton shirt, rubber bands, squeeze bottles, and gloves.
Fiber-reactive dyes work best because they bond well with cotton, giving you vibrant, lasting colors. The plain white cotton shirt serves as your blank canvas, allowing the dyes to pop.
Rubber bands are vital—you’ll use them to create the signature zig-zag folds that define the wig-wag pattern. Squeeze bottles help you apply the dye precisely, avoiding unwanted color mixing.
Gloves protect your hands from staining and chemicals, so don’t skip them. Besides these basics, have a plastic table cover and zip-lock bags ready for easy cleanup and setting the dye.
With these supplies, you’re all set to jump in!
Choosing the Right Fabric
When picking fabric for wig-wag tie-dye, you’ll want to choose natural fibers like cotton for the best color absorption.
Consider the weight of the fabric since lighter materials soak up dye differently than heavier ones.
Don’t forget to pre-wash your fabric to remove any sizing or chemicals that could affect your design.
Natural Fibers Preferred
Although synthetic fabrics can be easier to find, natural fibers like cotton, silk, and linen absorb dye more effectively, giving your wig-wag tie-dye patterns vibrant, lasting colors.
When you pick your fabric, focus on natural fibers to confirm your zig-zag designs pop with clarity and richness.
Here’s why natural fibers are your best bet:
- Better Dye Absorption – They soak up dyes deeply, producing vivid colors.
- Durability – Colors stay bright even after multiple washes.
- Texture Compatibility – They hold folds and ties well for precise patterns.
- Eco-Friendly – Natural fabrics are often more sustainable and biodegradable.
Choosing natural fibers assures your wig-wag tie-dye pieces will look stunning and stand the test of time.
Fabric Weight Considerations
Selecting the right fabric weight plays an essential role in achieving crisp, defined wig-wag tie-dye patterns.
Lightweight fabrics like cotton voile or lawn absorb dye quickly, resulting in sharp, vibrant zig-zags. However, they can be delicate and may distort if handled roughly.
Medium-weight fabrics, such as standard cotton or rayon, strike a good balance—they’re sturdy enough to hold folds neatly yet still take dye well, making them ideal for beginners.
Heavier fabrics, like denim or canvas, often resist dye penetration and might blur your pattern’s edges.
When choosing fabric, consider how well it folds and holds creases; this affects the wig-wag’s signature zig-zag lines.
Picking the right weight guarantees your design stands out with clarity and durability, enhancing your tie-dye experience.
Pre-washing Importance
Why should you always pre-wash your fabric before starting a wig-wag tie-dye project?
Pre-washing removes any chemicals, sizing, or dirt that might prevent the dye from absorbing evenly. It also softens the fabric, making it easier to fold and manipulate for those sharp zig-zag patterns you want.
Here’s why pre-washing is essential:
- Removes manufacturing residues that can block dye absorption.
- Prevents unwanted color reactions from detergents or fabric finishes.
- Reduces shrinkage after dyeing, so your design stays consistent.
- Improves dye adherence for brighter, longer-lasting colors.
Always choose natural fibers like cotton or rayon and pre-wash them thoroughly.
You’ll get crisp, vibrant wig-wag patterns that truly pop.
Preparing Your Fabric for Dyeing
Before you immerse yourself in dyeing, make certain your fabric is clean and free of any finishes or residues that could block the dye from absorbing properly.
Start by washing your fabric in warm water with a mild detergent, skipping fabric softeners. Rinse thoroughly to remove any leftover soap.
After washing, leave the fabric damp but not dripping—this helps the dye spread evenly. Lay it flat or hang it to remove excess water without drying it completely.
When you’re ready, use gloves to handle the fabric to keep oils from your hands off the material.
Preparing your workspace with plastic or a waterproof covering will protect surfaces from dye spills.
Taking these steps guarantees your fabric is perfectly prepped for vibrant, lasting colors in your wig-wag tie-dye project.
Step-by-Step Folding for Zig-Zag Patterns
Start by folding your fabric into precise accordion pleats to create the foundation for your zig-zag pattern. This folding technique controls how the dye penetrates, shaping your design. Follow these steps:
- Lay your fabric flat and smooth out any wrinkles.
- Begin folding from one edge, making even, narrow pleats back and forth.
- Once fully pleated, fold the pleated strip in half or thirds to form sharp angles.
- Adjust folds to guarantee the edges align neatly, creating the zig-zag crease lines.
These careful folds create the distinctive zig-zag effect when dye is applied. Precision here sets the stage for a striking pattern.
Next, you’ll learn how to bind the fabric properly to hold these folds during dyeing.
How to Bind the Fabric Properly
To get sharp zig-zag designs, you’ll need the right binding materials like rubber bands or string.
Fold your fabric carefully following the zig-zag pattern you created earlier.
Make sure to secure everything tightly so the dye doesn’t bleed where it shouldn’t.
Choosing Binding Materials
Although choosing the right binding materials might seem straightforward, it plays an essential role in achieving crisp, defined patterns with the wig-wag tie-dye technique. Your choice affects dye penetration and pattern clarity. Here’s what to take into account:
- Rubber Bands: Opt for thick, durable ones to hold folds tightly without slipping.
- String or Twine: Use natural fibers for a firm grip; avoid synthetic ones that can slide.
- Clamps or Clips: Helpful for securing fabric edges, especially on thicker materials.
- Plastic Wrap or Tape: Useful to keep sections separate and prevent dye bleeding.
Selecting the right materials guarantees your zig-zag lines stay sharp and vibrant.
Experiment with these options to find what works best for your fabric’s thickness and dye type.
Folding for Zig-Zag
Mastering the folding process is essential for creating the distinct zig-zag patterns characteristic of the wig-wag tie-dye technique. Start by laying your fabric flat, then accordion fold it tightly from one edge to the other. Once folded, fold the fabric again in a zig-zag fashion, like a fan, ensuring each crease lines up evenly. This controlled folding directs the dye flow and defines the sharp zig-zag lines.
Here’s a simple folding overview:
| Step | Action | Result |
|---|---|---|
| 1 | Lay fabric flat | Smooth base |
| 2 | Accordion fold | Narrow, even layers |
| 3 | Fold zig-zag (fan) | Zig-zag creases formed |
Follow these steps carefully to prepare your fabric for dyeing.
Securing Fabric Tightly
Once your fabric is folded into neat zig-zag layers, you’ll need to secure it firmly to maintain those sharp creases during dyeing.
Binding the fabric properly guarantees the dye creates crisp, defined patterns. Here’s how to do it right:
- Use strong rubber bands or string to wrap around the folded fabric tightly.
- Place the bands evenly along the length to hold all layers together.
- Twist the bands or tie the string so the fabric won’t slip or loosen.
- Check that the folds stay intact and adjust bindings if necessary before dyeing.
Selecting and Mixing Your Dye Colors
Before you start dyeing, you’ll want to carefully choose and mix your colors to achieve the vibrant, eye-catching effects that define the wig-wag tie-dye technique.
Pick a palette with high-contrast colors to make your zig-zag patterns pop—think bold reds, blues, and yellows or complementary colors like purple and orange.
When mixing, use precise measurements to keep colors consistent and avoid muddy blends. Dilute your dyes with water according to instructions, adjusting concentrations to control color intensity.
Don’t forget to test small amounts on scrap fabric first to see how colors interact and dry.
Applying Dye to Achieve Vibrant Zig-Zags
Although selecting the right colors is essential, applying the dye with precision is what truly brings your wig-wag patterns to life.
To get those vibrant zig-zags, you need to focus on how you place the dye.
- Use a squeeze bottle for controlled application, helping you stay within the folded lines.
- Apply dye slowly to avoid oversaturation, which can blur your zig-zags.
- Alternate colors carefully, ensuring high contrast to make each zig and zag pop.
- Press the dye gently into the fabric so it penetrates evenly without bleeding across sections.
Tips for Avoiding Color Bleeding
Because color bleeding can ruin your sharp zig-zag patterns, you need to take specific steps to keep dyes from running into each other. First, apply dyes carefully and avoid oversaturating fabric. Use rubber bands tightly to separate sections. Also, work quickly to prevent wet dyes from mixing.
Here’s a quick reference to help you avoid color bleeding:
| Tip | Why It Helps | How to Do It |
|---|---|---|
| Use less dye | Prevents excess moisture | Apply sparingly with brush |
| Tighten rubber bands | Keeps colors separated | Wrap bands firmly |
| Let layers dry | Stops wet dye mixing | Air dry before next dye |
| Work fast | Minimizes color run | Move quickly between steps |
Follow these tips, and you’ll keep your zig-zags crisp and vibrant.
Setting and Fixing the Dye
Once you’ve applied your dyes carefully, you need to set and fix the colors to make your design permanent and vibrant. This step guarantees your zig-zag patterns stay sharp and don’t fade quickly.
Follow these key actions:
- Wrap your fabric tightly in plastic to keep moisture in while the dye sets.
- Let it sit at room temperature for 6 to 8 hours, or overnight for deeper saturation.
- For synthetic fibers, use heat setting by steaming or ironing with a cloth barrier.
- Avoid exposing the dyed fabric to direct sunlight during this period to prevent premature fading.
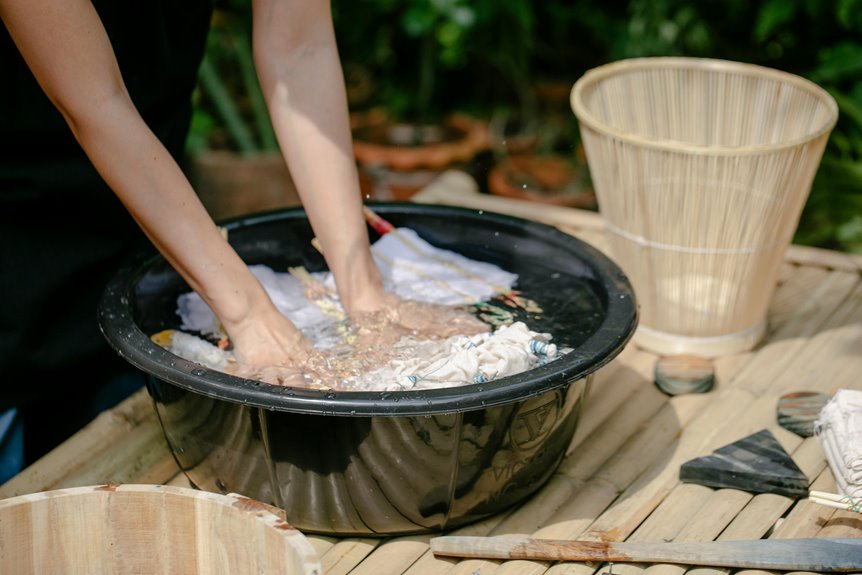
Rinsing and Washing Your Wig-Wag Tie-Dye
After letting your dye set properly, you’ll want to move on to rinsing and washing your Wig-Wag tie-dye to remove excess dye and reveal the final pattern.
Start by rinsing the fabric under cold running water while it’s still tied to prevent colors from bleeding too much. Keep rinsing until the water runs mostly clear.
Then, carefully untie your fabric and continue rinsing it thoroughly.
Once the initial rinse is complete, wash your tie-dye separately in cold water using a mild detergent. Avoid using bleach or harsh chemicals.
Finally, air dry your fabric away from direct sunlight to preserve the vibrancy of your zig-zag patterns.
Proper rinsing and washing are essential to locking in your design and ensuring long-lasting, vivid colors.
Creative Ideas to Customize Your Zig-Zag Designs
You can really make your zig-zag patterns pop by experimenting with bold color combinations that suit your style.
Choosing the right fabric is just as important since different materials absorb dye in unique ways.
Let’s explore some tips to help you customize your designs for the best results.
Color Combinations Exploration
How can you make your wig-wag tie-dye designs truly stand out? Exploring color combinations is key to customizing your zig-zag patterns and giving them unique flair. Here’s how you can experiment with colors for striking results:
- Complementary Colors: Pair colors opposite each other on the color wheel (like blue and orange) to create vibrant contrast.
- Analogous Colors: Choose colors next to each other (such as green, blue, and teal) for a harmonious and soothing look.
- Monochromatic Scheme: Use different shades of the same color to add depth without overwhelming the pattern.
- Bold Neons and Pastels: Mix bright neon hues with soft pastels to balance energy and subtlety.
Try these combinations to make your zig-zag wig-wag designs pop with personality and creativity!
Fabric Selection Tips
Choosing the right fabric sets the foundation for vibrant and durable wig-wag tie-dye patterns. You’ll want to pick natural fibers like cotton, rayon, or silk because they absorb dye better, resulting in brighter colors and sharper zig-zag designs.
Avoid synthetic blends, as they often repel dye and produce duller results. Pre-washing your fabric removes sizing and oils, allowing the dye to penetrate evenly.
Also, consider the fabric’s weight—lighter materials will show more vivid patterns but might be less durable, while heavier fabrics offer longevity with slightly muted colors.
Finally, test a small fabric swatch before committing to your project; it helps guarantee your chosen material reacts well to the dye and folding techniques. This way, your zig-zag designs will stand out beautifully.
Frequently Asked Questions
Can I Use the Wig-Wag Technique on Synthetic Fabrics?
Synthetic surfaces sometimes stubbornly shun standard stains. You can try using the wig-wag technique, but synthetic fabrics often resist vibrant colors. You’ll want special dyes designed specifically for synthetic materials to see stunning results.
How Long Does the Dye Need to Set for Best Results?
You should let the dye set for at least 6 to 8 hours to get vibrant colors. For even better results, leaving it overnight helps the dye fully bond with the fabric, ensuring lasting patterns.
Is the Wig-Wag Method Suitable for Kids to Try?
Did you know 75% of parents say tie-dye boosts creativity? You can definitely let kids try the wig-wag method, but make sure to supervise closely—they’ll need help with folding and applying dye safely for best results.
What Are the Best Storage Tips for Completed Tie-Dye Pieces?
You should let your tie-dye pieces dry completely, then wash them separately in cold water. Store them folded in a cool, dry place away from direct sunlight to keep colors vibrant and prevent fading over time.
Can I Combine Wig-Wag With Other Tie-Dye Techniques?
Back in the day, you’d never mix styles, but you can definitely combine wig-wag with other tie-dye techniques now. Just plan your colors and folds carefully, and you’ll create unique, vibrant patterns that wow everyone.