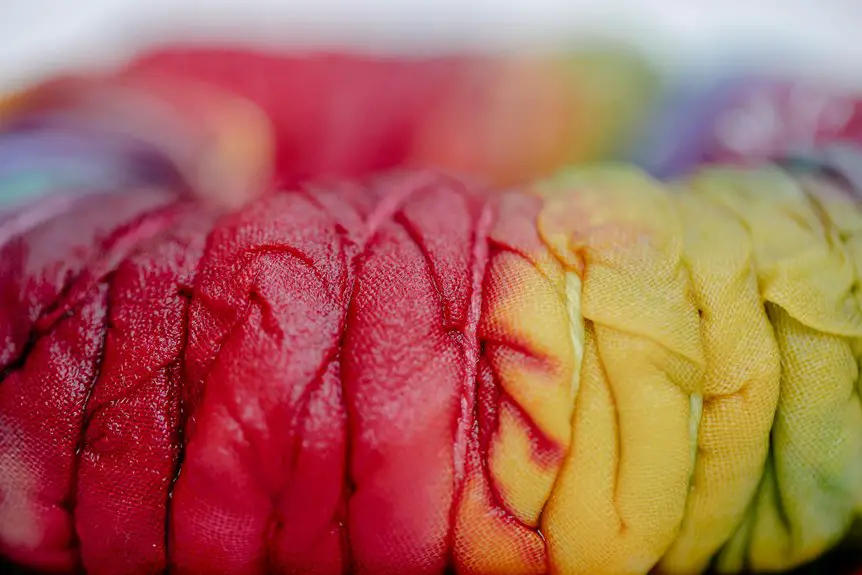
If you want soft, blended colors and a vibrant, flowing look, wet tie-dye is your go-to—you’ll dampen the fabric first for smooth gradients. But if you prefer sharp, bold patterns with crisp edges, dry tie-dye works best by applying dye directly onto dry fabric for punchier contrast. Your fabric type also matters since cotton absorbs dye differently than synthetics. Keep your project goals in mind, and discover which method fits your style as you explore more details.
Table of Contents
Key Takeaways
- Wet tie-dye is best for vibrant, blended colors with soft gradients and a softer fabric feel over time.
- Dry tie-dye creates sharp, defined patterns with bold contrasts and a firmer initial fabric texture.
- Cotton and natural fibers absorb wet tie-dye better, enhancing color spread and vibrancy.
- Dry tie-dye suits detailed designs on dry fabric, preventing color bleeding and requiring careful dye application.
- Choose wet tie-dye for artistic, unpredictable effects and dry tie-dye for precise, controlled patterns.
Understanding the Basics of Wet Tie-Dye
Wet tie-dye relies on applying dye to fabric that’s damp, which helps the colors blend and spread more smoothly.
When you wet your fabric before dyeing, the moisture allows the dye to move freely, creating soft, flowing patterns with seamless color changes. You’ll usually soak your item in water or a soda ash solution, then wring it out so it’s damp but not dripping.
Once you apply the dye, you can watch the colors bleed into each other, producing unique, watercolor-like effects. This technique is ideal if you want vibrant, blended hues and enjoy the unpredictability of how dyes interact on wet fabric.
Just remember to handle the material gently to maintain the desired pattern as the dye spreads.
Exploring the Dry Tie-Dye Method
You’ll start the dry tie-dye process by applying dye directly onto dry fabric without adding water first.
This technique offers sharper, more defined patterns and reduces waiting time for drying.
It’s a great choice when you want bold designs and quicker results.
Dry Tie-Dye Process
Dry tie-dye techniques let you create bold, defined patterns by applying dye directly onto dry fabric.
To start, you’ll want to prepare your fabric by folding, twisting, or tying it with rubber bands to form your desired design. Make sure the fabric is completely dry before applying dye, as moisture can cause colors to bleed and blur.
Use squeeze bottles or brushes to apply the dye carefully, targeting specific areas for sharp contrasts. Work quickly but precisely to avoid unwanted blending.
After dyeing, wrap the fabric in plastic to keep it damp and let the colors set for 6-8 hours or overnight.
Finally, rinse the fabric in cold water until the water runs clear, then wash and dry it to reveal your crisp, vibrant tie-dye creation.
Benefits of Dry Technique
One key advantage of using the dry tie-dye method is the control it gives you over your design. Since the fabric isn’t pre-wetted, the dye stays where you apply it, resulting in sharper, more defined patterns.
You won’t have to worry about colors bleeding into each other, so you can create intricate designs with ease. The dry technique also uses less water, which means your fabric dries faster and you spend less time waiting between steps.
Plus, you’ll save on dye since it absorbs more directly into the fabric. If you prefer precise, bold patterns and want a quicker process, the dry tie-dye method is perfect.
It’s ideal for beginners and experienced artists who want clean lines and vivid colors every time.
How Fabric Type Influences Tie-Dye Results
You’ll notice that the type of fabric you choose plays a big role in how your tie-dye turns out.
Cotton absorbs dye differently than synthetic fibers, which affects both the color vibrancy and the final pattern.
Understanding these differences helps you pick the best fabric for your wet or dry tie-dye technique.
Cotton vs. Synthetic Fibers
Choosing the right fabric is key to achieving vibrant tie-dye results. When deciding between cotton and synthetic fibers, keep these points in mind:
- Cotton absorbs dye well, producing bright, bold colors.
- Synthetic fibers like polyester don’t absorb dye easily, often resulting in muted or uneven colors.
- Cotton’s natural texture helps the dye spread evenly, enhancing your design’s clarity.
- Synthetic fabrics might require special dyes or techniques, adding complexity to your project.
If you want classic, vivid tie-dye, cotton is your best bet.
However, if you’re experimenting or using synthetic blends, be prepared for less predictable outcomes.
Understanding fabric types helps you choose the right technique—wet or dry—to match your material, maximizing your tie-dye’s impact.
Fabric Absorbency Effects
Fabric absorbency plays a crucial role in how your tie-dye colors turn out. When you work with highly absorbent fabrics like cotton, they readily soak up dye, allowing colors to penetrate deeply and create more consistent patterns.
On the other hand, less absorbent materials such as polyester resist dye absorption, which can lead to uneven or patchy results. If you use the wet tie-dye technique on absorbent fabrics, the liquid spreads smoothly, helping you achieve soft, flowing designs.
Conversely, dry tie-dye on these fabrics offers more control but might produce sharper edges. For synthetic blends, you might need specific dyes or treatments since their low absorbency affects how well the color adheres.
Understanding your fabric’s absorbency helps you choose the right technique and manage your expectations for the final design.
Impact on Color Vibrancy
Although the type of material you pick can make or break your tie-dye project, understanding how it impacts color vibrancy is key to getting the look you want.
Different fabrics absorb dyes in unique ways, directly affecting how bold or muted your colors appear. Here’s what you should consider:
- Cotton – Absorbs dye well, producing bright, vivid colors perfect for classic tie-dye.
- Polyester – Resists dye, often resulting in dull or faded colors unless you use special dyes.
- Rayon – Soaks up dye smoothly, giving you rich, saturated hues with a silky finish.
- Blends – Can be unpredictable; colors may vary depending on the dominant fiber.
Knowing your fabric’s tendencies helps you choose the right dye and technique for vibrant, eye-catching results.
Step-by-Step Process for Wet Tie-Dye
To get started with wet tie-dye, you’ll first need to dampen your fabric evenly. Use a spray bottle or run it under water, then wring out the excess so the fabric is moist but not dripping.
Next, twist, fold, or tie your fabric into your desired pattern using rubber bands. Prepare your dye according to the instructions, then apply it directly to the damp fabric. The moisture helps the colors blend and spread, creating soft edges and vibrant hues.
After dyeing, let the fabric sit for 6-8 hours to absorb the colors fully. Finally, rinse the fabric in cold water until it runs clear, remove the rubber bands, and wash it separately.
Dry your piece, and you’re ready to show off your wet tie-dye creation!
Step-by-Step Process for Dry Tie-Dye
Dry tie-dye starts with completely dry fabric, which allows you to create sharp, defined patterns. The process is straightforward and perfect if you want more control over your design.
Here’s how you do it:
- Prepare your fabric – Make sure it’s clean and fully dry before you begin.
- Fold and bind – Use rubber bands or string to create your desired patterns by tightly binding sections.
- Apply dye – Using squeeze bottles, carefully apply dye to specific areas. Since the fabric is dry, the colors stay where you place them.
- Let it set – Allow the dye to dry completely before unbinding to avoid color bleeding.
Follow these steps, and you’ll achieve crisp, precise tie-dye designs every time.
Comparing Color Vibrancy in Wet and Dry Techniques
When you choose between wet and dry tie-dye techniques, the vibrancy of your colors can vary considerably. Wet tie-dye often results in softer, blended hues because the dye spreads on damp fabric, while dry tie-dye creates sharper, more intense colors due to less spreading. Your choice depends on whether you want bold contrasts or subtle gradients.
| Technique | Color Vibrancy | Color Spread |
|---|---|---|
| Wet | Moderate | High (blended) |
| Dry | High | Low (sharp) |
| Result | Soft gradients | Bold contrasts |
Knowing how dye reacts with fabric moisture helps you predict the final look. So, if you want punchy colors, dry tie-dye is your go-to; for a dreamy effect, wet tie-dye works best.
Texture and Feel: Wet vs. Dry Tie-Dye
When you choose between wet and dry tie-dye, you’ll notice differences in how the fabric feels afterward.
Wet tie-dye tends to make the fabric softer, while dry tie-dye can leave a slightly stiffer texture.
Understanding how each method affects dye absorption will help you achieve the texture you want.
Fabric Softness Comparison
Although both wet and dry tie-dye methods create vibrant patterns, you’ll notice distinct differences in fabric softness and texture between the two.
When deciding which technique suits you best, consider these factors:
- Wet tie-dye often results in a softer, more pliable fabric due to dye and water saturation during the process.
- Dry tie-dye can leave the fabric feeling stiffer initially, as the dye sits primarily on the surface without excess moisture.
- Over time, wet tie-dye garments tend to become softer with washing, enhancing comfort.
- Dry tie-dye pieces may require extra washing or fabric softener to achieve similar softness.
Understanding these differences helps you pick the method that aligns with your comfort preferences and desired fabric feel.
Dye Absorption Differences
How does dye absorption affect the texture and feel of your tie-dye fabric? When you use the wet technique, the fabric soaks up dye more evenly, resulting in smoother color shifts and a softer hand feel. With dry tie-dye, the dye sits more on the surface, creating sharper patterns but a slightly stiffer texture. Knowing these differences helps you pick the method that matches your desired fabric feel.
| Technique | Dye Absorption | Resulting Texture |
|---|---|---|
| Wet | Deep, even soaking | Soft, smooth fabric feel |
| Dry | Surface-level dye | Crisp patterns, firmer |
| Wet (cotton) | Absorbs readily | Plush, flexible |
| Dry (synthetic) | Limited absorption | Rougher, less flexible |
Common Mistakes and How to Avoid Them
Mistakes in tie-dye often stem from skipping essential preparation steps or rushing through the process. To avoid frustration, keep these tips in mind:
- Don’t overlook fabric preparation: Always pre-wash your fabric to remove sizing that blocks dye absorption.
- Avoid uneven folding: Take your time to fold or twist fabric evenly for consistent patterns.
- Skip excessive dye application: Over-saturating can cause colors to bleed and muddy your design.
- Don’t rush drying: Let your piece dry fully before rinsing to set the colors properly.
Choosing the Right Technique for Your Project
Now that you know what to watch out for during tie-dyeing, it’s important to pick the technique that best suits your project.
If you want vibrant, blended colors with smooth shifts, wet tie-dye is your go-to. It’s perfect for soft fabrics like cotton, allowing dyes to spread and create artistic effects.
On the other hand, dry tie-dye works well if you prefer sharp, defined patterns and less bleeding. It’s ideal for designs where precision matters or when working with thicker fabrics.
Consider the look you want, the fabric type, and how much control you need over the dye. By matching your project’s goals with the appropriate technique, you’ll get the best results without unnecessary frustration or wasted materials.
Tips for Enhancing Your Tie-Dye Design
To elevate your tie-dye creations, focus on a few key techniques that maximize color vibrancy and pattern definition.
Start by prepping your fabric properly—wash without fabric softener to remove residues that block dye absorption. Next, consider your folding method; tighter folds create more defined patterns. Don’t forget to control moisture: wet fabrics help colors blend smoothly, while dry fabrics yield sharper contrasts.
Here are four tips to enhance your design:
- Use high-quality dyes for brighter, longer-lasting colors.
- Apply dye generously to avoid pale spots.
- Let your project sit wrapped for 6–24 hours to deepen colors.
- Rinse with cold water first to lock in patterns, then wash normally.
These steps will make your tie-dye pop every time!
Frequently Asked Questions
Can Tie-Dye Techniques Be Combined in a Single Project?
You can absolutely combine tie-dye techniques in one project—it’ll blow your mind! Mixing wet and dry methods lets you create wild, unique patterns that no one else has. Immerse yourself and watch your creativity explode!
How Do Washing Instructions Differ for Wet vs. Dry Tie-Dye?
You’ll want to wash wet tie-dye items gently in cold water to preserve colors, while dry tie-dye pieces can handle a normal wash. Always turn garments inside out and avoid harsh detergents to keep patterns vibrant.
Are There Environmental Impacts Specific to Wet or Dry Tie-Dye?
You’ll find that textile dyeing accounts for 20% of industrial water pollution. Wet tie-dye uses more water, increasing impact, while dry tie-dye conserves water, making it a more eco-friendly option you might want to contemplate.
What Safety Precautions Should Be Taken During Tie-Dyeing?
You should wear gloves and old clothes to protect your skin and avoid stains. Work in a well-ventilated area, keep dyes away from your face, and clean spills immediately to stay safe while tie-dyeing.
Can Tie-Dye Be Done Effectively on Synthetic Fabrics?
You might find synthetic fabrics less welcoming for tie-dye because they don’t absorb dye like natural fibers. But with special dyes designed for synthetics, you can still create vibrant, lasting designs—just be prepared for extra effort.
- Spiral Tie-Dye Technique: The Ultimate Step-by-Step Guide - July 13, 2025
- How to Create a Heart Shape With Tie-Dye - July 13, 2025
- The Art of the Mandala Tie-Dye: A Folding Guide - July 13, 2025

