To start tie-dyeing, gather plain white cotton fabric, vibrant dyes, squeeze bottles, and rubber bands. Wash and dampen your fabric for even color. Learn basic folds like spirals and crumples, then apply dye using squeeze bottles or brushes for unique patterns. After dyeing, let your fabric sit wrapped, rinse, and soak in vinegar to set colors. Follow these steps, and you’ll create bright, lasting designs. Keep going, and you’ll discover even more creative techniques and tips.
Key Takeaways
- Use plain white cotton fabric for best dye absorption and vibrant color results.
- Prepare fabric by washing without softener and dampening to ensure even dye adherence.
- Master basic folds like spiral, accordion, and crumple to create classic tie-dye patterns.
- Apply dye with squeeze bottles for precise color placement and experiment with layering.
- Set colors by wrapping fabric for 6-8 hours, then rinse and soak in vinegar solution to fix dye.
Essential Supplies You’ll Need
Getting started with tie-dye is simple once you have the right supplies. You’ll need basic items like plain white cotton shirts or fabric, as natural fibers absorb dye best.
Begin your tie-dye journey with plain white cotton fabric for the best dye absorption and vibrant results.
Grab a set of vibrant fabric dyes—liquid or powder works fine—along with squeeze bottles for easy application. Don’t forget rubber bands to create unique patterns and gloves to keep your hands clean.
A plastic table cover or garbage bags will protect your workspace from stains. You’ll also want plastic bags or plastic wrap to wrap your dyed pieces while they set.
Finally, have some old towels handy for quick cleanup. With these essentials ready, you’re all set to explore creative tie-dye designs with confidence.
Preparing Your Fabric for Dyeing
Before you start applying dye, make certain your fabric is clean and damp. This step guarantees the dye adheres evenly and produces vibrant colors.
Begin by washing your fabric without fabric softener to remove any oils or residues that could block the dye. Next, dampen the fabric thoroughly but avoid soaking it; it should feel moist to the touch. This moisture helps the dye spread smoothly.
Here’s a quick checklist for preparing your fabric:
- Wash: Use a mild detergent and skip fabric softeners.
- Dampen: Lightly wet the fabric until it’s evenly moist.
- Remove Excess Water: Squeeze out extra water without wringing to keep it ready for dyeing.
Following these steps sets a perfect foundation for your tie-dye project.
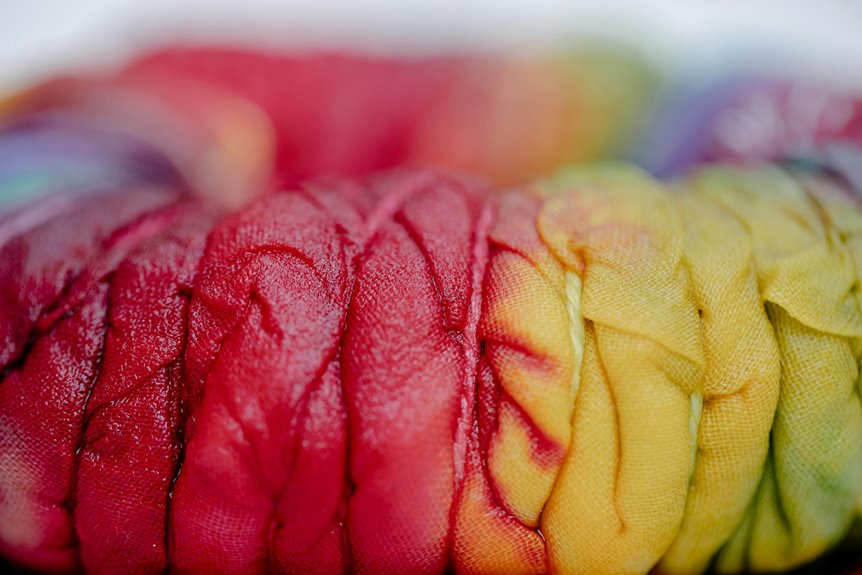
Basic Folding and Tying Techniques
Mastering three basic folding and tying techniques will help you create a variety of classic tie-dye patterns.
Start with the accordion fold: fold your fabric back and forth in a zigzag motion, then bind it tightly with rubber bands.
Next, try the spiral fold by pinching the fabric’s center and twisting it into a tight spiral, securing it with bands.
Finally, practice the crumple technique by scrunching the fabric randomly and tying it in several places.
Each method controls how the dye penetrates your fabric, creating distinct designs.
Make sure your ties are snug to prevent color bleeding but not so tight that the fabric tears.
Experiment with these folds and ties to release endless creative possibilities in your tie-dye projects.
How to Apply Dye for Different Effects
Now that you’ve mastered folding and tying, it’s time to focus on applying dye to create unique patterns.
You’ll learn how to control where the colors go and how layering different shades can add depth and vibrancy.
Let’s explore simple techniques that help you achieve stunning effects with your dyes.
Applying Dye Patterns
Several simple dye application methods can create striking tie-dye patterns that you’ll love.
How you apply the dye greatly affects the final look, so getting hands-on with different techniques is key.
Here are three popular ways to apply dye for unique effects:
- Squirt Bottles – Use squirt bottles to apply dye precisely, creating sharp edges or controlled color placement.
- Dip Dyeing – Dip sections of your fabric into the dye for gradual color shifts and soft gradients.
- Brush Painting – Paint dye onto fabric with a brush to create custom shapes and artistic designs.
Experiment with these methods to discover what works best for your project.
Layering Colors Techniques
Once you’ve explored different ways to apply dye, you can enhance your designs by layering colors. Start by applying your first color and let it set slightly—don’t wait too long, or the dye might dry.
Then, add a second color on top, either blending softly for a gradient effect or placing it sharply for contrast. You can repeat this with multiple colors, but keep in mind that darker shades will overpower lighter ones.
For subtle shifts, use translucent dyes and apply them sparingly in overlapping areas. Experiment with applying dye from different angles to create depth and texture.
Setting and Fixing Your Tie-Dye Colors
Setting and fixing your tie-dye colors secures your vibrant patterns stay bright and don’t wash out. After dyeing, you need to lock those colors in place so your design lasts through many washes. Here’s how you can do it:
- Let the dye set: Wrap your fabric in plastic and let it sit for 6-8 hours or overnight. This gives the dye time to bond with the fibers.
- Rinse carefully: Start rinsing with cold water to remove excess dye, then switch to warm water until it runs clear.
- Use a fixative or vinegar soak: Soak your fabric in a solution of water and white vinegar (or a commercial dye fixative) for 15-30 minutes to enhance color retention.
Following these steps guarantees your tie-dye remains vibrant and long-lasting.
Creative Patterns to Try for Beginners
You can create eye-catching designs with just a few simple tie-dye patterns that are perfect for beginners.
Start with the classic spiral by pinching the fabric center and twisting it into a tight disk before securing it with rubber bands. For a bold look, try the bullseye pattern by folding the fabric accordion-style and binding it at intervals.
The crumple or scrunch technique lets you bunch the fabric randomly, creating organic, marbled effects. If you want clean lines, fold your fabric into triangles or stripes and secure with bands before dyeing.
Each pattern offers unique results, and experimenting with color placement enhances your design. Don’t hesitate to mix these techniques to develop your own style and get comfortable with the process.
Troubleshooting Common Tie-Dye Issues
Mistakes can happen when tie-dyeing, but most issues are easy to fix with a few adjustments. If your colors turn out muddy, it’s often because the dyes overlapped too much—try spacing out your dye applications next time.
If the colors are too light or faded, you mightn’t have used enough dye or didn’t let the fabric set long enough. Ultimately, if your design looks blurry, it could be due to poor fabric folding or insufficient tying.
Light colors? Use more dye and let fabric set. Blurry designs mean weak folds or ties.
Here’s how to troubleshoot common problems:
- Muddy colors: Avoid overlapping dyes; apply colors carefully.
- Faded colors: Use enough dye and let the fabric sit for 6-8 hours.
- Blurry patterns: Fold fabric tightly and secure with strong rubber bands.
These tweaks will improve your results quickly!
Frequently Asked Questions
Can I Tie-Dye Synthetic Fabrics Like Polyester?
You can tie-dye polyester, but it’s trickier than cotton. Use dye specifically for synthetics, like disperse dye, and apply heat to set colors. Otherwise, your colors might not show up well or fade quickly.
How Long Does Tie-Dye Ink Stay Vibrant on Fabric?
Your colorful creation will keep its lively charm for years if you treat it gently. By washing with care and avoiding harsh sunlight, you’ll make sure the tie-dye ink stays vibrant and full of life longer.
Is It Safe to Tie-Dye With Kids at Home?
Yes, you can safely tie-dye with kids at home if you use non-toxic dyes, protect surfaces, and supervise closely. Wearing gloves and old clothes helps keep the process fun and mess-free for everyone involved.
Can I Use Natural Dyes Instead of Commercial Ones?
Imagine painting with whispers of the earth—yes, you can use natural dyes instead of commercial ones. They bring unique, earthy hues but require patience and care to extract vibrant, lasting colors for your creative projects.
How Do I Wash Tie-Dye Items to Prevent Color Fading?
You should wash tie-dye items in cold water with a gentle detergent. Turn them inside out and avoid harsh chemicals or bleach. Air dry or use low heat to help preserve the vibrant colors longer.