Imagine you've just completed your first DIY tote bag and are thrilled with the result—it's practical, stylish, and uniquely yours. Now, think about expanding your sewing skills with a variety of other beginner-friendly fabric projects. From crafting simple pillow covers that can transform your living space to making decorative fabric flowers that add a whimsical touch to any room, the possibilities are endless. You'll find that each project not only enhances your home but also boosts your confidence as a budding sewer. Curious about what else you can create with a bit of fabric and some basic skills?
Table of Contents
Key Takeaways
- Start with DIY tote bags to practice basic sewing, fabric dyeing, and painting techniques.
- Customize pillow covers by selecting fabric, measuring, sewing, and adding unique touches like fabric painting.
- Create fabric flowers to explore fabric manipulation and use them as versatile embellishments.
- Make simple curtains by selecting fabrics, measuring, and sewing hems for a polished look.
- Design and customize coasters using various fabric colors, textures, and painting methods for a personal touch.
Tote Bags
Creating your own tote bags is a fun and practical way to immerse yourself in DIY fabric projects. You'll find tote bag customization not only satisfying but also an excellent canvas to showcase your creativity.
Start with a plain canvas tote, which you can easily transform using fabric dyeing techniques. Experiment with tie-dye, ombre effects, or even resist dyeing to create striking, unique patterns.
Beyond dyeing, tote bag painting opens up endless possibilities. Use fabric paints and brushes to create intricate designs or simple, bold statements. Stencils can be particularly useful if you're aiming for precision and consistency. Don't forget to set the paint properly, usually by ironing the reverse side once it's dry, to guarantee longevity.
For those who love texture and dimension, applique designs are a fantastic addition. Cut out shapes from different fabrics and sew them onto your tote bag. This method allows you to layer fabrics, creating a tactile experience that's both visually and physically appealing.
Combine applique with other techniques like embroidery for a truly personalized masterpiece. By mastering these methods, you'll not only create beautiful tote bags but also gain skills transferable to countless other fabric projects.
Pillow Covers
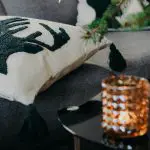
Transform your living space effortlessly with custom pillow covers that reflect your personal style. Crafting your own pillow covers allows you to experiment with pillowcase customization, including fabric painting and unique designs. Not only do these covers add a personal touch to your home, but they're also a fantastic way to practice your sewing skills.
To get started, you'll need basic materials and tools. Here's a quick guide:
- Choose Your Fabric: Select a fabric that complements your decor. Cotton, linen, and even velvet are great choices.
- Measure and Cut: Measure your existing pillow or DIY pillow inserts. Add an extra inch on each side for seam allowance.
- Sew the Edges: Sew three sides of your fabric pieces together, leaving one side open for the insert. Use a sewing machine for a clean finish.
- Customize and Finish: Utilize pillowcase customization techniques like fabric painting to add your own flair. Once satisfied, insert the stuffing and sew the final edge.
When it comes to stuffing options, consider using synthetic fiberfill for a plush feel, or even repurpose old clothing for an eco-friendly alternative. This project is an excellent way to elevate your home's aesthetic while honing your DIY skills.
Fabric Flowers
After adding a unique touch to your pillows, why not elevate your decor further with charming fabric flowers? These handcrafted blooms are a fantastic way to master fabric manipulation and add a personalized flair to your surroundings. You can use them as versatile fabric embellishments for various home decor projects, from adorning picture frames to creating stunning wall art.
To start, choose fabrics that complement your existing decor. Cut out petal shapes in varying sizes, and layer them to create depth and dimension. You can sew or glue the petals together, depending on your preference. Adding beads or buttons to the center of your flowers can provide that extra touch of elegance. Experiment with different fabrics like cotton, silk, or felt to see how each material changes the flower's appearance and texture.
Don't limit yourself to home decor—fabric flowers can also be transformed into stylish pet accessories. Attach a fabric flower to your pet's collar for a cute, unique look. The possibilities are endless!
Kitchen Towels
Spruce up your kitchen with custom-made towels that blend functionality and style. Crafting your own kitchen towels gives you the freedom to tailor them to your aesthetic while mastering essential sewing techniques.
Here's how you can create beautiful and practical dish cloths and napkins.
- Choose Your Fabric: Opt for absorbent materials like cotton or linen. These fabrics not only soak up spills efficiently but also add a timeless touch to your kitchen decor.
- Cut and Hem: Cut your fabric into desired sizes, typically around 16×24 inches for dish cloths and 18×18 inches for napkins. Hem the edges to prevent fraying and give your towels a refined look.
- Add Personal Touches: Incorporate embroidery or applique to personalize your towels. Simple embroidery patterns or a small applique can transform plain cloths into unique pieces that mirror your style.
- Finishing Touches: Wash and press your towels to make sure they're ready for use. A well-pressed towel not only looks polished but also enhances the fabric's absorbency.
Table Runners
Creating your own table runners is an easy way to add a touch of elegance and personality to your dining space. Start with a basic fabric, and use fabric dyeing to achieve the perfect color. You can also explore fabric painting to add unique designs. If you love intricate details, try embroidery techniques to personalize your runner with monograms or seasonal motifs.
Here's a quick overview to get you started:
| Technique | Materials Needed | Tips |
|---|---|---|
| Fabric Dyeing | Fabric dye, gloves, bucket | Test dye on a small piece first |
| Fabric Painting | Fabric paint, brushes | Use stencils for precision |
| Embroidery | Embroidery floss, needles | Start with simple patterns |
| Quilting Basics | Fabric scraps, batting | Use a rotary cutter for accuracy |
| Finishing Edges | Sewing machine, thread | Double-fold hem for durability |
If you're feeling adventurous, combine quilting basics with your fabric choices. This adds texture and dimension to your table runner. Always finish the edges with a neat double-fold hem to guarantee durability.
Scrunchies
Once you've mastered table runners, why not try your hand at making scrunchies, a fun and practical project perfect for beginners? Creating scrunchies allows you to explore custom designs and experiment with various fabrics and patterns. Plus, they're incredibly useful and stylish accessories that make excellent gifts.
Here's a simplified guide to get you started:
- Choose Your Fabric: Pick a fabric that matches your style. Cotton, silk, and velvet are great choices for custom designs.
- Cut and Measure: Cut a piece of fabric approximately 22 inches long and 3-4 inches wide. Remember, the width will affect the scrunchiness.
- Select Elastic: Measure and cut a piece of elastic about 8-10 inches long. You have various elastic options, from thin to thick, depending on how tight you want the scrunchie to be.
- Sew and Assemble: Fold the fabric lengthwise with the right sides together. Sew along the edge, leaving a small gap for turning it inside out. Thread the elastic through the fabric tube, sew the ends of the elastic together, and then stitch the gap closed.
Coasters
If you're looking for a quick and simple fabric project, making coasters is an excellent choice for beginners. You can transform basic materials into functional and stylish accessories for your home. Start with selecting coaster materials—cotton, linen, or felt are great options. They're easy to work with and offer durability and absorbency.
Next, focus on coaster designs. Think about the aesthetic you want to achieve. Floral prints, geometric shapes, or minimalist patterns can all set different moods. Once you have a design in mind, choose your coaster patterns. Simple squares or circles are ideal for beginners, but don't shy away from experimenting with hexagons or other shapes as you gain confidence.
Coaster customization is where you can truly let your creativity shine. Add personal touches like monograms, embroidery, or even fabric paint to make your coasters unique. Layering different fabrics or adding a layer of batting inside can also give your coasters a plush feel.
To assemble, cut your fabric according to your patterns and sew the pieces together, leaving a small opening to turn them right-side out. Finish by stitching the opening closed and pressing the coasters flat with an iron.
Enjoy your customized creations!
Simple Curtains
Making simple curtains is a fantastic way to add a personal touch to your living space while honing your sewing skills. Start by selecting fabric patterns that complement your room's aesthetic. A well-chosen pattern can transform a room, so consider the overall theme and color coordination. Don't be afraid to mix bold prints with neutral tones for a balanced look.
Next, take precise window measurements. Measure the width and height of your window to confirm your curtains will fit perfectly. Add extra width for desired fullness and consider the length for either floor-grazing elegance or a more casual, window-sill style.
Here's a step-by-step guide to get you started:
- Choose Your Fabric: Opt for patterns that match your room's decor. Light fabrics are great for a breezy vibe, while heavier fabrics add a luxurious touch.
- Measure and Cut: Using your window measurements, cut the fabric to size, adding extra for hems.
- Sew the Hems: Fold and sew the edges to prevent fraying, creating a polished look.
- Select Hanging Methods: Decide between rod pockets, grommets, or tabs based on your style and ease of installation.
Fabric Baskets
Creating fabric baskets is a fun and useful project. You'll start by choosing the right fabric for durability and style.
Master some basic sewing techniques to guarantee your basket holds its shape well.
Choosing the Right Fabric
Choosing the correct fabric for your baskets is vital to ensure longevity and aesthetic appeal. When it comes to fabric types, consider sturdiness and durability.
Cotton canvas and denim are excellent choices due to their robustness. For a touch of elegance, opt for upholstery fabric.
Color selection plays an important role in the final look of your baskets. Neutral tones can lend a sophisticated feel, while vibrant hues can make your baskets pop.
To help you choose the right fabric, follow these guidelines:
- Durability: Make sure the fabric can withstand wear and tear. Heavier fabrics like canvas and denim are ideal.
- Color Selection: Pick colors that complement your home décor. Neutral shades offer versatility, while bold colors add a striking accent.
- Texture: The texture of the fabric can impact the basket's feel and appearance. Smooth fabrics create a sleek look, while textured fabrics add depth.
- Ease of Handling: Some fabrics are easier to work with than others. Beginners should opt for fabrics that don't fray easily, like felt or canvas.
Basic Sewing Techniques
When starting your fabric basket project, mastering a few basic sewing techniques will help guarantee a polished and professional finish. First, gather your sewing essentials: a sewing machine, sharp scissors, a rotary cutter, a cutting mat, and fabric pins. These tools are essential in preventing beginner mistakes like uneven seams and frayed edges.
Next, focus on fabric selection. Choose a sturdy fabric such as canvas or denim to maintain your basket's shape. For pattern cutting, use your rotary cutter and cutting mat for precise edges. Cutting accurately is pivotal for a seamless assembly.
Once your fabric is cut, practice the straight stitch and backstitch on scrap fabric. These fundamental stitches form the backbone of your project.
When stitching the sides and base of your basket, use a quarter-inch seam allowance, and always press your seams open with an iron. This guarantees a crisp, clean finish.
Adding Personal Touches
To make your fabric basket truly unique, consider incorporating personal touches like decorative stitching, fabric paint, or appliqué. These elements can turn a simple fabric basket into a memorable piece that stands out.
Here are a few ideas to get you started:
- Decorative Stitching: Use contrasting thread colors to create intricate designs or simple patterns. Decorative stitching can add both texture and visual interest to your fabric basket.
- Fabric Painting: This technique allows you to add bold, colorful designs. Whether you choose to paint abstract shapes or detailed images, fabric painting can transform your basket into a personalized gift.
- Embroidery: Incorporate embroidered initials, names, or small motifs. Embroidery can be detailed and intricate, offering endless possibilities for customizing clothing and accessories.
- Appliqué: Sew on fabric shapes or patches to add a three-dimensional effect. Appliqué can be used to depict anything from florals to geometric patterns, giving your basket a unique flair.
Potholders
Creating potholders is a practical and fun project. You can choose heat-resistant fabrics to protect your hands. You'll need to master simple sewing techniques to stitch your materials together securely.
With a few basic steps, you can craft stylish and functional potholders in no time.
Choosing Heat-Resistant Fabrics
Selecting the right heat-resistant fabric is crucial for making effective and safe potholders. With the correct fabric selection, your DIY project will offer prime heat protection while looking fantastic. Here's how to make the best choice:
- Cotton Fabric: Choose 100% cotton fabric for your potholders. It's durable, breathable, and can withstand high temperatures. Avoid synthetic blends as they can melt under extreme heat.
- Insulating Batting: Use heat-resistant batting like Insul-Bright. This material contains a metalized film that reflects heat, providing an extra layer of protection. Place it between the cotton layers when sewing.
- Terry Cloth: Terry cloth is another great option for added heat resistance. It's thick, absorbent, and provides excellent insulation. You can use it as a lining or an outer layer.
- Canvas: Heavy-duty canvas fabric is also suitable for potholders. It's thick and durable, offering substantial heat protection. Verify it's 100% cotton to avoid any melting risks.
Mastering these fabric choices guarantees your potholders will be both functional and safe. Embrace these sewing techniques to enhance your DIY projects and create potholders that can handle the heat in any kitchen.
Simple Sewing Techniques
Mastering simple sewing techniques is essential for crafting durable and attractive potholders. You'll need to start with a sturdy base fabric that can withstand heat. Consider using cotton or a heat-resistant blend. Once you've chosen your fabric, think about incorporating creative touches like fabric painting and embroidery. These elements can elevate your potholders from basic kitchen tools to personalized masterpieces.
Begin by cutting your fabric into squares, typically around 8×8 inches. For added thickness, layer batting between the fabric pieces. Secure the layers with pins, then sew around the edges, leaving a small opening to turn the fabric right-side out. After flipping, stitch the opening closed.
Next, explore fabric dyeing techniques to add vibrant colors to your potholders. You can create unique patterns and designs that reflect your style. Patchwork is another excellent method to add visual interest. Combine different fabric scraps to form a cohesive and eye-catching design.
When you've finished sewing, consider adding a loop for easy hanging. This simple addition makes your potholders functional and stylish. With practice, these techniques will become second nature, allowing you to create beautiful and practical kitchen accessories effortlessly.
Frequently Asked Questions
What Are Essential Tools for Starting DIY Fabric Projects?
You'll need essential tools like fabric scissors, a sewing machine, and measuring tape. Master basic sewing techniques and fabric cutting tips to guarantee precision. Don't forget pins, needles, and a seam ripper for corrections!
How Do I Choose the Right Fabric for My Project?
To choose the right fabric for your project, consider the fabric weight, patterns, color, and texture. Match fabric weight to your project's needs, select patterns that complement your design, and guarantee color and texture suit your vision.
Can I Use Fabric Scraps for Beginner Projects?
Imagine a quilt pieced from cherished memories—using fabric scraps for beginner projects is just as rewarding. Scrap fabric ideas and upcycling creations spark innovation, transforming your fabric stash into endless crafting inspiration. Embrace the mastery!
How Do I Properly Care for Handmade Fabric Items?
To maintain fabric item longevity, wash handmade pieces in cold water on a gentle cycle. For stain removal techniques, pre-treat stains with a mild detergent before washing. Always air dry to prevent shrinkage and preserve the fabric's integrity.
Are There Any Beginner-Friendly Sewing Machine Recommendations?
Begin your sewing journey with a reliable Brother CS6000i, a beginner-friendly machine that's as smooth as silk. Master basic stitching techniques and guarantee its longevity with regular sewing machine maintenance. Immerse yourself and create magic!
- Tetron Fabric for Marine Applications: Durability and Use Cases - June 18, 2025
- Tetron Fabric for Outdoor Furniture: Weather Resistance and Care - June 18, 2025
- Tetron Fabric for Wall Coverings: Style and Application Tips - June 18, 2025


