When you're using fabric markers on different textures, it's crucial to understand how each surface interacts with the ink. You'll want to select the right markers tailored to fabric types, and prepare your materials properly to avoid unwanted surprises. For instance, smooth fabrics require a different approach than textured ones, and you might need specific techniques for stretchy materials. But what do you do when mistakes happen, or how do you care for your designs once they're complete? Let's explore these essential tips to ensure your projects turn out just right.
Table of Contents
Key Takeaways
- Prewash and iron fabric to ensure a clean, smooth surface before using fabric markers for optimal results.
- Test markers on a swatch to check compatibility with different fabric textures and avoid undesirable ink interaction.
- Use high-quality, permanent markers designed for the specific fabric type to prevent bleeding and ensure vibrant designs.
- For stretchy fabrics, select markers that adhere well and allow designs to cure fully before washing to maintain integrity.
Choosing the Right Fabric Markers
When choosing fabric markers, you should consider factors like color vibrancy, fabric compatibility, and durability.
Color vibrancy is essential because it determines how bold and eye-catching your designs will be. Look for markers that provide a rich palette, ensuring your artwork stands out on any fabric.
Next, think about fabric compatibility. Not all markers work well on every fabric type. Some markers are specifically designed for cotton, while others excel on synthetic materials. Check the label to ensure that your chosen markers are suitable for your fabric to achieve the best results.
Durability is another crucial factor. You want your designs to last through washing and wear. Some fabric markers are permanent and fade-resistant, while others may wash out after a few cycles. Always opt for markers that specify they're made for fabric and are machine washable.
Preparing Different Fabric Types
Preparing various fabric types for your designs involves understanding their unique textures and properties. Each fabric can react differently to markers, so it's crucial to prep accordingly.
Here are three essential steps to prepare your fabrics effectively:
- Prewash the Fabric: Washing removes any chemicals or finishes that might interfere with the ink. Use a mild detergent and let the fabric dry completely before starting.
- Iron the Fabric: Smooth out any wrinkles to create a flat, even surface. This makes it easier for you to control your designs and ensures the markers apply evenly.
- Test on a Swatch: Before diving into your main design, test your markers on a small fabric swatch. This helps you see how the ink interacts with the texture, giving you a better idea of how it'll look on the larger piece.
Techniques for Smooth Fabrics
Smooth fabrics like silk or satin require specific techniques to ensure your designs pop without bleeding or smudging.
First, choose high-quality fabric markers that are specifically designed for smooth surfaces; this makes a significant difference in how the ink adheres and dries. Before you start, lay your fabric flat on a stable surface to prevent any shifting while you work.
It's helpful to place a piece of cardboard or paper underneath the fabric to prevent the ink from soaking through. When applying your marker, use light pressure and gentle strokes to avoid saturating the fabric.
If your design has intricate details, consider outlining first and then filling in with color. This approach helps maintain clean lines and prevents the ink from spreading. For finer details, opt for markers with a finer tip.
Once you're done, let the design dry completely before handling the fabric to avoid smudging. Finally, heat-setting your design with an iron on a low setting can help lock in the colors, ensuring your artwork remains vibrant and intact after washing.
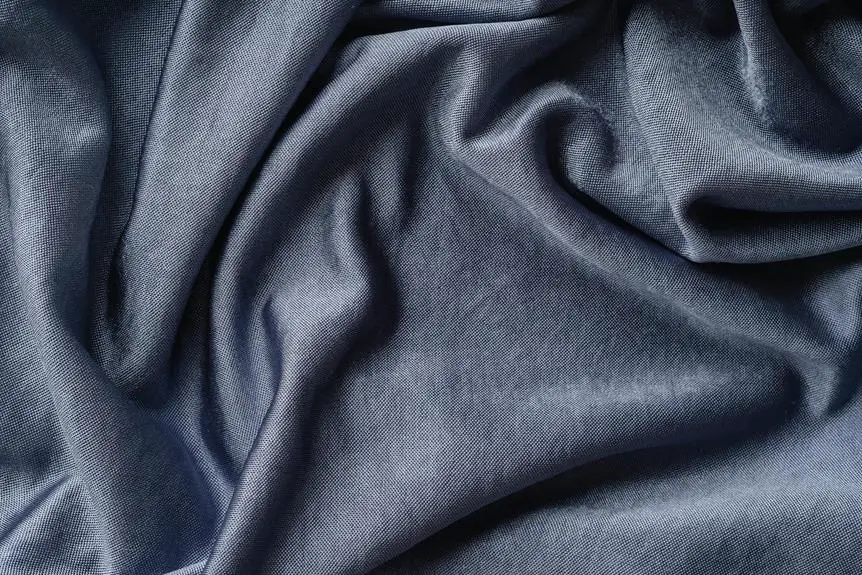
Best Practices for Textured Surfaces
When working with textured surfaces, you'll want to prepare the fabric properly to ensure your designs come out crisp and vibrant.
Choosing the right fabric marker is equally important, as not all markers perform well on uneven textures.
Let's explore these best practices to help you achieve the best results.
Surface Preparation Techniques
Start by cleaning the textured surface thoroughly to remove any dust or oils that could interfere with the fabric markers' adherence. This step is crucial for achieving vibrant and long-lasting designs.
Here are some best practices to ensure your surface is properly prepared:
- Use a mild detergent: Mix a small amount of detergent with warm water. Use a sponge or cloth to gently scrub the surface, making sure to reach into any crevices. Rinse with clean water and allow it to dry completely.
- Test a small area: Before diving into your artwork, test a small, inconspicuous area of the textured surface. This helps you gauge how the fabric marker interacts with the material and ensures you get the desired effect.
- Iron if necessary: If the textured surface allows, consider lightly ironing it to smooth out any wrinkles. This step creates a flatter area for better precision while using fabric markers.
Choosing the Right Marker
Selecting the right fabric marker for your textured surface can greatly influence the outcome of your design.
When you're working with different textures, it's essential to consider the marker's tip and ink type. For coarse fabrics like burlap or canvas, opt for markers with a broad tip. This allows you to cover more area quickly and ensures your ink penetrates the texture effectively.
On the other hand, if you're using smoother materials, such as cotton or silk, a fine tip marker will give you the precision needed for intricate designs. Also, check the ink composition; water-based markers are generally more versatile and easier to wash out, while permanent markers deliver bold colors that last longer.
Before you start, test your chosen marker on a scrap piece of the same fabric. This way, you can see how the marker interacts with the texture and adjust your approach if necessary.
Always keep in mind that the more textured the surface, the more patience you'll need; sometimes, multiple layers of ink are required for a vibrant finish. Choose wisely, and your designs will pop beautifully on any textured surface!
Tips for Stretchy Fabrics
Using fabric markers on stretchy fabrics requires a few key techniques to ensure vibrant, lasting results without compromising the material's elasticity. To achieve the best outcome, keep these tips in mind:
- Choose the Right Marker: Opt for fabric markers specifically designed for stretchy materials. These markers offer better adhesion and flexibility, preventing cracking or fading when the fabric stretches.
- Work with Tension: Always stretch the fabric slightly while you're drawing. This helps the ink settle into the fibers without creating any gaps. However, avoid overstretching, as this can distort your design once the fabric returns to its original shape.
- Heat Set Your Design: After your design is complete, heat setting is crucial. Use an iron on a low setting (without steam) to gently press over the design. This helps to lock in the ink and improve durability, ensuring your artwork withstands washing and wear.
Fixing Mistakes on Fabric
When you make a mistake on fabric, quick fixes can save your project from disaster.
You'll want to explore immediate correction techniques and color blending strategies that can help you seamlessly repair any errors.
Let's look at how to effectively address those mishaps and keep your designs looking sharp.
Immediate Correction Techniques
Mistakes can happen while working with fabric markers, but knowing how to quickly correct them can save your project. Here are some immediate correction techniques you can use to fix those pesky errors:
- Blotting: If you make a mistake right after applying the ink, quickly grab a clean cloth or paper towel. Gently blot the area to absorb excess ink without smudging. Be careful not to rub, as that can spread the ink further.
- Water and a Brush: For water-soluble fabric markers, dip a small brush in water and lightly brush over the mistake. This can help lift the ink off the fabric. Make sure to test this technique on a scrap piece first to avoid any damage.
- Fabric Paint: If the mistake is significant or the ink has dried, you can use fabric paint to cover it up. Choose a color that matches your fabric and carefully paint over the error. This technique allows you to seamlessly integrate the fix into your design.
Color Blending Strategies
Color blending can transform errors into artistic opportunities, allowing you to seamlessly integrate corrections into your fabric design. When you make a mistake, don't panic! Instead, grab your fabric markers in complementary colors to create a blended effect that masks your error.
Start by layering your chosen colors. Apply the darker shade first, focusing on the area of the mistake. Then, use a lighter shade and gently blend the edges of the darker color with small, circular motions. This technique softens the transition, making the correction less noticeable. If you're working with a more textured fabric, consider using a stippling technique to add depth and dimension.
Another effective strategy is to introduce a third color. This can help create a gradient effect, making the correction look intentional. Just remember to work quickly, as fabric markers can dry fast, making it harder to blend.
Lastly, don't be afraid to get creative. Turn a mistake into a design feature by incorporating new elements that complement your correction. With practice, you'll find that blending colors can enhance your fabric art and turn errors into unique expressions of creativity.
Caring for Your Finished Designs
To keep your designs vibrant and intact, you should always wash them gently by hand or on a delicate cycle. This helps prevent fading and keeps the fabric markers looking fresh.
Here are a few additional tips to care for your finished designs:
- Air Dry: After washing, avoid using a dryer. Instead, lay your fabric flat or hang it to air dry. This prevents any heat damage that could cause the colors to bleed or fade.
- Store Properly: When you're not using your decorated items, store them in a cool, dry place. Avoid direct sunlight, as prolonged exposure can cause colors to fade over time.
- Avoid Abrasive Cleaners: If you need to spot-clean your design, don't use harsh chemicals or abrasive materials. Opt for a gentle cleaner and a soft cloth to maintain the integrity of the fabric and the markers.
Frequently Asked Questions
Can I Use Fabric Markers on Leather Materials?
Yes, you can use fabric markers on leather materials, but it's essential to test first. Make sure the leather is clean and dry, and keep in mind that the colors may look different on leather.
How Do I Remove Fabric Marker Stains From Skin?
To remove fabric marker stains from your skin, try using rubbing alcohol or hand sanitizer. Apply a small amount to a cotton ball, gently rub the stained area, and rinse with soap and water afterward.
Are Fabric Markers Safe for Children's Clothing?
Yes, fabric markers are generally safe for children's clothing, especially those labeled non-toxic. Just make sure to check the product's guidelines and allow the ink to set properly to avoid any potential issues.
How Long Do Fabric Marker Designs Typically Last?
Fabric marker designs usually last several washes, especially if you heat-set them. You'll find that on cotton, they tend to hold up better, while synthetic fabrics might cause the ink to fade faster.
Can I Heat-Set Fabric Marker Designs in the Dryer?
Yes, you can heat-set fabric marker designs in the dryer. Just place your item in the dryer on high heat for about 30 minutes. This helps to make your designs more permanent and vibrant.

- How Does Ring Spun Cotton Affect Garment Fit and Shape Retention? - August 13, 2024
- What Are the Challenges in Producing Ring Spun Cotton? - August 13, 2024
- Is Ring Spun Cotton Suitable for Plus-Size Clothing? - August 13, 2024


