When you're stenciling with multiple colors, it's crucial to start with the right materials and preparation to achieve a clean, professional look. You'll want to choose durable stencils and quick-drying paints to minimize any chance of bleeding. After prepping your surface, consider how to create a cohesive color palette that enhances your design. But once you've tackled these basics, you'll discover that layering techniques can truly transform your project into something special. What's the best way to layer colors effectively without losing the integrity of your design?
Key Takeaways
- Choose high-quality stencils and acrylic paints specifically designed for stenciling to prevent bleeding and ensure vibrant colors.
- Clean and prime your surface thoroughly to enhance paint adherence and achieve professional-looking results.
- Plan a color palette with a main base color and complementary accent colors for a cohesive design.
- Use layering techniques, starting with a light base and adding transparent top layers for depth and texture.
Choose the Right Materials
Choosing the right materials is crucial for achieving clean and precise stenciling results. First, you'll need high-quality stencils made from durable materials like mylar or plastic. These materials resist bending and tearing, ensuring your stencil maintains its shape during the process. Opt for stencils with clear, defined edges for sharp lines in your designs.
Next, consider your paint. Acrylic paints are popular for stenciling due to their quick-drying properties and vibrant colors. Choose paints that are specially formulated for stenciling to prevent bleeding under the stencil. If you're working with multiple colors, make sure to use painter's tape to secure the stencil in place, preventing any movement as you apply the paint.
Don't forget about brushes or sponges. A stencil brush with stiff bristles allows for better control and minimizes paint seepage, while a sponge can help create a smooth, even application.
Lastly, gather a palette or tray for your paints to keep everything organized. By selecting the right materials, you'll set yourself up for success and achieve stunning results in your stenciling projects.
Prepare Your Surface
Before you start stenciling, it's crucial to prepare your surface properly.
Make sure to clean and prime the area, and choose the right materials to avoid any mishaps.
Using sturdy stencils will ensure your design comes out crisp and clear.
Clean and Prime Surface
You should always clean and prime your surface to ensure the stencil adheres properly and the design turns out crisp and clear. A clean surface prevents dirt and grease from interfering with the paint, while priming helps to create an even base, enhancing color vibrancy and longevity.
Here's a quick reference table to guide you through the cleaning and priming process:
| Step | Action | Purpose |
|---|---|---|
| 1. Clean | Use soap and water | Remove dirt, grease, and debris |
| 2. Dry | Allow the surface to dry | Ensure paint adheres well |
| 3. Prime | Apply a suitable primer | Create an even base for painting |
After cleaning, make sure the surface is completely dry before applying primer. Choose a primer that suits your specific material, as this can affect adherence and finish quality. Following these steps helps you avoid common pitfalls and sets the stage for a successful stenciling project. When you take the time to prepare properly, you'll be rewarded with a stunning, professional-looking result.
Choose Appropriate Materials
Selecting the right materials is crucial for achieving a clean and professional look in your stenciling project. Start with a suitable surface, ensuring it's clean, dry, and smooth. If you're stenciling on walls, consider using a high-quality paint that's designed for your specific surface type, whether it's drywall, wood, or metal.
Next, choose the right paint. Acrylic paints work well for most surfaces and dry quickly, while latex paints offer excellent coverage. Always opt for paints that are low in VOCs for a safer working environment. You'll also want to have a good assortment of brushes or sponges on hand, depending on your preferred application method.
Don't forget about tools like painter's tape, which can help secure your stencil and create clean edges. If you're working on fabric, make sure to use fabric paint and a stencil adhesive to prevent shifting.
Lastly, protect your workspace with drop cloths or newspapers to catch any spills. By gathering these appropriate materials, you're setting yourself up for success, ensuring your stenciling project turns out beautifully and without any frustrating mishaps.
Use Sturdy Stencils
Using sturdy stencils is essential for achieving crisp, clean designs that won't warp or shift during application. When you choose the right materials for your stencils, you set yourself up for success.
Here are some tips to help you select sturdy stencils:
- Material Matters: Look for stencils made from thick plastic or metal. These materials resist bending and provide a solid base for your paint.
- Design Thickness: Opt for stencils with thicker lines and shapes. Thinner designs can easily break or warp, leading to messy outcomes.
- Reusability: Choose stencils that are easy to clean and can withstand multiple uses. This will save you time and money in the long run.
- Weight: A heavier stencil will stay in place better when you're applying paint. If you're working on a vertical surface, consider using weights or tape to secure it further.
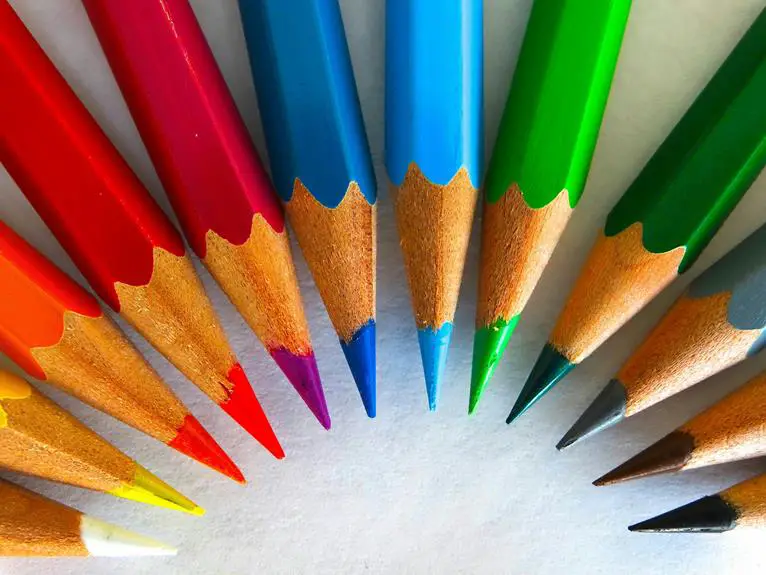
Plan Your Color Palette
A well-chosen color palette can transform your stenciling project from ordinary to extraordinary. Start by selecting colors that complement each other, creating a cohesive look. Think about the mood you want to convey; warm colors can evoke energy, while cool colors often create a calming effect.
Once you've decided on a mood, gather paint samples or swatches. Lay them out together to see how they interact. It's helpful to choose one main color as your base, then pick two or three accent colors that will highlight the details of your design.
Don't forget to consider the surface you're working on. If it's dark, you might want to choose brighter colors to ensure your design stands out. If it's light, deeper shades can add depth and richness.
Also, test your colors on scrap material before committing. This way, you'll see how they appear once dry and how they look together.
Layering Techniques
How can you elevate your stenciling project with layering techniques? Layering not only adds depth and interest to your design, but it also allows you to blend colors seamlessly. Here are four effective layering techniques to consider:
- Start with a Base Color: Apply your lightest color first as a base. This sets the foundation for the layers to come and helps the subsequent colors pop.
- Use Transparent Paint: Incorporate transparent or semi-transparent paints for your top layers. This allows the base color to shine through, creating a beautiful, blended effect.
- Change Brush Techniques: Experiment with different brush strokes or sponges for each layer. This can add texture and variation to your design, making it more dynamic.
- Layer in Sections: Focus on one section of your stencil at a time. This helps you control the application and prevents colors from mixing unintentionally.
Use Proper Stenciling Tools
Which tools you choose for stenciling can make a significant difference in the quality of your final design. Using the right brushes, sponges, and sprays helps you achieve clean, crisp lines, especially when working with multiple colors.
Here's a quick guide to essential stenciling tools:
| Tool Type | Purpose |
|---|---|
| Stencil Brushes | Ideal for detail work and edges |
| Foam Rollers | Great for even coverage |
| Spray Bottles | Perfect for large areas or effects |
When selecting brushes, opt for ones with stiff bristles to prevent paint from bleeding under the stencil. Foam rollers work well for larger surfaces and can help you apply an even coat with minimal fuss. If you want to add texture or gradient effects, consider using spray bottles to achieve a unique look.
Don't forget to have painter's tape handy; it helps secure your stencil in place, preventing any shifting while you work. With the right tools, you'll find stenciling with multiple colors becomes easier and more enjoyable, allowing your creativity to shine through.
Clean Up and Maintenance
Proper clean-up and maintenance of your stenciling tools will ensure they last longer and perform better for future projects. After completing your stenciling, it's crucial to take a few moments to clean everything up properly. Neglecting this step can lead to dried paint and ruined tools.
Follow these essential steps for effective clean-up:
- Rinse Brushes and Rollers: Immediately rinse your brushes and rollers under warm water to remove paint. If you used acrylic paint, soap and water will do the trick.
- Clean Stencils: Soak stencils in warm, soapy water to loosen paint. Use a soft brush or sponge to gently scrub off any residue.
- Wipe Surfaces: Use a damp cloth to wipe down your work area, removing any stray paint or spills. This keeps your space tidy and ready for next time.
- Store Tools Properly: Once everything is clean and dry, store your tools in a dry place, away from direct sunlight. This helps prevent damage and keeps them in top condition.
Frequently Asked Questions
Can I Use Spray Paint With Stencils?
Yes, you can use spray paint with stencils! Just make sure to hold the spray can at an angle and maintain a consistent distance. This helps prevent paint from bleeding under the stencil edges.
How Do I Fix Mistakes While Stenciling?
When you make mistakes while stenciling, don't panic. You can gently lift the stencil, clean excess paint with a damp cloth, or touch up with a fine brush. Just be patient and precise!
Is It Necessary to Seal My Stenciled Project?
Yes, sealing your stenciled project is necessary. It protects the design from wear and fading, ensuring your hard work lasts. A good sealant keeps colors vibrant and maintains the overall quality of your artwork.
What Surfaces Are Best for Multi-Color Stenciling?
For multi-color stenciling, smooth surfaces like canvas, wood, or metal work best. They allow for even paint application and clean lines, making your designs pop. Avoid textured surfaces that can interfere with your stencil's precision.
How Can I Create a Gradient Effect With Stencils?
To create a gradient effect with stencils, you'll blend colors on your brush, starting with the lightest shade and gradually layering darker tones. This technique gives your design depth and a smooth transition.