When you're riveting multiple layers of fabric, the right approach can make all the difference. You'll want to start by selecting rivets that suit both the thickness and type of fabric you're working with, ensuring durability in the finished product. Preparing your layers carefully is crucial, and using the right tools can save you time and frustration. But there's more to consider beyond just tools and materials. What techniques can you employ for precise placement, and how do you troubleshoot common issues that may arise? Let's explore these essential aspects.
Key Takeaways
- Choose the right rivets based on material, size, and finish to ensure compatibility with fabric layers.
- Pre-wash and match the weight of fabrics to maintain stability and prevent future issues like shrinkage.
- Use precise measuring tools and fabric clips instead of pins to prevent shifting during the riveting process.
- Ensure all fabric layers are flat and smooth before setting rivets to avoid puckering and misalignment.
Choosing the Right Rivets
When selecting rivets, consider factors like material, size, and the type of fabric you're working with to ensure a secure and durable hold.
First, think about the material of the rivets. Metal rivets are typically stronger and more durable than plastic ones, making them ideal for heavy-duty applications. If you're working with lightweight fabrics, though, plastic rivets might suffice.
Next, size matters. The diameter and length of the rivets should match the thickness of your fabric layers. If the rivets are too long, they may protrude excessively, while too short rivets won't hold the layers together effectively. Measure your fabric layers accurately to choose the proper size.
Additionally, consider the finish of the rivets. Depending on your project, you might prefer a polished or matte finish to complement your fabric.
Lastly, think about the style of rivet. Decorative rivets can enhance the aesthetic appeal of your project, while standard ones focus solely on function.
Preparing Your Fabric Layers
Before you start riveting, it's crucial to choose the right fabrics for your project.
Make sure to pre-wash your fabric layers to prevent any future shrinkage that could affect the fit and appearance.
These steps set the foundation for a successful riveting experience.
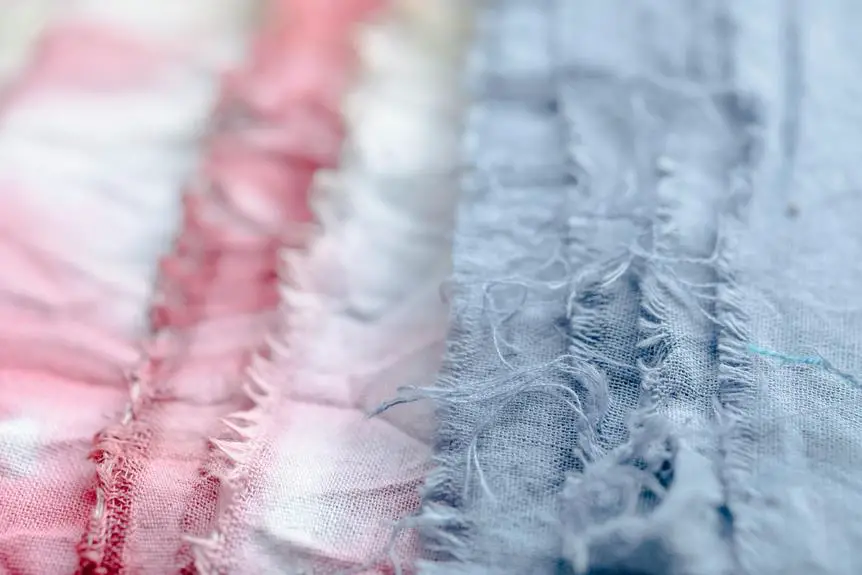
Choose Appropriate Fabrics
Selecting the right fabrics is crucial for ensuring your project layers work well together and achieve the desired effect. The choice of fabric can impact not just the aesthetics but also the functionality of your finished item.
Here are some key factors to consider when choosing your fabrics:
- Weight: Opt for fabrics that complement each other in weight. A heavy fabric paired with a lightweight one can lead to a less stable structure.
- Texture: Different textures can add depth to your project. Combining smooth and textured fabrics can create visual interest, but ensure they work well together when riveted.
- Stretch: If you're using fabrics with different stretch abilities, be cautious. Ideally, you want fabrics that have similar elasticity to avoid puckering or distortion.
- Color & Pattern: Make sure the colors and patterns harmonize. Bold patterns can clash if layered improperly, so consider how they'll look together when riveted.
Pre-Wash Fabric Layers
Pre-washing your fabric layers helps to prevent any shrinkage or color bleeding after you've riveted them together. This step is crucial for ensuring your finished project remains true to size and color. To prepare your fabric layers effectively, follow these simple steps:
| Step | Description |
|---|---|
| Wash the Fabric | Use cold water and a gentle detergent to protect the fibers. |
| Dry the Fabric | Air dry or tumble dry on low to prevent damage. |
| Iron if Necessary | Smooth out wrinkles to ensure layers align correctly during riveting. |
Tools You'll Need
To successfully rivet multiple layers of fabric, you'll need a few essential tools at your fingertips. Having the right equipment not only makes the process smoother but also ensures your results are professional and durable.
Here are four must-have tools for your riveting project:
- Rivet Setter: This tool is crucial for securing the rivets. It comes in various sizes, so choose one that matches your rivets.
- Fabric Hole Punch: A good hole punch will help you create precise openings in your fabric layers for the rivets. Make sure it can handle multiple layers.
- Cutting Mat: Protect your work surface with a cutting mat. It'll provide a stable base and prevent damage to your table while you work.
- Rivets: Don't forget the rivets themselves! Choose high-quality, durable rivets that are suitable for your fabric type and thickness.
With these tools in hand, you're set to tackle your riveting project with confidence. Get ready to elevate your fabric creation game!
Techniques for Accurate Placement
To achieve accurate placement when riveting multiple layers of fabric, you need to use proper alignment tools that ensure everything lines up perfectly.
Marking your fabric placement points is crucial for precision, so don't skip this step.
Use Proper Alignment Tools
Using proper alignment tools ensures your fabric layers are placed accurately, which is crucial for achieving a polished final product. When you work with multiple layers, even a slight misalignment can lead to unwanted puckering or uneven seams.
To help you maintain precision, consider using the following alignment tools:
- Straight Edge Ruler: Use this for measuring and cutting straight lines, ensuring your fabric edges remain aligned.
- Fabric Clips: Instead of pins, try using fabric clips to hold layers together without shifting. They're especially useful for thicker fabrics.
- Measuring Tape: Always keep a measuring tape handy to double-check lengths and distances between layers before securing them.
- Chalk or Fabric Marker: Mark your fabric lightly to indicate where layers need to align; ensure the marks are easy to remove later.
Mark Fabric Placement Points
Accurately marking fabric placement points is key to ensuring your layers align perfectly and maintain their intended design. To start, gather your tools: a fabric marker or chalk, a ruler, and a straight edge. Use the ruler to measure and mark your placement points on each layer, ensuring consistency across all pieces.
When marking, consider the fabric type; a light touch with chalk works well on dark fabrics, while a fabric marker can be more visible on lighter ones. Always test your marking tool on a scrap piece to ensure it doesn't bleed or leave a permanent mark.
For intricate designs, you might want to create a template. Cut out your pattern from paper, then trace around it on your fabric layers. This method guarantees that each layer mirrors the design accurately.
Don't forget to double-check your measurements before committing to the marks. It's easy to misalign a point, and correcting it after cutting can be frustrating.
Pin or Clip Layers
When you pin or clip the layers together, it ensures they'll stay aligned as you sew, making the entire process smoother. Properly securing your fabric layers is crucial for achieving accurate results, especially when working with multiple layers.
Here are some techniques you can use for effective pinning or clipping:
- Use the Right Tools: Opt for fabric clips for thicker layers or delicate fabrics that might be damaged by pins. For lighter materials, traditional pins work just fine.
- Pin at Regular Intervals: Space your pins or clips about 4-6 inches apart. This keeps layers secure without causing distortion.
- Pin Perpendicular to the Seam: Place pins or clips perpendicular to your seam line. This makes it easier to remove them as you sew and reduces the risk of hitting a pin with the needle.
- Check Alignment Before Sewing: After pinning or clipping, double-check the alignment of your layers. Adjust as necessary to ensure they're perfectly positioned.
Securing the Rivets Properly
To ensure that rivets hold securely, it's essential to choose the right tools and techniques for the job.
Start by selecting high-quality rivets that match the thickness and type of fabric you're using. If you're working with multiple layers, make sure the rivet length is appropriate to penetrate through all the layers without being too long.
Next, use a heavy-duty rivet setter and a mallet to apply even pressure. Position the rivet in the designated hole, ensuring it's aligned correctly. When you strike the setter, do so firmly but controlled to avoid damaging the fabric. Use a backing plate or anvil to support the rivet from behind—this helps prevent the fabric from bunching or tearing.
After setting the rivet, check that it's secure by gently tugging on the fabric around it. If it feels loose or wobbly, you might need to redo it.
Always take your time during this process; rushing can lead to mistakes that compromise the integrity of your project. Properly securing your rivets enhances both the durability and appearance of your finished product.
Troubleshooting Common Issues
Riveting multiple layers of fabric can sometimes lead to frustrating problems that need quick solutions. Here are some common issues you might encounter and how to tackle them:
- Rivet Misalignment: If your rivets aren't lining up, double-check your measurements before you start. Use a fabric marking tool for precise placement.
- Fabric Puckering: Puckering can occur when the fabric layers aren't smooth. Make sure to press your fabric before riveting and hold everything taut during the process.
- Rivet Failure: If rivets are popping off, you may be using the wrong size or type. Ensure you're selecting rivets that are compatible with the thickness of your fabric layers.
- Difficulty in Setting Rivets: If you struggle to set your rivets, check your tools. Ensure your rivet setter is appropriate for the rivets you're using and that it's in good condition.
Frequently Asked Questions
Can I Use Rivets on Leather and Fabric Together?
Yes, you can use rivets on leather and fabric together. Just make sure you choose the right type of rivet and properly prepare both materials. This'll ensure a strong, durable hold for your project.
How Do I Choose the Right Color for Rivets?
Choosing the right color for rivets depends on your project's overall aesthetic. Consider the fabric's hue, pattern, and theme. You want rivets that either complement or contrast beautifully, enhancing your design without overwhelming it.
Are There Eco-Friendly Rivet Options Available?
Yes, there are eco-friendly rivet options available. You can choose from recycled metals, biodegradable materials, or organic coatings. These choices help reduce environmental impact while maintaining durability and style in your projects.
Can I Remove Rivets if I Make a Mistake?
Yes, you can remove rivets if you make a mistake. Use a rivet removal tool or a drill to carefully extract them, but be cautious not to damage the surrounding material during the process.
What Are the Best Brands for High-Quality Rivets?
When choosing high-quality rivets, you'll want to consider brands like Tandy Leather, Dritz, and KAM Snaps. They offer durable options that hold up well, ensuring your projects look professional and last a long time.