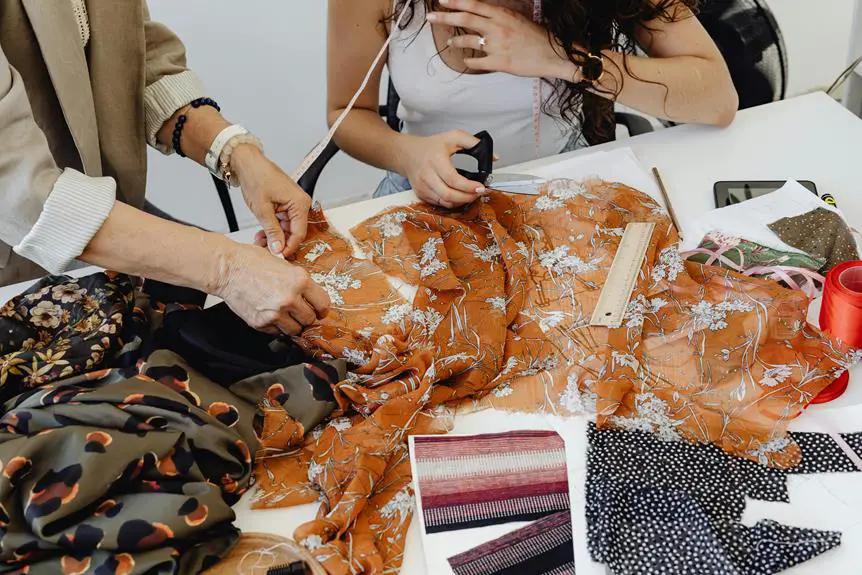
When you're layering fabrics for cutting, you've got to be strategic about your choices and techniques. Selecting compatible materials is crucial to prevent shifting, and pre-washing helps maintain consistency. It's also important to align your patterns and grainlines to ensure accuracy. Don't overlook the tools you use; a rotary cutter and self-healing mat can make a significant difference. However, the real game-changer lies in how you secure those layers and the cutting order you follow. Mastering these elements can elevate your projects to a new level, so let's explore some tried-and-true methods that can help.
Table of Contents
Key Takeaways
- Choose fabrics with similar weights and textures to prevent shifting during cutting, ensuring accuracy in your cuts.
- Align fabric grains and patterns before cutting for consistency and a cohesive look in the final garment.
- Use straight pins for delicate fabrics and clips for thicker ones to secure layers and minimize slipping.
- Iron layers flat before cutting to eliminate wrinkles that can affect alignment and cutting precision.
Choose the Right Fabrics
When choosing fabrics for layering, consider their weight and texture to ensure they work well together. Light fabrics can easily shift under heavier materials, leading to uneven cuts. So, if you're working with a lightweight cotton, pair it with similar or slightly heavier fabrics for better stability. Textures also matter; smooth fabrics slide around more than those with a bit of grip.
Think about the purpose of your project, too. If you're making garments, opt for fabrics that complement each other in drape and feel. Mixing a soft jersey with a stiffer fabric can create interesting contrasts, but be cautious about how they interact during cutting.
Also, pay attention to the fabric grain. Aligning the grain correctly across all layers helps maintain consistency in your cuts. If you're layering patterned fabrics, ensure the designs align properly for a cohesive look.
Lastly, always pre-wash your fabrics when possible. This preemptively avoids future shrinkage and ensures that the textures and weights remain consistent during the cutting process.
Prepare Your Cutting Space
Before you start cutting, make sure your workspace is clear and organized.
Gather all the necessary tools, like scissors, weights, and a ruler, to keep everything at hand.
A tidy cutting space not only boosts your efficiency but also helps prevent mistakes.
Clear Your Workspace
A tidy workspace ensures you can cut fabrics accurately and efficiently. Start by removing any unnecessary items from your cutting area. Clear off tables or surfaces, and make sure you have enough space to lay out your fabrics without obstruction. This not only helps you see your materials clearly but also minimizes the risk of cutting mistakes.
Next, organize your fabrics by type or color. This way, you can easily grab what you need without rummaging through piles. If you're working with multiple layers, keep them separated to avoid confusion. You'll save time and frustration when everything's in its place.
Ensure your lighting is adequate, so you can see the details of your fabrics and markings clearly. Natural light is ideal, but if that's not an option, use bright, white bulbs that mimic daylight.
Gather Necessary Tools
With your workspace cleared, it's time to gather the tools you'll need for cutting fabrics effectively. Having the right tools not only simplifies the process but also ensures precision in your cuts.
Here are three essential items you should have on hand:
- Rotary Cutter: This tool is a game-changer. It slices through multiple layers with ease, making it perfect for your fabric layering. Choose a sharp blade for the best results.
- Cutting Mat: A self-healing cutting mat protects your work surface and keeps your blades sharp. Look for one large enough to accommodate your fabric layers without any overhang.
- Ruler or Straightedge: A clear acrylic ruler helps you measure and cut straight lines. Opt for a ruler with grid markings for added accuracy, especially when working with patterned fabrics.
With these tools ready, you're well-equipped to start layering and cutting your fabrics. Take a moment to familiarize yourself with each tool, and you'll find your cutting experience smoother and more enjoyable.
Happy cutting!
Use Proper Tools
To achieve clean cuts when layering fabrics, you need the right tools in your arsenal.
Essential cutting tools, like rotary cutters and sharp scissors, make all the difference in precision.
Pair these with effective fabric layering techniques, and you'll streamline your cutting process significantly.
Essential Cutting Tools
Choosing the right cutting tools can make all the difference in achieving clean, precise edges for your layered fabrics. With the right tools, you'll find that cutting through multiple layers becomes a smooth and enjoyable process. Start by investing in these essential tools:
- Rotary Cutter: This tool glides through fabric layers effortlessly, ensuring you get straight, even cuts every time. It's perfect for slicing through multiple pieces without the drag of traditional scissors.
- Cutting Mat: A self-healing cutting mat not only protects your workspace but also provides a stable surface for your rotary cutter. The grid lines help you align your fabric accurately, making it easier to achieve that perfect cut.
- Fabric Scissors: A good pair of fabric scissors is a must for any sewing enthusiast. Opt for sharp, ergonomic scissors that are designed specifically for fabric to prevent fraying and ensure clean edges.
Fabric Layering Techniques
Layering fabrics effectively requires a keen understanding of techniques that enhance both stability and precision during cutting.
Start by using a clean, flat surface to lay out your fabric. This prevents shifting and ensures your layers remain aligned. Utilize weights or pins to secure the layers, but be careful not to distort the fabric.
When you're ready to cut, employ a rotary cutter rather than scissors. A rotary cutter glides smoothly through multiple layers, offering a clean edge and reducing the risk of fraying. Make sure your cutting mat is in good condition; a worn mat can compromise your cuts.
If you're working with slippery fabrics, consider using a fabric spray adhesive to temporarily bond the layers. This'll help keep everything in place while you cut. Alternatively, a fabric stabilizer can provide additional support, especially for delicate materials.
Lastly, always keep your blades sharp. Dull blades can snag and pull the fabric, leading to jagged edges.
Pin or Weigh Fabric Layers
When you're ready to secure your fabric layers, you can either pin them in place or use weights to keep everything from shifting during cutting. Each method has its benefits, so choose the one that feels most comfortable for you. Pins can provide a more secure hold, while weights allow for quicker setup without leaving holes in your fabric.
Here are three effective options to consider:
- Straight Pins: Use sharp, thin pins to avoid damaging delicate fabrics. Insert them perpendicular to the cutting line to keep layers aligned without getting in the way.
- Clips: If you're working with thicker materials, consider using fabric clips. They grip the layers tightly without slipping and won't leave pinholes behind.
- Weights: Use fabric weights or even household items like washers or small bags of rice. Place them evenly around the edges to hold everything down and prevent shifting while you cut.
Ultimately, whether you choose pins or weights, the key is to ensure your fabric layers remain stable and secure. This will lead to cleaner cuts and more accurate results in your sewing projects.
Align Patterns Carefully
Securing your fabric layers is just the first step; aligning your patterns accurately is vital for achieving the best results in your cutting process.
Start by laying out your pattern pieces on top of your fabric layers. Make sure the grainlines are running parallel to the selvage edge. This helps prevent distortion and ensures your final garment hangs correctly.
Next, check for any notches, markings, or dots that guide you during assembly. These indicators should be perfectly aligned across all layers. If your pattern has a repeat, like stripes or plaids, take extra care to match them up. Misalignment can result in uneven seams and a less polished look.
Once everything's in place, use weights or pins to keep the layers steady. Avoid shifting your fabric while you're adjusting the patterns. If you notice any misalignment, adjust it before you start cutting.
It's much easier to fix an issue now than to deal with the consequences later. By taking the time to align your patterns carefully, you'll set yourself up for a smoother cutting experience and a more professional finish.
Happy cutting!
Practice Cutting Techniques
Practicing different cutting techniques is essential for mastering the art of fabric manipulation. When you cut fabric with precision, you ensure your projects turn out beautifully.
Start by familiarizing yourself with three key techniques that will elevate your cutting skills:
- The Rocking Method: Hold your scissors at a slight angle and rock the blades back and forth. This technique allows for smooth, continuous cuts, especially through multiple layers.
- The Rotary Cutter: Use a rotary cutter for straight lines and curves. It glides effortlessly over fabric, giving you clean edges. Always use a cutting mat to protect your surfaces.
- The Snip and Slide: For intricate shapes, try the snip and slide technique. Make small snips into the fabric, then slide the scissors to follow the curve or shape. This method helps maintain control and accuracy.
Frequently Asked Questions
Can I Layer Different Fabric Types Together?
Yes, you can layer different fabric types together! It's a great way to create unique textures and styles. Just ensure they have similar care requirements and consider how each fabric will behave when combined.
How Do I Prevent Shifting While Cutting Multiple Layers?
To prevent shifting while cutting multiple layers, you can use weights or pins to secure the fabric. Make sure your cutting surface is flat and use a rotary cutter for clean, precise cuts without movement.
What Are the Best Fabrics for Beginners to Layer?
For beginners, cotton and cotton blends work best for layering. They're easy to handle, don't shift much, and come in various patterns. Start with these fabrics to build your confidence and skills in layering.
How Do I Store Leftover Fabric Layers After Cutting?
To store leftover fabric layers after cutting, fold them neatly and place them in a dedicated container or drawer. Label each piece for easy identification, and keep them away from moisture to maintain their quality.
Is There a Specific Order for Layering Fabrics?
When layering fabrics, start with the heaviest material at the bottom, followed by mid-weight fabrics, and finish with the lightest on top. This order ensures stability and better cutting outcomes for your projects.
- The “Wet Powder on Dry Fabric” Tie-Dye Technique - July 14, 2025
- The “Dry Powder on Wet Fabric” Tie-Dye Technique - July 14, 2025
- How to Blend Colors Seamlessly in an Ombre Dye - July 14, 2025


