When you're layering colors in tea staining, it's crucial to master a few techniques to achieve the depth and richness you want. You'll want to let each layer dry completely before adding the next; otherwise, you risk unwanted color bleeding. Choosing the right tea can also make a significant difference in the final outcome. As you experiment, consider blending shades for a more dynamic effect. But there are common pitfalls to watch out for that could derail your project—knowing these could save you time and frustration. Let's explore those strategies further.
Key Takeaways
- Ensure each layer of tea is completely dry before applying the next to prevent color bleeding and achieve crisp lines.
- Experiment with different tea concentrations for varied vibrancy; stronger brews yield more intense color layers.
- Utilize a brush or sponge for smooth application, maintaining consistent pressure for even distribution across the surface.
- Try blending complementary teas to create unique shades and enhance the depth of your layered effects.
Understanding Tea Staining Basics
Tea staining is a simple technique that allows you to achieve beautiful, aged effects on paper and fabric. It's perfect for creating vintage looks for crafts, home decor, or even personal projects.
To start, gather your materials: paper or fabric, tea bags, a container for brewing, and water.
Begin by boiling water and steeping your tea bags. The longer you steep, the darker your solution will be, so tailor this to your desired effect. Once your tea is ready, immerse your material fully in the liquid. Keep an eye on it; a few minutes can make a huge difference.
After soaking, carefully remove your material and let it dry flat. You can repeat this process for deeper tones, but remember to let it dry completely between layers.
The beauty of tea staining lies in its unpredictability, so embrace the variations in color and texture that occur. Experiment with different soaking times and tea concentrations to find your perfect shade.
With a bit of practice, you'll master the basics of tea staining and create unique pieces that reflect your individual style. Enjoy the process, and let your creativity flow!
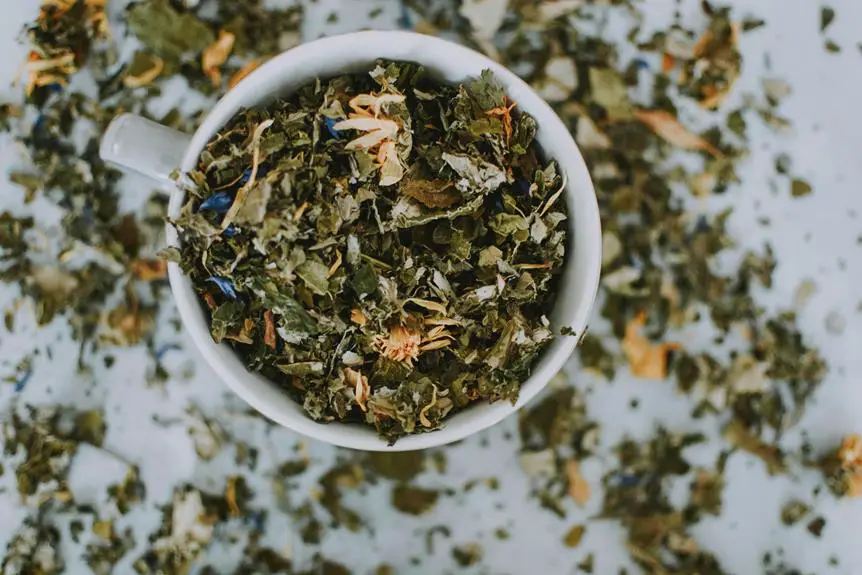
Choosing the Right Tea
Selecting the right type of tea can significantly influence the final color and character of your stained materials. Different teas produce varying shades, so it's essential to choose wisely based on the look you want to achieve.
Here's a quick reference table to help you decide:
| Tea Type | Color Result | Flavor Notes |
|---|---|---|
| Black Tea | Dark brown to black | Robust and bold |
| Green Tea | Light tan to green | Fresh and grassy |
| Herbal Tea | Soft browns to reds | Diverse, depending on herbs used |
When using black tea, expect deep, rich hues that add drama to your projects. Green tea offers a lighter, more delicate finish, perfect for subtlety. Herbal teas can provide unexpected colors and unique characteristics, depending on the specific blend you choose.
Ultimately, experimenting with different teas will lead to discovering the perfect combination for your creative vision. Test small samples before committing, and enjoy the process of layering shades to enhance your work!
Preparing Your Materials
Before you start tea staining, you need to select the right paper that will absorb the tea effectively.
You'll also want to choose tea varieties that complement each other for the best layering effects.
Getting these materials right sets you up for a successful project.
Selecting the Right Paper
Choosing the right paper can make all the difference in achieving the desired effects of your tea staining project. Not all papers react the same way to tea, so it's essential to select one that enhances your creativity. Here are a few options to consider:
- Watercolor Paper: This type is thick and absorbent, allowing for beautiful, rich stains. It holds up well to layering without tearing.
- Cardstock: If you want a sturdier option, cardstock is great for creating bold designs. It can handle the staining process while providing a solid surface for your artwork.
Before you dive into staining, experiment with samples of each paper type. This way, you can see how they react with the tea, which will help you determine which paper aligns best with your vision.
With the right paper, you'll set the stage for stunning layers and effects that truly stand out in your tea staining project!
Choosing Tea Varieties
Exploring various tea varieties can significantly influence the depth and tone of your stains, so it's worth trying different options to find what resonates with your artistic vision.
Start with classic black teas, like English Breakfast or Assam, which produce rich, dark hues. These varieties are great for creating bold contrasts and deep textures in your artwork.
If you prefer softer, warmer tones, experiment with green teas such as Sencha or Matcha. These can add a gentle warmth and subtle greenish tint, perfect for delicate layering.
Herbal teas, like chamomile or hibiscus, can also bring unique colors and scents to your work, allowing for creative expression.
Don't forget about oolong and white teas, which can offer a range of shades, from earthy to light and airy.
To get the best results, steep your tea for varying lengths of time—shorter steeps yield lighter stains, while longer steeps produce darker, more saturated colors.
Ultimately, keep track of your experiments with different teas and their effects on your materials. This way, you'll build a personal palette that enhances your tea staining projects beautifully.
Layering Techniques to Explore
Experimenting with various layering techniques can enhance the depth and richness of your tea-stained projects. By combining different methods, you'll discover unique effects that elevate your art.
Here are a few techniques you might want to explore:
- Wet-on-Wet: Apply a fresh layer of tea while the previous one is still damp. This allows colors to blend seamlessly, creating soft transitions.
- Dry Brushing: Use a dry brush with a little tea to add subtle highlights and texture. This technique works wonders for details and can give your project a more dimensional look.
As you play with these techniques, don't hesitate to mix and match. Each project is an opportunity to learn and refine your skills.
You'll find that layering isn't just about color; it's also about creating a story within your artwork. So grab your supplies, and let your creativity flow!
Color Mixing Tips
Mixing different shades of tea can add incredible depth to your stained artwork, so don't hesitate to play around with various combinations. Experimenting with different types of tea can yield unique colors and effects, enhancing your creative process. Here are some handy color mixing tips to guide you:
- Start with a base color: Choose a primary tea, like black or green, as your foundation.
- Blend in complementary colors: Mix in herbal or fruit teas to create warmth or coolness.
- Test your mixes: Always try your combinations on scrap paper before applying them to your final piece.
Here's a simple reference table to help you identify potential color mixes:
| Base Tea | Complementary Tea | Resulting Shade |
|---|---|---|
| Black Tea | Chamomile | Warm amber |
| Green Tea | Hibiscus | Soft plum |
| Oolong Tea | Rooibos | Rich terracotta |
| White Tea | Lavender | Light lavender hue |
| Matcha | Peppermint | Fresh mint green |
Drying and Setting Your Layers
Once you've applied your tea layers, it's crucial to let them dry properly to ensure the colors set beautifully. Rushing this step can lead to muddy or uneven results.
Here are some tips to help you achieve the best outcome:
- Patience is key: Allow each layer to dry completely before adding the next one. This not only enhances the depth of color but also prevents smudging.
- Choose the right environment: Dry your pieces in a well-ventilated space. Avoid direct sunlight, as it can fade the colors and warp your material.
Troubleshooting Common Issues
When layering colors in tea staining, you might encounter a few common issues that can affect your final results. One frequent problem is uneven color distribution. If you notice patches that are darker or lighter than others, it could be due to how you applied the tea. To fix this, ensure you apply each layer evenly, using a brush or sponge to blend the colors smoothly.
Another issue is bleeding between layers. If your colors start to mix unexpectedly, it's likely that the previous layer isn't fully dried. Always wait until one layer is completely dry before adding the next. If you're in a hurry, consider using a heat gun to speed up the drying process.
Lastly, if you find that the colors are too muted, you might be using too weak of a tea concentration. Experiment with stronger brews to achieve the vibrancy you desire. Remember, tea staining is all about trial and error, so don't get discouraged. Keep practicing, adjusting your techniques, and soon you'll master the art of layering colors in tea staining!
Frequently Asked Questions
Can I Use Herbal Teas for Staining Projects?
Yes, you can use herbal teas for staining projects! They provide unique colors and scents, adding character to your work. Experiment with different blends to achieve the shades you're looking for in your creations.
How Do Different Papers React to Tea Staining?
Different papers absorb tea stains uniquely. Some papers soak up color quickly, creating rich tones, while others resist, resulting in lighter shades. Experimenting with various papers helps you discover which texture and weight yield your desired effect.
What's the Best Way to Store Used Tea Bags?
You can store used tea bags in an airtight container in the fridge for a few days. Alternatively, if they're dry, keep them in a cool, dark place to preserve their flavor and prevent mold.
Can I Add Scents to My Tea Stain Mixture?
Yes, you can add scents to your tea stain mixture! Just mix essential oils or fragrant herbs into the solution. Experiment to find the perfect aroma that complements the color and enhances your project's overall appeal.
How Do I Clean My Brushes After Tea Staining?
To clean your brushes after tea staining, rinse them under warm water immediately. Use soap or brush cleaner to remove residue, gently reshape the bristles, and let them dry flat to maintain their shape.