When you're cutting multiple layers of fabric, precision is key, and a few helpful strategies can make a significant difference. Start by ensuring your layers are perfectly aligned and secured to prevent any shifting during the cutting process. You'll want to choose the right tools to achieve clean, straight cuts, but there's more to it than just that. Understanding the nuances of stabilizing your fabric and planning your cuts can elevate your work. If you're curious about these techniques and how they can improve your results, keep going to uncover the essential tips you might be missing.
Key Takeaways
- Ensure all fabric layers are aligned evenly and securely using weights or pins to prevent shifting during cutting.
- Use a rotary cutter for straight cuts and fabric scissors for woven materials to achieve clean edges.
- Cut through all layers simultaneously to maintain alignment and ensure consistent cuts across pieces.
- Mark alignment points with tailor's chalk to enhance accuracy and avoid mistakes while cutting.
Choose the Right Tools
When you're ready to cut fabric, selecting the right tools can make all the difference in achieving clean, precise edges.
Start with a good pair of fabric scissors. They're designed specifically for cutting fabric, ensuring smooth cuts without fraying the edges. Avoid using regular household scissors, as they can lead to uneven cuts and damage your fabric.
Next, consider using a rotary cutter. This tool is excellent for cutting multiple layers at once, speeding up your process. Pair it with a self-healing cutting mat to protect your surfaces while ensuring your blade stays sharp longer.
Don't forget about rulers or straight edges. A clear acrylic ruler helps you measure and guide your cuts accurately, especially for straight lines. If you're working with intricate designs, fabric weights can hold your layers in place, preventing slipping as you cut.
Lastly, invest in a good quality seam ripper. While it may not seem like a cutting tool, it's essential for correcting mistakes cleanly.
With the right tools in hand, you'll find cutting fabric not only easier but also more enjoyable, setting you up for a successful project.
Prepare Your Fabric
When you prepare your fabric, you set the stage for a successful cutting experience.
Start by choosing quality fabric, as it makes a noticeable difference in your project.
Then, pre-wash and iron your fabric, and align the layers properly to ensure accuracy.
Choose Quality Fabric
Choosing quality fabric is essential for ensuring your projects not only look great but also stand the test of time. When you invest in high-quality materials, you'll find that your finished pieces have better durability, drape, and overall appearance. Here are some key factors to consider when selecting your fabric:
| Fabric Type | Quality Indicators |
|---|---|
| Cotton | Softness, thread count |
| Linen | Smooth texture, natural sheen |
| Polyester | Resilience, colorfastness |
| Silk | Luster, lightweight feel |
| Wool | Warmth, elasticity |
Look for fabric that feels good to the touch and has a consistent weave. Don't hesitate to examine the fabric closely; check for any imperfections or irregularities. Remember, the right fabric not only enhances the beauty of your work but also impacts how your project holds up over time. Always read labels and ask for samples when possible. By choosing quality fabric, you're setting the foundation for a successful sewing experience, making your cutting process smoother and your end results more satisfying.
Pre-wash and Iron
Preparing your fabric by pre-washing and ironing it helps prevent future mishaps in your sewing projects.
When you pre-wash, you remove any chemicals, dirt, or sizing that might be on the fabric. This step is crucial because it ensures that your fabric won't shrink or bleed colors after you've cut and sewn it. Always check the care instructions on the fabric label to determine the best washing method.
After washing, you'll want to dry your fabric properly. If it's cotton, tumble drying is usually fine, but for delicate fabrics, air drying is safer.
Once your fabric is clean and dry, it's time to iron it. Ironing smooths out wrinkles and creases, making it easier to cut accurately. Use the appropriate heat setting for your fabric type to avoid damaging it.
Take your time with these steps; they lay the foundation for your sewing success. By pre-washing and ironing, you're setting yourself up for precise cuts and a more enjoyable sewing experience.
Trust me, addressing these details now will save you headaches later on in your project.
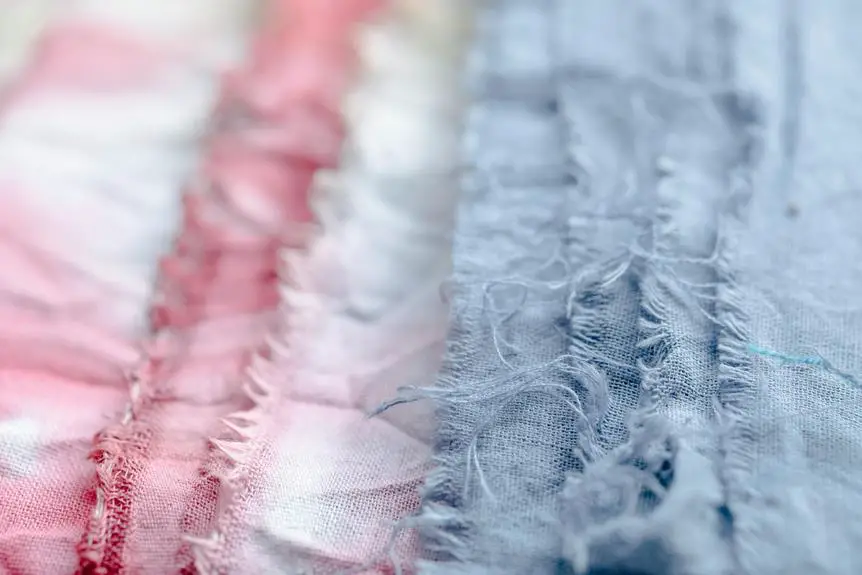
Align Fabric Layers
Aligning your fabric layers ensures that your cuts are accurate and consistent, which is essential for a polished final project.
Start by laying your first layer flat on a clean, smooth surface. Smooth out any wrinkles, as they can lead to uneven cuts. Once it's flat, place additional layers on top, making sure to match the edges precisely.
Use weights or pins to hold the fabric in place, especially if you're working with slippery materials. If you're cutting multiple pieces, stack them in a way that the pattern aligns across all layers. This technique not only saves time but also guarantees that your pieces will match perfectly when sewn together.
Check that all layers are even and aligned at the corners. If you notice any discrepancies, adjust before you start cutting. It's also helpful to mark alignment points with tailor's chalk or a fabric marker to keep everything in line as you cut.
Use Proper Cutting Techniques
When you're cutting fabric, using the right techniques can make all the difference.
You'll want to ensure your cutting tools are sharp.
Align your layers correctly, and utilize a cutting mat for the best results.
Let's explore these essential points to enhance your fabric cutting skills.
Sharp Cutting Tools
Using sharp cutting tools is essential for achieving clean, precise edges, so always make sure your scissors or rotary cutters are well-maintained.
Dull blades can lead to frayed edges and uneven cuts, which can ruin your fabric layers and compromise your project. Regularly sharpen your scissors and replace rotary cutter blades as needed; this will save you time and frustration in the long run.
When you cut, hold your scissors at the correct angle and apply consistent pressure. For rotary cutters, ensure the blade is fully extended and use a cutting mat to protect your surfaces.
Don't rush the process—take your time to guide the tool smoothly through the fabric for the best results.
If you're using scissors, consider the type of fabric you're cutting. Fabric shears work well for woven materials, while pinking shears help reduce fraying on edges.
For thicker layers, a rotary cutter can be more effective, allowing you to slice through multiple layers with ease. Remember, investing in quality cutting tools and maintaining them will elevate your cutting experience and yield professional-looking finishes in your projects.
Layer Alignment Strategies
To ensure accurate cuts, always stack your fabric layers neatly and secure them with pins or weights before you start cutting. This will prevent any shifting that could lead to uneven edges or misaligned patterns. When aligning your layers, double-check that all pieces are facing the same direction, especially if your fabric has a distinct pattern or nap.
Use a cutting mat to help keep everything in place, but avoid relying solely on it for alignment. Make sure the edges of each layer are aligned, and consider using fabric weights to help hold everything down. If you're cutting intricate shapes, take the time to carefully position your pattern pieces on top of the layers.
When you begin cutting, use a rotary cutter for straight lines and sharp scissors for curves. Always cut through all layers at once to maintain the alignment. If you notice any misalignment during the process, stop and adjust before continuing.
Taking these steps to ensure proper layer alignment will help you achieve cleaner, more precise cuts in your fabric projects.
Happy cutting!
Cutting Mat Importance
A cutting mat is essential for protecting your surfaces and ensuring clean, accurate cuts every time. It provides a firm, stable base that absorbs the pressure from your rotary cutter or scissors, preventing damage to your table or workspace. By using a cutting mat, you'll also prolong the life of your cutting tools and achieve more precise results.
Here are some tips for using your cutting mat effectively:
- Choose the Right Size: Make sure your cutting mat is large enough to accommodate the fabric layers you're working with, allowing for easy movement and cutting.
- Use Grid Lines: Take advantage of the grid lines on your mat. They help you align your fabric and make straight cuts, especially when working with multiple layers.
- Rotate the Mat: Instead of moving your fabric, rotate the mat to make cutting easier and more comfortable, reducing strain on your hands and wrists.
- Keep It Clean: Regularly clean your cutting mat to remove fabric scraps and dust, ensuring a smooth cutting surface for better results.
Incorporating these tips will enhance your cutting experience and improve your fabric projects.
Stabilize Your Layers
How can you ensure your fabric layers stay perfectly aligned while cutting? Stabilizing your layers is key to achieving clean, precise cuts.
Start by laying your fabric pieces flat on your cutting mat, ensuring there are no wrinkles or folds. Smooth out each layer with your hands, pushing from the center to the edges to eliminate any air pockets.
To further stabilize, consider using fabric weights. These can help hold your layers in place, preventing any shifting as you cut. If you're working with slippery fabrics, a spray fabric adhesive can also provide temporary bonding, but make sure it won't affect your fabric's integrity when removed.
Additionally, check the grain of your fabric. Aligning the selvage edges will help keep everything in order, reducing the chance of misalignment during cutting. If you're cutting multiple layers of the same fabric, stack them neatly; this ensures they'll be cut uniformly.
Taking these steps will give you a solid foundation for cutting multiple layers effectively. Remember, a well-stabilized fabric means more accurate cuts and a better end result for your sewing projects.
Pin or Clip Effectively
Pinning or clipping your fabric layers correctly ensures they stay in place during cutting, leading to more accurate results.
When you work with multiple layers, effective pinning or clipping is crucial. Here are some tips to help you do it right:
- Use the right tools: Opt for pins or clips that are suitable for your fabric type. For thicker materials, try using fabric clips, while finer fabrics can be pinned without damaging them.
- Pin strategically: Place pins or clips about every 4 to 6 inches apart along the edges. This provides even support without creating unnecessary bulk.
- Avoid pinning through the cutting line: Ensure that your pins or clips are positioned away from where you'll cut. This prevents interference and keeps your cutting line clear.
- Check for alignment: After pinning or clipping, double-check that all layers are aligned properly. Adjust as needed to avoid shifting during the cutting process.
Plan Your Cuts
After ensuring your fabric layers are secured, it's time to plan your cuts carefully to achieve the best results. Take a moment to visualize your final project and how each piece fits together. This will help you determine how to position your pattern pieces on the fabric.
Consider the following factors before making your cuts:
| Factor | Considerations |
|---|---|
| Pattern Placement | Align patterns for grain direction |
| Fabric Width | Ensure you'll have enough fabric |
| Cutting Order | Cut larger pieces first, then smaller |
| Notches & Markings | Mark notches clearly for easier assembly |
| Seam Allowances | Account for seam allowances in cuts |
Practice Safety Measures
When cutting fabric, it's crucial to use the right tools and techniques to ensure your safety and the accuracy of your cuts. Neglecting safety measures can lead to accidents and injuries, so follow these guidelines to keep yourself safe:
- Use Sharp Tools: Dull blades are more dangerous as they require extra force. Ensure your rotary cutter or scissors are sharp for clean cuts.
- Cut Away from Your Body: Always position your cutting tool so that you're cutting away from yourself. This minimizes the risk of accidental cuts.
- Employ a Cutting Mat: Invest in a self-healing cutting mat. It protects your surfaces and keeps your blades from dulling quickly.
- Keep Your Workspace Organized: Clutter can lead to accidents. Maintain a clean workspace to avoid tripping over or misplacing tools.
Frequently Asked Questions
What Types of Fabric Are Best for Cutting Multiple Layers?
When you're cutting multiple layers, lightweight cotton, linen, or jersey fabrics work best. They're easier to manage and cut through smoothly. Avoid heavy or thick materials, as they can create complications during the cutting process.
Can I Use Regular Scissors for Multiple Layers?
You can use regular scissors for cutting multiple layers, but it's not ideal. They might struggle to cut cleanly through thicker stacks, leading to uneven edges. Investing in fabric scissors is a better choice for precision.
How Do I Choose the Right Cutting Mat?
Choosing the right cutting mat depends on your projects. Consider size, thickness, and material. A self-healing mat prevents damage and prolongs use. Ensure it's compatible with your tools and provides a stable cutting surface for accuracy.
Is It Necessary to Wash Fabric Before Cutting?
It's not strictly necessary to wash fabric before cutting, but doing so can prevent shrinkage and remove any chemicals. If you prefer a cleaner, softer feel, washing's a great option before you start cutting.
How Can I Avoid Fraying When Cutting Multiple Layers?
To avoid fraying when cutting, you can use pinking shears or apply a fray-check solution along the edges. Make sure your fabric is tightly stacked, and always cut with sharp scissors for clean edges.