When you explore tea staining in crafts, you unlock a unique method to elevate your projects. This technique transforms mundane materials into vintage-inspired masterpieces with warm, earthy tones that invite curiosity. You might find that everyday items like paper and fabric take on a new life, offering texture and depth that can't be achieved through standard methods. However, the possibilities don't stop there—there are specific techniques and materials that can enhance your results even further. So, what's the best way to start experimenting with this eco-friendly art form?
Table of Contents
Key Takeaways
- Tea staining adds vintage charm with warm, earthy tones, enhancing various craft projects like paper, fabric, and woodwork.
- Natural fibers like cotton and linen absorb tea better, resulting in vibrant and rich colors for fabric crafts.
- Layering different tea shades creates depth and texture, allowing for creative expression in mixed media and other projects.
- Utilizing eco-friendly materials, tea staining minimizes chemical waste and repurposes kitchen scraps, promoting sustainable crafting practices.
Understanding Tea Staining
Tea staining is a popular technique that adds a vintage charm to your crafts by mimicking the natural aging process of materials. This method uses brewed tea to create warm, earthy tones, making your projects look beautifully weathered. When you apply a tea stain, you're not just coloring the surface; you're infusing it with character, allowing your materials to tell a story.
To get started, you'll need brewed tea, which can range from black to herbal, depending on the shade you want. The longer you steep the tea, the darker the color will be. Once it's ready, you can either dip your materials directly into the tea or brush it on for more controlled application.
Experimenting with different teas can yield unique results, so don't hesitate to try various types. Keep in mind that the staining process can also be influenced by the material's texture and thickness.
Whether you're enhancing paper, fabric, or wood, tea staining is an accessible way to transform ordinary items into something special. So, grab some tea, roll up your sleeves, and let your creativity flow!
Materials Suitable for Tea Staining
When you're considering tea staining, not all materials work equally well.
Paper crafts can absorb the rich colors beautifully, while certain fabrics take on a warm, vintage look.
Let's explore the best options for both paper and fabric to achieve the perfect tea stain effect.
Paper Craft Applications
Many types of paper can absorb tea stains beautifully, enhancing your craft projects with a warm, vintage look. When you're selecting paper for tea staining, consider the following materials that work exceptionally well:
| Paper Type | Absorption Level | Ideal Projects |
|---|---|---|
| Watercolor Paper | High | Vintage postcards, art prints |
| Cardstock | Moderate | Greeting cards, scrapbook pages |
| Coffee Filters | Low | DIY flowers, layered crafts |
Watercolor paper is perfect if you want deep, rich stains. It soaks up tea beautifully, allowing for stunning gradients. Cardstock, while not as absorbent, still offers a lovely texture and can be used for a variety of projects. If you're looking for something more unconventional, coffee filters can add a unique touch to your crafts, perfect for creating delicate layers.
Experiment with different paper types to discover which ones resonate with your style. Each type brings its own charm, transforming your creations into something truly special. So grab some tea, and let your creativity flow!
Fabric Staining Techniques
Several types of fabric work wonderfully for tea staining, each bringing its own unique texture and effect to your crafting projects.
Natural fibers like cotton, linen, and silk absorb tea beautifully, allowing for rich colors and lovely variations. Cotton is readily available and easy to work with, making it a popular choice for beginners. Linen, with its textured surface, adds depth and character, while silk offers a luxurious, soft finish that enhances the staining process.
You can also experiment with blends, such as cotton-polyester mixes, but keep in mind that synthetic fibers may not absorb the tea as effectively, resulting in a lighter color. If you're looking to achieve a vintage look, lace and muslin are fantastic options as well. They can create delicate patterns and add a whimsical touch to your projects.
Before you dive in, make sure to prewash your fabric to remove any finishes that might hinder absorption.
Once your fabric is ready, you can start staining, adjusting the steeping time to achieve your desired shade. Remember, practice makes perfect, so don't be afraid to test different fabrics and techniques!
Techniques for Effective Staining
To achieve the best results with tea staining, you need to prepare your materials properly.
Layering your stain can create depth and richness, enhancing the overall look of your project.
Let's explore these techniques to elevate your craft.
Preparing Materials Properly
Properly preparing your materials is crucial for achieving an even and beautiful tea stain on your crafts.
Start by choosing the right type of paper or fabric. Natural fibers, like cotton or linen, absorb tea better than synthetics. Once you've selected your material, pre-wash it to remove any coatings or finishes that might resist the stain. Use a mild detergent and avoid fabric softeners, as they can leave residues.
Next, allow your material to dry completely. If you're working with paper, consider lightly dampening it before staining; this helps the tea spread more uniformly.
Prepare your tea by brewing it to the desired strength. A stronger brew will yield a deeper color, while a lighter brew provides subtle hues. After brewing, let the tea cool to room temperature.
Before you begin staining, test the tea on a scrap piece of your material. This way, you can see how the color develops and adjust your technique accordingly.
With your materials prepped and your tea ready, you're set to create stunning, stained crafts that showcase your personal style. Remember, the key to success lies in the details of preparation!
Layering for Depth
Layering different shades of tea can create a rich depth and texture in your crafts, enhancing their visual appeal. Start by choosing a variety of teas, such as black, green, or herbal, each offering unique hues. Brew each tea separately, allowing them to cool while you prepare your materials.
For the first layer, dip your craft in the lightest tea, ensuring even coverage. Allow it to dry completely. Once dry, apply a second layer with a darker tea using a brush or sponge, focusing on areas where you want to create shadows or highlights. This technique adds dimension and interest.
Don't hesitate to experiment with different application methods. For instance, you can use a spray bottle for a soft, misty effect or a sponge for more controlled staining. You can even create patterns by masking certain areas with tape or stencils before applying your tea.
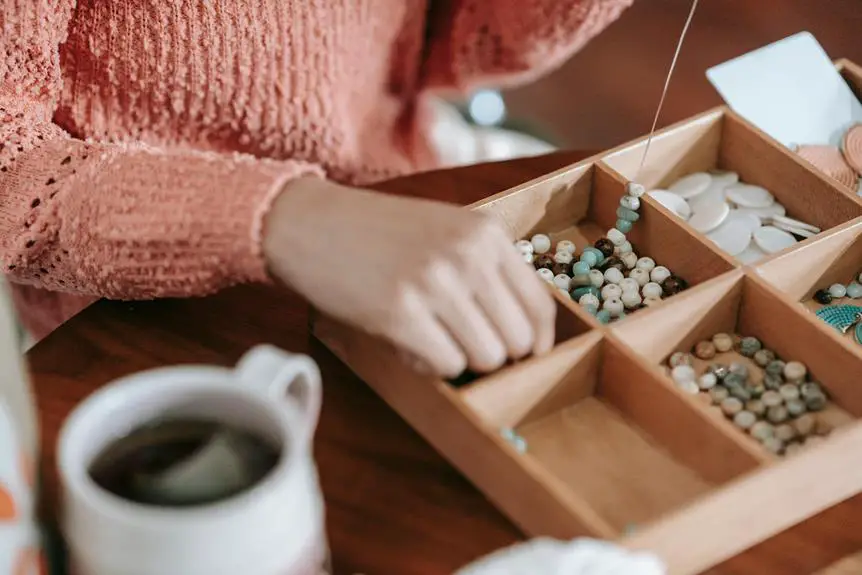
Creative Projects Using Tea Stains
Tea stains can add a unique, vintage charm to your craft projects, transforming ordinary materials into beautiful works of art.
You can start with paper. Simply soak it in brewed tea for an antique look. Create aged letters, invitations, or scrapbook pages that evoke nostalgia.
Next, consider fabric. Dipping cotton or linen in tea creates a lovely, muted tone perfect for quilting or sewing projects. You can even design custom tote bags or table linens that feel warm and inviting.
For a creative twist, try tea staining on wood. Applying tea with a brush can enhance the grain and give your furniture or crafts a rustic vibe.
If you're into mixed media, combine tea-stained elements with other materials like buttons, lace, or ribbons to add depth and texture.
Finally, don't forget about pottery! Use tea to create unique, earthy designs on your clay pieces.
There's no limit to what you can create with tea stains. So grab your supplies, brew some tea, and let your imagination flow as you explore the endless possibilities.
Tips for Perfecting Your Technique
To achieve the best results with your tea staining technique, start by experimenting with different tea varieties to find the perfect shade for your project. Black tea will give you a rich, dark tone, while green tea produces a lighter, more subtle effect. Once you've chosen your tea, brew it strong enough to create a noticeable hue.
Next, consider the material you're staining. Natural fibers like cotton, linen, and silk absorb tea better than synthetic fabrics, so opt for these if you want vibrant results. Before applying the tea, pre-wash your fabric to remove any finishes that could hinder absorption.
When you're ready to stain, use a sponge brush or a spray bottle for even application. If you want a gradient effect, apply more tea to specific areas. Don't forget to experiment with soaking times; a longer soak deepens the color while a quick dip creates a lighter stain.
Eco-Friendly Aspects of Tea Staining
Choosing tea staining for your crafts not only enhances your projects with beautiful tones but also supports eco-friendly practices by utilizing a natural and biodegradable material. Unlike synthetic dyes, tea is derived from plants, meaning it won't harm the environment or your health. When you use tea, you're opting for a sustainable choice that minimizes chemical waste.
Moreover, tea staining allows you to repurpose leftover tea, reducing waste in your kitchen. Instead of tossing out used tea bags, you can transform them into a creative element for your projects. This practice of reusing materials not only saves resources but also inspires creativity in how you approach craft-making.
Additionally, tea staining is a low-impact process that requires minimal energy. You don't need to heat harsh chemicals or use excessive water, which makes it a practical choice for eco-conscious crafters. By choosing tea as your staining medium, you're actively contributing to a greener planet, one craft at a time.
Inspiring Examples From Crafters
Crafters around the world are finding innovative ways to incorporate tea staining into their projects, showcasing the versatility and beauty of this eco-friendly technique. You can easily draw inspiration from their creativity and unique approaches. Whether you're aiming for vintage charm or a natural aesthetic, these ideas can spark your imagination.
- Aged Book Pages: Many crafters tea-stain paper to create antique-looking pages for journals or scrapbooks, adding character to their written memories.
- Fabric Dyeing: Some artists use tea to dye fabrics, resulting in soft, muted tones perfect for quilts or home décor items.
- Greeting Cards: Personalized greeting cards with tea-stained backgrounds become special keepsakes, making heartfelt messages even more meaningful.
- Mixed Media Art: Incorporating tea-stained elements into mixed media projects adds depth and dimension, enhancing the overall visual appeal.
With these inspiring examples, you can start experimenting with tea staining and discover endless possibilities for your own craft projects!
Frequently Asked Questions
Can I Use Flavored Teas for Staining Projects?
Yes, you can use flavored teas for staining projects. They'll add unique hues and scents. Just keep in mind that the flavors might affect the final color, so experiment to see what works best for you.
How Long Does Tea Stain Last on Materials?
Tea stains can last a long time, but their longevity depends on the material and how it's treated. If you seal the stained fabric or paper properly, it could preserve the color for years.
Is Tea Staining Safe for Children's Crafts?
Yes, tea staining is safe for children's crafts. It's non-toxic and natural, so you don't have to worry about harmful chemicals. Just supervise them to ensure they don't stain themselves or the surroundings too much.
Can I Mix Different Tea Types for Unique Colors?
Yes, you can mix different tea types to create unique colors! Experimenting with black, green, or herbal teas will give you varied hues. Just brew them separately and combine for interesting results in your projects. Enjoy!
What Should I Do if My Fabric Feels Stiff After Staining?
If your fabric feels stiff after staining, try rinsing it with cold water and adding a fabric softener. You can also gently iron it on a low setting to help soften the fibers.

- How Does Ring Spun Cotton Affect Garment Fit and Shape Retention? - August 13, 2024
- What Are the Challenges in Producing Ring Spun Cotton? - August 13, 2024
- Is Ring Spun Cotton Suitable for Plus-Size Clothing? - August 13, 2024


