If you want a fun group tie-dye project, try the classic spiral technique—it’s easy to master and creates vibrant swirls everyone will love. The fold and clamp method offers neat, linear patterns and works well for varied skill levels. Ice dyeing brings stunning, natural color blends and adds excitement watching ice melt. For unique looks, Shibori-inspired folds or heart and bullseye designs let each person get creative. Keep going to discover great tips that make your group activity even better.
Table of Contents
Key Takeaways
- Classic Spiral Tie-Dye is simple, visually striking, and easy for groups to create coordinated designs quickly.
- Fold and Clamp Method offers neat, repeatable patterns ideal for group workshops with varied skill levels.
- Ice Dyeing Technique allows multiple participants to add colors simultaneously, creating unique, collaborative results.
- Shibori-Inspired Patterns teach traditional folding and binding, engaging groups in cultural dyeing techniques.
- Heart and Bullseye Designs are fun, easy to master, and perfect for personalized group projects or themed events.
Classic Spiral Tie-Dye
To create a classic spiral tie-dye, you’ll start by laying your fabric flat and pinching the center where you want the spiral to begin.
Twist the fabric around that point, turning it into a tight, flat spiral shape. Secure the spiral with rubber bands, crossing them over the fabric to create pie-like sections.
Twist fabric into a tight spiral and secure with rubber bands, creating pie-like sections for dyeing.
Each segment will hold a different color, so plan your dyes accordingly. Apply the dye in alternating colors between the sections, making sure to saturate the fabric thoroughly but not so much that colors bleed excessively.
Once dyed, wrap the fabric in plastic to keep it moist and let it set for 6-8 hours. After rinsing and drying, your vibrant spiral pattern will be ready to show off.
Fold and Clamp Method
After mastering the classic spiral, you might want to try a different approach that offers more control over your patterns. The fold and clamp method lets you create sharp, geometric designs by folding fabric neatly and securing it with clamps before dyeing. This technique is perfect for group activities because it’s simple and produces striking results.
Here’s a basic folding guide to get you started:
| Step | Action | Visual Result |
|---|---|---|
| 1 | Fold fabric in half | Straight crease |
| 2 | Accordion fold along edge | Fan-like shape |
| 3 | Secure with clamps | Firm, flat bundle |
| 4 | Apply dye on exposed areas | Crisp, linear patterns |
Try different folds and clamp positions to create unique designs every time!
Ice Dyeing Technique
While you might be used to applying dye directly, ice dyeing flips the process by letting melting ice carry the color across your fabric. This technique creates stunning, watercolor-like patterns that are unique every time.
Here’s how you can get started:
- Lay your fabric flat on a rack or tray.
- Pile ice cubes evenly over the fabric.
- Sprinkle powdered dye over the ice, using different colors as you like.
- Let the ice melt completely, allowing the dye to spread naturally.
Ice dyeing is perfect for group activities because it’s simple, fun, and produces unpredictable, vibrant results.
Just be sure to work outdoors or in a well-ventilated area to handle the dye safely and enjoy the creative process!
Shibori-Inspired Patterns
Although Shibori is a traditional Japanese dyeing method, you can easily adapt its folding and binding techniques to create striking patterns with your group.
Start by folding fabric into pleats or triangles, then bind sections tightly with rubber bands, string, or clamps. Each binding restricts dye penetration, resulting in unique, crisp lines and geometric shapes.
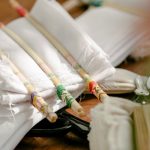
Fold fabric into pleats or triangles, bind tightly to create crisp lines and striking geometric dye patterns.
Encourage your group to experiment with different folds—accordion, triangular, or circular—to see how designs change. Use indigo or other deep dyes to replicate the classic Shibori look.
When everyone’s done, let the fabric dry before unbinding to reveal stunning, organic patterns. This method is perfect for groups because it’s simple, hands-on, and produces beautiful, individual results while celebrating traditional craftsmanship in a fun, collaborative way.
Heart and Bullseye Designs
Two classic tie-dye patterns you can easily create with your group are heart and bullseye designs. Both are simple, visually striking, and perfect for group bonding. Here’s how to get started:
- For a heart design, fold the fabric in half and draw half a heart along the fold. Pinch along the outline and bind tightly with rubber bands.
- For a bullseye, pinch the fabric where you want the center and pull it up into a cone shape. Wrap rubber bands at intervals down the cone.
- Apply dye in sections between bands for vibrant rings or fill heart shapes with contrasting colors.
- Let the fabric set, rinse, and watch your group’s creations come to life with these iconic patterns!
Frequently Asked Questions
What Types of Fabric Work Best for Tie-Dye Projects?
You absolutely need cotton for tie-dye—it soaks up colors like a sponge on steroids! Natural fabrics like rayon and silk work well too. Avoid synthetics; they just won’t give you those vibrant, eye-popping results you want.
How Do You Prepare Fabric Before Dyeing?
You should wash your fabric to remove any sizing or dirt, then keep it damp before dyeing. This helps the dye spread evenly and absorb better, giving you vibrant, long-lasting colors on your project.
What Safety Precautions Should Be Taken During Tie-Dyeing?
You should wear gloves and old clothes to protect your skin and fabrics. Work in a well-ventilated area, avoid inhaling fumes, and cover surfaces to prevent stains. Always follow dye instructions carefully to stay safe.
How Long Should Dyed Items Be Left to Set?
Did you know fabrics retain dye best when left for at least 6 to 8 hours? You should let your dyed items set that long, or even overnight, to guarantee vibrant, long-lasting colors before rinsing or washing.
Can Tie-Dye Colors Be Mixed to Create New Shades?
You can definitely mix tie-dye colors to create new shades, but be careful. Some colors blend well, while others might turn muddy. Experiment with small batches first to find the perfect color combinations you like.
- The Best Tie-Dye Techniques for Group Activities - July 14, 2025
- How to Do Speckle Dyeing With Powder Dyes - July 14, 2025
- The Chevron Tie-Dye Pattern: A Step-by-Step Guide - July 14, 2025

