To set dye in hand-dyed fabrics and prevent bleeding, wash your fabric first to remove any finishes, then soak it in a fixative solution like vinegar or salt for at least 30 minutes. Rinse the fabric immediately after dyeing in cold water until it runs clear, and heat-set the dye with an iron or dryer. Maintain proper dye bath temperatures for effective bonding. Keep exploring to discover more techniques and tips for vibrant, lasting colors.
Key Takeaways
- Wash fabric before dyeing to remove impurities, ensuring better dye adherence and preventing bleeding.
- Soak dyed fabric in a fixative solution, like vinegar or salt, to enhance color bonding.
- Rinse dyed fabric in cold water immediately after dyeing to eliminate excess dye and prevent bleeding.
- Heat-set the dye using an iron or dryer to secure the colors in the fabric.
- Test colorfastness with a small piece of fabric and assess for any color transfer before use.
Importance of Dye Fixation
When you dye fabric, the importance of dye fixation can’t be overstated. Proper fixation guarantees that the vibrant colors you’ve chosen stay put, preventing them from bleeding or fading over time.
Without effective dye fixation, your hard work can quickly become a washout, literally. You’ll want to use the right fixation method to bond the dye molecules to the fabric fibers, creating lasting results.
Different dyes require different fixatives, so knowing which one to use is key. Remember, a well-fixed dye not only enhances the fabric’s appearance but also its durability.
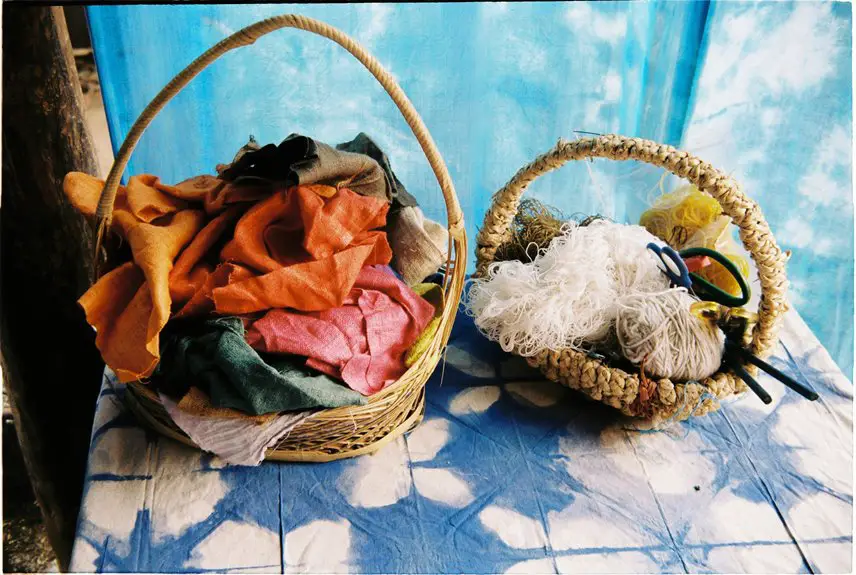
Preparation of Fabric for Dyeing
Before you start the dyeing process, preparing your fabric is key to achieving the best results.
First, wash your fabric to remove any dirt, oils, or finishes that might interfere with dye absorption. Use a mild detergent and rinse thoroughly.
Wash your fabric with mild detergent to eliminate dirt and oils for optimal dye absorption. Rinse thoroughly.
Next, consider soaking your fabric in a fixative solution, like salt or vinegar, depending on the type of fabric you’re using. This step helps improve dye adherence.
After soaking, rinse the fabric again and let it dry completely.
If you’re using natural fibers, you might want to pre-shrink your fabric by washing it in hot water.
Finally, iron your fabric to guarantee a smooth surface, which will help create even dye application.
With your fabric prepared, you’re ready to start dyeing!
Choosing the Right Dye
When choosing the right dye for your hand-dyed fabrics, it’s crucial to weigh the benefits of natural versus synthetic dyes.
You’ll want to reflect on how colorfastness affects the longevity of your project.
Making an informed choice here can greatly impact the final look and durability of your fabric.
Natural vs. Synthetic Dyes
Choosing between natural and synthetic dyes can greatly impact the outcome of your hand-dyed fabrics, especially if you have specific color and durability requirements in mind.
Natural dyes, derived from plants, insects, and minerals, often provide subtle, rich shades that can enhance the beauty of your fabric. However, they can be less predictable and may require more time and effort to set properly.
On the other hand, synthetic dyes offer a wider range of vibrant colors and more consistent results. They’re often easier to use and set, making them a go-to for many projects.
Ultimately, your choice depends on your aesthetic goals, the intended use of the fabric, and your willingness to experiment with the dyeing process.
Colorfastness Considerations
As you determine the right dye for your hand-dyed fabrics, colorfastness should be at the forefront of your decision-making process. Not all dyes are created equal; some may bleed or fade over time, ruining your hard work.
When choosing a dye, consider whether it’s designed for the fabric type and intended use. For example, if you’re dyeing cotton for garments, opt for a dye known for its washfastness. Test a small fabric swatch first to see how it holds up against water and light exposure.
Techniques for Effective Dye Setting
To guarantee your hand-dyed fabrics maintain their vibrant colors, employing effective dye-setting techniques is essential.
First, rinse your fabric in cold water immediately after dyeing to remove excess dye. Then, use a fixative like vinegar or salt, depending on your dye type, to help bond the dye to the fibers. Soak your fabric in a solution of water and fixative for at least 30 minutes.
Afterward, rinse again in cold water until it runs clear. Heat-setting is another option; simply iron the dry fabric on a low setting or place it in a dryer for a short cycle.
Always test a small piece first to verify compatibility. By following these steps, you’ll enjoy long-lasting, vibrant colors in your fabrics.
Managing Dye Bath Conditions
To achieve the best results in your dyeing process, you need to manage your dye bath conditions carefully.
Focus on maintaining ideal temperature control, adjusting dye concentration as needed, and selecting the right container for your fabrics.
These factors play an essential role in ensuring vibrant, long-lasting colors.
Optimal Temperature Control
While you prepare your dye bath, maintaining the right temperature is essential for achieving vibrant and long-lasting colors in hand-dyed fabrics. The ideal temperature often depends on the type of dye you’re using, but generally, higher temperatures help the dye bond more effectively with the fibers.
Keep your dye bath between 140°F and 200°F for most dyes. You can use a thermometer to monitor the temperature closely. If it gets too hot, it can cause the dye to lose intensity; too cool, and the dye won’t set properly.
Stir the dye bath regularly for even temperature distribution. Remember, consistent temperature control not only enhances color saturation but also minimizes the risk of dye bleeding later on.
Adjusting Dye Concentration
Adjusting the dye concentration in your dye bath can greatly impact the final color of your hand-dyed fabrics.
If you want a bolder, more intense hue, increase the dye concentration. Conversely, for softer, pastel shades, dilute the dye with more water.
Pay attention to the fabric type, as some materials absorb dye differently; natural fibers typically take on color more vibrantly than synthetics.
Always test a small swatch before committing to the entire fabric piece.
Remember, factors like dye type and the duration of immersion can also affect the final outcome.
By fine-tuning the dye concentration, you’ll gain better control over your results, leading to beautiful, consistent colors in your projects.
Happy dyeing!
Proper Container Selection
Choosing the right container for your dye bath is essential for achieving the best results in your hand-dyed fabrics.
Opt for a non-reactive material, like stainless steel or glass, to prevent unwanted chemical reactions that could affect your dye. Avoid plastic containers, as they can absorb dye and lead to contamination in future projects.
Confirm the container is large enough to allow your fabric to move freely, promoting even dye distribution. Additionally, consider the container’s heat resistance if you’re using hot dye baths.
Finally, make certain it’s easy to clean, as leftover dye particles can affect future dyeing sessions. By selecting the right container, you’ll set the stage for vibrant, long-lasting colors in your fabrics.
Enhancing Colorfastness With Helper Substances
To guarantee that your hand-dyed fabrics maintain their vibrant colors, incorporating helper substances can greatly enhance their colorfastness. These substances, like vinegar or salt, help fix the dye in the fabric, ensuring it doesn’t bleed during washing.
Here’s a quick reference table for common helper substances and their uses:
| Helper Substance | Purpose | Suggested Usage |
|---|---|---|
| Vinegar | Enhances dye fixation | Add 1 cup per gallon of water |
| Salt | Sets dye in cotton | Use 1 cup in dye bath |
| Baking Soda | Brightens colors | Mix 1-2 tablespoons in wash |
| Fixative | Prevents fading | Follow package instructions |
Experiment with these to see which works best for your dyed fabrics!
Rinsing and Drying Procedures
Once you’ve finished dyeing your fabric, rinsing it properly is crucial to set the colors and prevent bleeding. Start by running cold water over the fabric until the water runs clear. This helps remove excess dye and guarantees the colors bond effectively.
Rinsing dyed fabric in cold water until it runs clear is essential for setting colors and preventing bleeding.
Avoid using hot water, as it can cause the dye to bleed. If you’ve used a fixer, follow the manufacturer’s instructions for rinsing duration.
After rinsing, gently squeeze out the water without wringing or twisting, which can damage the fibers. Lay the fabric flat on a clean towel to absorb moisture, then hang it to air dry away from direct sunlight.
This method helps maintain the vibrancy of your colors while preventing any unwanted bleeding.
Testing for Colorfastness
After you’ve rinsed and dried your hand-dyed fabric, it’s time to confirm the colors are stable. Testing for colorfastness is essential to avoid surprises later. Here’s a simple method to check:
- Take a small piece of the fabric and dampen it with water.
- Place it between two pieces of white fabric or paper.
- Press with a warm iron for a few seconds.
- Check for any color transfer.
Use the following table to guide your testing:
| Test Method | Description |
|---|---|
| Water Test | Dampen and press on white fabric |
| Rubbing Test | Rub with a damp cloth |
| Sunlight Test | Expose to sunlight for a few hours |
| Heat Test | Iron with a white cloth in between |
This confirms your colors will remain vibrant!
Sustainable Dyeing Practices
While hand-dyeing can be a creative outlet, it’s important to contemplate sustainable practices that minimize environmental impact. Start by choosing natural dyes derived from plants, fruits, and minerals. These options aren’t only eco-friendly but also often safer for your health.
When it comes to fabrics, opt for organic materials that don’t use harmful chemicals during production. You can also reduce water usage by dyeing in smaller batches or using water-efficient techniques.
Additionally, consider recycling and reusing your dye solutions to lessen waste. Finally, always dispose of any leftover dyes responsibly, avoiding traditional methods that can harm the environment.
Frequently Asked Questions
How Long Should I Let the Dye Set Before Rinsing?
You should let the dye set for at least 30 minutes to guarantee it adheres properly. This time allows the colors to bond with the fibers, minimizing the risk of bleeding when you rinse.
Can I Use a Washing Machine for Dye Setting?
You can use a washing machine for dye setting, but it’s essential to guarantee the cycle’s gentle. Too much agitation might lead to uneven results. Always test a small piece first to avoid surprises.
What Should I Do if the Color Is Too Light?
If the color’s too light, you can try dyeing it again. Mix a stronger dye solution and reapply it carefully. Just be sure to test on a small area first to avoid unexpected results.
Is It Safe to Mix Different Dye Types?
Mixing different dye types can be tricky, so you should test a small sample first, follow instructions closely, and monitor results. If you’re not sure, stick to one type for consistent, vibrant colors.
How Can I Prevent Color Fading Over Time?
To prevent color fading over time, you should store items away from direct sunlight, wash them in cold water, use a gentle detergent, and avoid high heat when drying. These steps help maintain vibrant colors.