When repairing velvet fabric, first assess the type and damage—tears, burns, or crushed pile need different care. For small tears, use delicate hand stitches or fabric glue designed for soft textiles. Larger holes may require matching patches sewn with tight, neat stitches. Burns call for gentle cleaning before repair. Always prepare your workspace well and keep materials handy. Proper care after repair helps maintain velvet’s lush look. Explore these steps to restore your velvet effectively.
Table of Contents
Key Takeaways
- Use delicate hand stitching like ladder or slip stitch to mend small tears for a nearly invisible repair on velvet fabric.
- Treat burns by gently blotting with a damp cloth and mild detergent before rinsing, then carefully trim damaged fibers if necessary.
- For larger tears, trim frayed edges and sew matching velvet patches with tight, small stitches to blend with the original fabric.
- Select fabric adhesives designed for soft, flexible velvet and test on a hidden area to avoid discoloration or stiffness.
- Maintain repaired velvet by avoiding sunlight, brushing pile lightly, and spot cleaning gently to prolong fabric softness and appearance.
Understanding the Different Types of Velvet
Before you begin repairing velvet fabric, it’s important to understand the different types of velvet you might encounter. Velvet isn’t just one fabric; it varies by material and weave.
You’ll find silk velvet, which feels luxurious and delicate, requiring gentle handling. Cotton velvet is sturdier but still soft, making it a bit easier to work with. Polyester velvet is more durable and stain-resistant, so repairs might last longer.
Additionally, velvet can be cut pile or uncut pile, affecting how the fibers lie and how damage shows. Knowing the fiber content and pile type helps you choose the right repair method and tools.
Identifying Common Velvet Damages
Velvet fabric often shows five common types of damage that you should learn to spot early: crushing, matting, tears, burns, and stains.
Crushing happens when the pile gets flattened, making the fabric lose its soft texture. Matting occurs when fibers stick together due to friction or moisture, leaving dull patches.
Tears are straightforward—rips or holes that break the fabric’s surface. Burns usually create shiny, stiff spots where heat has damaged the fibers.
Stains can range from watermarks to oily spots, altering velvet’s appearance permanently if untreated. By recognizing these damages quickly, you can address them before they worsen.
Keep a close eye on velvet items, especially in high-use areas, to maintain their luxurious look and feel.
Preparing Your Workspace and Materials
Once you’ve identified the type of damage, setting up your workspace properly can make the repair process smoother and more effective.
Choose a clean, well-lit area with a flat surface where you can comfortably spread out your velvet fabric. Gather essential tools like sharp scissors, fine needles, matching thread, and a small iron or steamer. You’ll also need fabric glue or adhesive for certain repairs, along with a soft cloth or pressing cloth to protect the velvet pile.
Keep all materials organized and within reach to avoid interruptions. Make sure your hands are clean and dry to prevent staining the delicate fabric.
Techniques for Repairing Small Tears in Velvet
When you spot a small tear in your velvet, start by evaluating how severe it’s to choose the best repair method.
You’ll want to use delicate stitching techniques that blend with the fabric’s texture or, for quicker fixes, consider fabric adhesives designed for velvet.
These approaches help restore the fabric without damaging its soft, plush surface.
Assessing Tear Severity
Small tears in velvet can often be fixed with the right approach, but you need to carefully evaluate their severity first.
Begin by examining the tear’s length and depth—small surface snags might only need gentle realignment, while deeper cuts could require more intensive repair.
Check if the fabric’s pile is disrupted or missing around the tear; this affects how well it will blend after repair.
Also, note if the tear edges fray easily or stay intact, as this influences your repair technique.
Finally, consider the tear’s location—stressed areas like seams might worsen over time without proper handling.
Stitching Methods for Velvet
After evaluating the severity of the tear, you can choose the best stitching method to repair your velvet fabric. For small tears, hand stitching is ideal because it offers control and precision. Use a fine needle and matching thread to keep the repair invisible. A ladder stitch or slip stitch works well to close the tear without disrupting the pile. Here’s a quick guide:
| Stitch Type | Best For | Tips |
|---|---|---|
| Ladder Stitch | Straight tears | Keep stitches even, tight |
| Slip Stitch | Curved or irregular | Hide stitches inside fabric |
| Running Stitch | Temporary holds | Use sparingly, not for final |
| Backstitch | Reinforcement | Strong, avoid bulkiness |
Pick the stitch that fits your tear type to restore your velvet smoothly and invisibly.
Using Fabric Adhesives
Although stitching offers a reliable way to fix tears in velvet, fabric adhesives provide a quick and less noticeable alternative for small repairs.
To use fabric adhesive, first clean the damaged area gently, ensuring it’s free of dirt and oils. Apply a thin layer of adhesive to the tear’s edges with a fine brush or toothpick.
Press the edges together carefully, aligning the velvet’s nap for a seamless look. Use a small weight or clamp to hold the fabric in place while the adhesive dries, usually for a few hours.
Avoid excess glue to prevent stiff patches. This method works best for minor tears and won’t require sewing skills, letting you restore your velvet quickly without altering its luxurious texture.
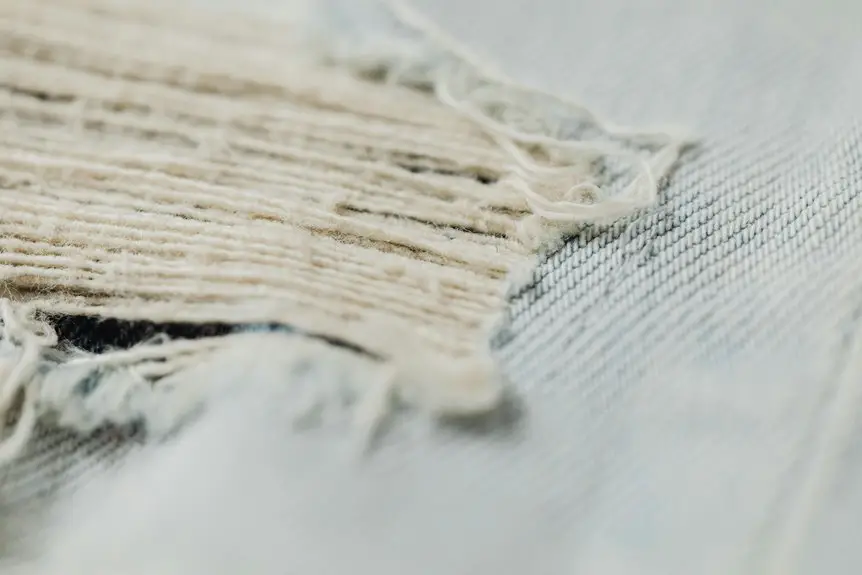
How to Fix Larger Tears and Holes
When you encounter larger tears or holes in velvet fabric, a careful approach is essential to restore its smooth texture and rich appearance.
Start by evaluating the damage and gathering matching velvet patches or fabric scraps. Then, follow these steps:
- Prepare the Area: Trim any frayed edges and clean the fabric to guarantee proper adhesion and stitching.
- Attach the Patch: Position the patch underneath the tear, aligning the pile direction. Use fabric adhesive or pins to hold it in place.
- Sew Carefully: Use a fine needle and matching thread to stitch the edges with small, tight stitches, blending them into the surrounding fabric.
This method helps maintain velvet’s luxurious look while effectively repairing larger damages.
Removing Burns and Scorch Marks From Velvet
If you notice burns or scorch marks on your velvet, you’ll want to act quickly to minimize damage and restore its appearance.
Start by gently blotting the affected area with a clean, damp cloth to cool the fabric and prevent further scorching. Avoid rubbing, as this can spread the damage.
Next, apply a small amount of mild detergent mixed with water to a soft cloth and dab the burn spot carefully. Rinse with a clean damp cloth to remove soap residue.
For stubborn scorch marks, you can try a vinegar and water solution (equal parts), but test it on a hidden area first.
Always let velvet air dry away from direct heat or sunlight. If the damage is severe, consulting a professional cleaner is your best bet to avoid worsening the burn.
Restoring Velvet Pile After Damage
Since the pile gives velvet its distinctive texture and softness, restoring it after damage is essential to bring back the fabric’s luxurious look.
When the pile gets crushed or flattened, you can revive it with a few simple steps. First, gently brush the pile with a soft-bristled brush to lift the fibers.
Second, use steam from a handheld steamer or an iron held at a distance to relax the fibers; be careful not to wet the fabric.
Third, let the velvet air dry completely in a well-ventilated area.
These steps help rebuild the pile’s height and softness, making the fabric look fresh again.
With patience, you’ll restore your velvet’s signature plush feel and appearance.
Using Fabric Glue and Adhesives Safely on Velvet
When you choose fabric glue for velvet, make sure it’s flexible and designed for delicate materials to avoid stiffening or damage.
Apply the adhesive sparingly with a fine-tip applicator, focusing only on the edges that need bonding.
Let it dry completely without pressing to maintain the velvet’s soft texture.
Choosing Suitable Fabric Adhesives
Although choosing the right adhesive might seem straightforward, selecting fabric glue that won’t damage velvet requires careful attention.
Velvet’s delicate texture and pile can be easily affected by harsh chemicals or thick glues, so you need to pick adhesives designed specifically for soft fabrics.
Here are three key factors to take into account:
- Flexibility: Choose a glue that remains flexible after drying to maintain velvet’s softness and prevent stiff patches.
- Non-yellowing: Verify the adhesive doesn’t yellow or discolor over time, preserving the fabric’s rich color.
- Clear drying: Opt for a glue that dries transparent to avoid visible residue or stains on the velvet surface.
Application Techniques for Velvet
Applying fabric glue to velvet requires careful steps to preserve its texture and appearance. First, test the adhesive on a hidden area to verify it won’t discolor or stiffen the fabric.
Use a fine-tip applicator to apply glue sparingly along the tear or damaged area. Avoid excess glue, which can seep through and harden, ruining the velvet’s softness.
Press the edges gently together and place a clean, heavy object on top to maintain contact while drying. Work in a well-ventilated area and follow the glue manufacturer’s drying time recommendations.
After the glue sets, brush the velvet gently with a soft cloth or velvet brush to restore its pile. Taking these precautions helps you repair velvet without compromising its luxurious feel.
When to Seek Professional Velvet Repair Services
How do you know if a velvet repair is beyond a simple DIY fix? If the damage is extensive or involves specialized restoration, it’s best to call in a professional.
Here are three signs you should seek expert help:
- Large Tears or Holes: If the tear is bigger than a couple of inches, professionals have the tools and skills to reweave or patch without ruining the fabric’s texture.
- Burn Marks or Severe Scorching: DIY fixes can’t fully restore burnt velvet; experts use advanced techniques to minimize visible damage.
- Antique or High-Value Velvet: When the fabric has sentimental or monetary value, professionals guarantee the repair preserves its integrity and appearance.
Knowing when to get professional help saves time and prevents worsening the damage.
Tips for Preventing Future Velvet Damage
To keep your velvet looking its best, you’ll want to use proper cleaning techniques that avoid harsh chemicals or excessive moisture.
Handle your velvet items gently and store them in a way that prevents crushing or stretching the fabric.
Taking these simple steps can help protect your velvet from future damage.
Proper Cleaning Techniques
Cleaning velvet properly takes careful attention to detail and the right techniques to keep the fabric looking its best.
You want to avoid harsh scrubbing or soaking, which can damage the delicate fibers. Instead, follow these steps:
- Spot Clean Carefully: Use a soft cloth dampened with cold water and mild detergent. Dab gently—don’t rub—to lift stains without crushing the pile.
- Use a Soft Brush: After drying, lightly brush the velvet in the direction of the nap to restore its texture.
- Air Dry Flat: Always let velvet air dry flat to prevent stretching or distortion.
Protective Handling Practices
Although velvet is a luxurious and delicate fabric, you can extend its life considerably by handling it with care. Always avoid rough surfaces and sharp objects that can snag or tear the fibers.
When moving or storing velvet items, support the entire piece to prevent stress on seams. Keep velvet away from direct sunlight to prevent fading, and avoid excessive moisture that can damage the fabric’s pile.
Use gentle brushes or a lint roller to clean surface dust without crushing the nap. When wearing velvet clothing, be mindful of jewelry or accessories that might catch on the fabric.
Caring for Repaired Velvet to Maintain Its Appearance
Once you’ve repaired your velvet, you’ll want to handle it gently to keep its texture and look intact. Proper care guarantees your efforts last and the fabric stays beautiful.
- Avoid direct sunlight: Sun exposure can fade colors and weaken fibers, so keep your velvet away from windows or use curtains to block harsh rays.
- Use a soft brush: Regularly brush the pile lightly with a velvet brush or soft cloth to maintain its plushness and remove dust without damaging repairs.
- Spot clean carefully: If you need to clean, dab gently with a damp cloth and mild detergent, avoiding soaking or rubbing to protect the repaired area and fabric integrity.
Frequently Asked Questions
Can Velvet Be Machine Washed After Repairs?
You shouldn’t machine wash velvet after repairs, as it can damage the fabric or stitching. Instead, spot clean gently or opt for professional dry cleaning to keep the texture and repairs intact without causing further harm.
What Is the Best Type of Needle for Sewing Velvet?
You’ll want to use a sharp or microtex needle when sewing velvet. These needles pierce the dense fabric cleanly, preventing snags or pulls. Always choose a fine size, like 70/10, for the best results.
How Long Does It Take for Fabric Glue to Dry on Velvet?
Fabric glue usually takes about 20 to 30 minutes to dry on velvet, but you should wait at least 24 hours for a full cure. Don’t rush; it’ll guarantee a strong, lasting bond on your fabric.
Are There Eco-Friendly Adhesives Suitable for Velvet Repair?
While synthetic glues often harm the planet, you can choose eco-friendly adhesives like natural rubber or plant-based glues. They work gently on velvet, letting you repair without sacrificing environmental care or fabric quality.
Can Damaged Velvet Be Repurposed for Other Crafts?
You can absolutely repurpose damaged velvet for other crafts. Cut it into patches, use it for appliqués, create jewelry, or decorate accessories. It’s a great way to reduce waste and add unique texture to your projects.

- The Ultimate Guide to Using Scrims in Film and Video Production - June 26, 2025
- A Manufacturer’s Guide to Polyester and Fiberglass Scrim Suppliers - June 26, 2025
- The Engineering Behind Reinforcement Laid Scrims in Modern Composites - June 26, 2025


