You can easily create vibrant tie-dye pumpkins by using fabric dye and rubber bands to section off your cleaned, dry pumpkin. Twist the pumpkin, secure it with bands, and apply dye with squeeze bottles, blending colors freely. Let it sit wrapped for a few hours to absorb the dye. Afterward, pick a cool spot to display it, and consider a clear sealant to preserve your design. Keep going, and you’ll uncover creative color ideas and preservation tips that really bring your craft to life.
Key Takeaways
- Use a smooth pumpkin, clean and dry it thoroughly for optimal dye absorption.
- Section the pumpkin with rubber bands to create distinct tie-dye patterns.
- Apply fabric dye or food coloring with squeeze bottles in vibrant color combinations.
- Let the dyed pumpkin sit wrapped for 4-6 hours to fully absorb the colors.
- Display in a shaded area and use sealant spray to preserve the pumpkin’s colors and longevity.
Supplies Needed for Pumpkin Tie-Dye
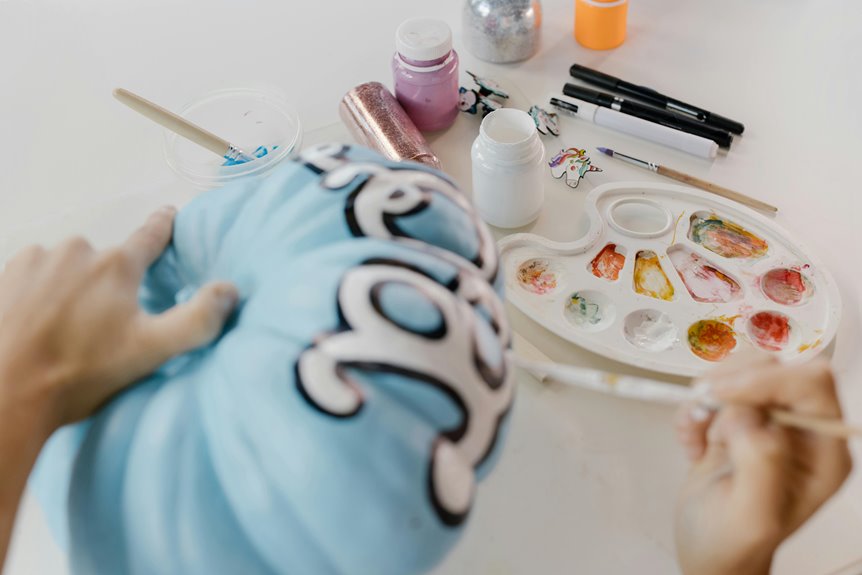
Before you begin your pumpkin tie-dye project, gather all the essential supplies to secure a smooth process. You’ll need a pumpkin—choose one with a smooth surface for the best results.
Start your pumpkin tie-dye by gathering all the essential supplies for an easy, creative experience.
Get fabric dye or liquid food coloring in various colors to create vibrant patterns. Grab rubber bands to section off parts of the pumpkin, which helps form classic tie-dye designs.
Don’t forget disposable gloves to protect your hands from stains. You’ll also want plastic squeeze bottles or spray bottles for easy dye application.
Lay down a plastic tablecloth or newspaper to keep your workspace clean. Finally, keep some paper towels or old rags nearby for quick cleanups.
Having these supplies ready secures you can focus on creating your colorful masterpiece without interruptions.
Preparing Your Pumpkin for Tie-Dye
Once you have your supplies ready, you’ll want to clean your pumpkin thoroughly to guarantee the dye adheres properly. Start by wiping off dirt with a damp cloth, then rinse it under cool water. Dry the pumpkin completely to prevent the dye from running. If your pumpkin has a glossy finish, lightly sanding it can help the dye soak in better.
Here’s a quick guide to prepping your pumpkin:
| Task | Tools Needed | Purpose |
|---|---|---|
| Cleaning | Damp cloth, water | Remove dirt and debris |
| Drying | Towel or air dry | Make sure no moisture remains |
| Sanding (opt) | Fine sandpaper | Improve dye absorption |
Following these steps guarantees your pumpkin is ready for vibrant tie-dye results.
Step-by-Step Guide to Tie-Dyeing Your Pumpkin
With your pumpkin prepped and ready, you can start applying the dye to create your unique tie-dye design. Follow these steps to bring your pumpkin to life:
- Twist and Bind: Pinch your pumpkin gently and twist it into sections, securing each with rubber bands. This creates the classic tie-dye pattern areas.
- Apply Dye: Use squeeze bottles to carefully apply different colors to each section. Don’t worry about precision; the dyes will blend beautifully.
- Let It Set: Place your pumpkin in a plastic bag or wrap it loosely with plastic wrap. Let it sit for 4-6 hours to allow the dye to soak in thoroughly.
Once done, remove the bands and admire your vibrant, one-of-a-kind tie-dye pumpkin!
Creative Color Combinations and Patterns
Colors and patterns bring your tie-dye pumpkin to life, turning it into a vibrant work of art. You can mix classic Halloween hues or experiment with unexpected shades for a unique look. Consider combining warm oranges with deep purples or bright greens. Patterns like spirals, stripes, or blotches add dynamic textures that make your pumpkin stand out. Here’s a quick guide to inspire your creations:
| Color Combination | Pattern Style | Effect |
|---|---|---|
| Orange & Black | Spiral | Classic Halloween vibe |
| Purple & Lime Green | Stripes | Bold and energetic |
| Yellow, Orange & Red | Blotches | Warm autumn feel |
| Blue & White | Tie-dye bursts | Cool and unexpected |
| Pink & Purple | Swirls | Fun and whimsical |
Play around with these combos and patterns to make your pumpkin truly your own!
Tips for Displaying and Preserving Your Tie-Dye Pumpkin
Although your tie-dye pumpkin looks fantastic fresh, you’ll want to display it thoughtfully to keep it vibrant for as long as possible.
Start by choosing a cool, shaded spot to avoid direct sunlight, which can fade the colors quickly. Next, consider placing your pumpkin on a moisture-resistant surface to prevent mold from developing underneath.
Place your tie-dye pumpkin in a cool, shaded spot on a moisture-resistant surface to keep colors vibrant and prevent mold.
Finally, protect it from harsh weather if displayed outdoors by using a clear sealant spray; this adds a protective layer without dulling your colors.
By following these simple steps, you’ll extend the life of your colorful creation and enjoy it throughout the season.
Frequently Asked Questions
Can I Use Real Pumpkins for Tie-Dyeing, or Are Artificial Ones Better?
You can use real pumpkins for tie-dyeing, but artificial ones might be easier to handle and last longer. Real pumpkins can get messy and spoil, so choose based on how long you want your craft to last.
How Long Does the Tie-Dye Effect Typically Last on a Pumpkin?
You’ll find the tie-dye effect lasts about one to two weeks on a real pumpkin, depending on conditions. Artificial pumpkins keep the colors vibrant indefinitely since they don’t decay or fade like real ones do.
Is the Tie-Dye Technique Safe for Children to Try?
Imagine the vibrant swirls as colorful leaves dancing in autumn wind. You’ll find the tie-dye technique safe for kids if you use non-toxic dyes and supervise, turning creativity into a joyful, mess-friendly adventure they’ll love.
What Should I Do if the Dye Stains My Hands or Clothes?
If dye stains your hands, wash them quickly with soap and warm water. For clothes, act fast—rinse with cold water, then soak in a mix of detergent and water. Avoid heat until the stain’s gone.
Can I Use Tie-Dye Pumpkins as Food After Decorating?
You shouldn’t eat tie-dye pumpkins since the dyes and chemicals aren’t food-safe. Instead, use regular pumpkins for cooking, and keep your decorated ones just for display to avoid any health risks or contamination.