When you're working on embroidery, mastering pinpoint techniques is crucial for a polished finish. You need to visualize your design and break it into sections to boost accuracy. Selecting the right tools, like fabric marking pens and rulers, can make a significant difference. It's also vital to prepare your fabric correctly, but that's just the beginning. Before you proceed, consider the common pitfalls that could derail your project. Understanding these factors can elevate your work, but there's more to explore about ensuring your embroidery meets the highest standards.
Table of Contents
Understanding Pinpoint Techniques
When you master pinpoint techniques, you'll enhance your embroidery skills and achieve cleaner, more precise designs. Pinpointing involves accurately marking your fabric to ensure every stitch lands exactly where you want it.
Start by visualizing your design; break it down into manageable sections. This will help you focus on one area at a time, reducing the chance of errors.
Next, practice your marking methods. You can use fabric pens, tailor's chalk, or even sticky notes to outline your design. Make sure your marks are clear but easy to remove. You don't want any residue left on your finished piece.
As you begin stitching, keep your fabric taut. This will prevent puckering and ensure your stitches remain even and neat. Remember to use the right tension in your thread; if it's too loose or too tight, it can affect your precision.
Essential Tools for Pinpointing
To achieve precise markings for your embroidery, having the right tools on hand makes all the difference. The right tools not only streamline your process but also enhance the accuracy of your work.
Here are three essential items you should always keep in your embroidery toolkit:
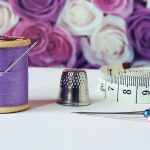
- Fabric Marking Pens: These pens come in various colors and types, including disappearing ink and water-soluble options. Choose one that best suits your fabric to ensure your markings are clear and easy to remove.
- Rulers or Measuring Tapes: Accurate measurements are crucial in embroidery. A good ruler or measuring tape helps you align designs and maintain consistent spacing, ensuring your finished piece looks professional.
- Tailor's Chalk or Pencils: For more permanent markings, tailor's chalk or pencils are great options. They allow you to sketch designs directly onto your fabric, giving you more control over placement and sizing.
With these tools, you'll be well-equipped to create precise, beautiful embroidery. Remember, investing in quality tools pays off in the end, making your embroidery projects smoother and more enjoyable.
Preparing Your Fabric
When you're preparing your fabric for embroidery, choosing the right material is crucial for achieving the best results.
You should also consider pre-washing techniques to prevent any surprises later on.
Let's explore how these steps can set you up for success.
Selecting Suitable Fabric
Choosing the right fabric is crucial for achieving beautiful embroidery results, as it directly impacts the design's appearance and durability. You'll want to consider a few key factors when selecting your fabric to ensure a successful project.
- Fabric Weight: Opt for a fabric weight that complements your design. Heavier fabrics, like canvas, work well for bold designs, while lighter fabrics, like cotton, are better for intricate patterns.
- Fabric Type: Different fabrics react differently to embroidery. Natural fibers, such as cotton and linen, usually hold stitches better than synthetic ones. However, blends can provide a good balance of durability and flexibility.
- Fabric Texture: Smooth, tightly woven fabrics allow for clearer, more defined stitches, while textured or loosely woven fabrics can cause distortion. Always test a small swatch to see how your embroidery interacts with the fabric.
Pre-Washing Techniques
Pre-washing your fabric is essential for removing any chemicals or finishes that could interfere with your embroidery. This step helps ensure that your thread adheres properly and that your design remains vibrant after washing. To get started, check the fabric care label for washing instructions.
For most fabrics, you can machine wash them in cold water with a mild detergent. If you're working with delicate materials, consider hand washing to prevent damage. Avoid using fabric softeners, as they can leave residues that hinder embroidery.
After washing, dry your fabric according to the care instructions. If you're using cotton or linen, you might want to tumble dry on low to help minimize shrinkage. Iron your fabric if needed, ensuring it's smooth and wrinkle-free.
Once your fabric is pre-washed and dried, you can cut it to your desired size. Remember to test a small swatch before starting your project, especially if you're using dyes or other treatments.
Techniques for Accurate Placement
To achieve accurate placement in embroidery, you'll want to measure carefully and mark your fabric precisely. This ensures that your design is exactly where you want it, leading to professional-looking results.
Here are three techniques you can use to improve your placement accuracy:
- Use a Measuring Tape: Begin by measuring the area where you'll be embroidering. Mark the center point and any reference points that'll guide your design placement.
- Create Guidelines: Lightly draw guidelines on your fabric with fabric chalk or a disappearing ink pen. These lines will serve as a visual guide, helping you align your design accurately.
- Pin or Baste the Fabric: Before you start stitching, pin or baste your fabric to secure it in place. This prevents shifting during the embroidery process, ensuring your design stays aligned with your guidelines.
Common Mistakes to Avoid
Even with careful placement techniques, it's easy to make mistakes that can affect the quality of your embroidery project. One common pitfall isn't stabilizing your fabric properly. Skipping this step can lead to puckering or distortion, ruining your design. Always choose the right stabilizer based on the fabric type and the complexity of your embroidery.
Another mistake is miscalculating your design placement. You might think you've centered it perfectly, but a quick check can save you from a costly error. Always measure and double-check before you start stitching.
Don't forget to consider needle and thread compatibility. Using the wrong needle can snag or break your thread, while using the wrong thread type can affect the final appearance.
Lastly, avoid rushing through the setup process. Taking your time to ensure everything is in place can prevent issues down the line. Remember, patience is key. By steering clear of these common mistakes, you'll set yourself up for success and achieve the high-quality results you desire in your embroidery projects.
Tips for Final Touches
When you're wrapping up your embroidery project, it's crucial to focus on the final touches that can make a big difference.
Adjusting the thread tension and applying finishing stitch techniques can elevate your work to a professional level.
Let's explore these essential tips to ensure your project looks its best.
Thread Tension Adjustment
Adjusting thread tension ensures your embroidery looks polished and professional, so pay close attention during the final touches. Proper tension not only affects the design's appearance but also its durability. If the tension's too tight, you'll see puckering or thread breakage; too loose, and your stitches may look sloppy.
Here are three tips for effectively adjusting thread tension:
- Test Stitches: Always start with test stitches on a scrap piece of the same fabric. This will help you identify if adjustments are needed before working on your final piece.
- Monitor Upper and Bobbin Tension: Don't forget to check both upper and bobbin thread tension. If one is off, it can affect the entire design. Adjust incrementally, making small changes until you achieve the desired look.
- Use the Right Thread Type: Different threads have different tension needs. Make sure you're using the right type for your project, as this can significantly impact the final result.
Finishing Stitch Techniques
Finishing stitch techniques play a crucial role in giving your embroidery a polished and professional look. To achieve that, start by trimming any excess thread tails carefully. Use sharp scissors to avoid fraying, making sure you cut as close to the fabric as possible without snipping the design.
Next, consider adding a border stitch. This not only frames your work beautifully but also reinforces the edges, preventing any potential unraveling. A simple running stitch or a decorative scallop can elevate the overall aesthetic.
Don't forget about blocking your piece if it's fabric-based. Lightly steaming or pressing your embroidery can help it lay flat and remove any creases. Just be cautious with heat settings, especially on delicate fabrics.
Frequently Asked Questions
Can I Use Pinpoint Techniques on All Fabric Types?
You can use pinpoint techniques on many fabric types, but it's best to test first. Some fabrics may not hold the precision well, so experiment to ensure the results meet your expectations.
How Do I Troubleshoot Misaligned Designs?
To troubleshoot misaligned designs, check your fabric's tension, ensure proper hooping, and verify your machine's settings. If issues persist, recalibrate the design alignment and test with a simple pattern to confirm adjustments.
Is Pinpoint Suitable for Beginner Embroiderers?
Yes, pinpoint's user-friendly features make it suitable for beginner embroiderers. You'll find its intuitive tools simplify the design process, helping you create beautiful projects without feeling overwhelmed. It's a great starting point for your embroidery journey!
What Are the Best Threads for Pinpoint Embroidery?
When choosing threads for pinpoint embroidery, opt for high-quality cotton or polyester. They offer durability and vibrant colors, making your designs pop. Experiment with various weights to achieve different textures and effects in your projects.
How Do I Maintain My Pinpoint Tools?
To maintain your pinpoint tools, regularly clean them to prevent residue build-up. Check for wear and tear, lubricate moving parts, and store them in a dry place. Doing this ensures they'll perform optimally for your projects.
- Tetron Fabric for Marine Applications: Durability and Use Cases - June 18, 2025
- Tetron Fabric for Outdoor Furniture: Weather Resistance and Care - June 18, 2025
- Tetron Fabric for Wall Coverings: Style and Application Tips - June 18, 2025


