If you want vibrant colors with less water waste, low water immersion dyeing is a great choice. It uses concentrated dyes and minimal water, saving resources and reducing cleanup time. Traditional tie-dye offers bold, intricate patterns but needs more water, effort, and supplies. Both methods create unique designs, but your project’s needs and environmental goals will guide the best fit. Keep exploring to find which dyeing style suits your creativity and budget best.
Key Takeaways
- Low water immersion uses less water and dye, making it more eco-friendly and cost-effective than traditional tie-dye.
- Traditional tie-dye produces bold, multi-colored patterns with sharper contrasts, while low water immersion yields softer, more fluid designs.
- Low water immersion requires less setup, cleanup, and drying time compared to the more labor-intensive traditional tie-dye process.
- Both methods need pre-washed natural fibers and fiber-reactive dyes for vibrant, lasting colors.
- Traditional tie-dye demands a larger workspace and produces more wastewater, whereas low water immersion minimizes environmental impact.
What Is Traditional Tie-Dye?
Although traditional tie-dye has been around for decades, you might still find it surprisingly simple to do.
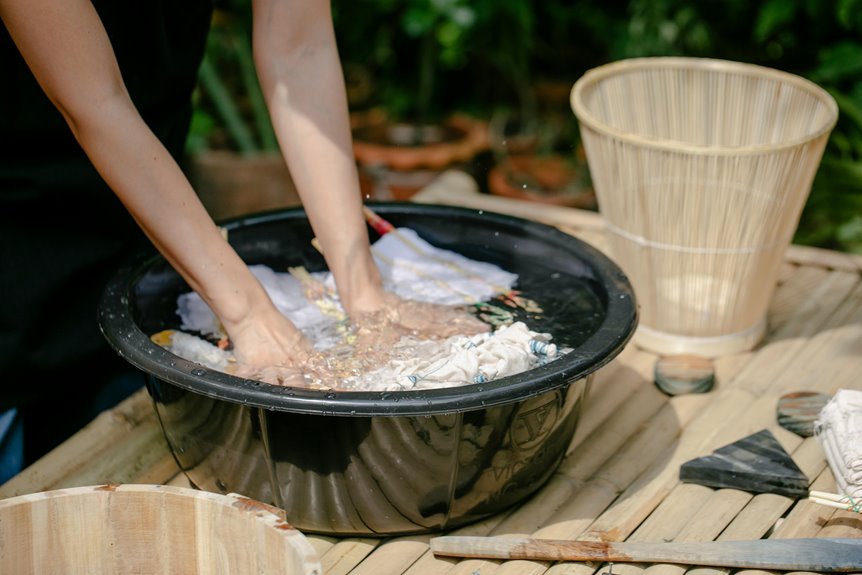
You start by twisting, folding, or scrunching your fabric and securing it with rubber bands to create patterns. Then, you apply vibrant dye directly onto the fabric, often using multiple colors. The fabric soaks in the dye while you let it sit, usually for several hours.
After rinsing and drying, your unique, colorful design emerges. This hands-on process lets you experiment with shapes and hues freely.
Traditional tie-dye relies on plenty of water to spread and mix dyes, which means you’ll need a workspace that can handle splashes and mess.
Understanding Low Water Immersion Dyeing
When you switch to low water immersion dyeing, you use far less water than in traditional methods, which changes how the dye interacts with the fabric. Instead of flooding the fabric, you submerge it in a small amount of dye solution, allowing the fibers to absorb color more efficiently.
This technique helps you achieve vibrant, concentrated hues with less waste. You’ll notice the dye penetrates evenly, reducing the risk of muddled or washed-out patterns.
Plus, low water immersion speeds up the process since the dye bonds faster. It’s an eco-friendly choice that conserves water and minimizes runoff, making your creative process more sustainable.
Low water immersion speeds dye bonding, conserves water, and reduces runoff for a greener, faster dyeing process.
Once you understand how dye concentration and limited water volume work together, you’ll appreciate the unique results this method offers.
Materials Needed for Traditional Tie-Dye
To get started with traditional tie-dye, you’ll need the right fabric—usually cotton works best for vibrant colors.
You’ll also want to choose the appropriate dyes, like fiber-reactive or all-purpose dyes, depending on your project.
Don’t forget protective gear like gloves and aprons to keep yourself clean and safe while you work.
Essential Fabric Choices
Choosing the right fabric makes all the difference in traditional tie-dye. You want natural fibers like cotton, rayon, or silk because they absorb dye better and produce vibrant colors.
Cotton is the most popular choice—it’s affordable, widely available, and holds dye well. Rayon offers a softer feel and brighter hues, while silk provides a luxurious texture and delicate finish.
Avoid synthetic fabrics like polyester since they resist dye and won’t give you the bold patterns you’re aiming for. Also, make certain your fabric is clean and pre-washed to remove any sizing or chemicals that could block the dye.
Picking quality fabric guarantees your tie-dye project looks sharp and lasts longer through washes and wear.
Dye Types Overview
Dyes form the heart of any traditional tie-dye project, determining the vibrancy and longevity of your colors. You’ll choose between fiber-reactive, all-purpose, or natural dyes, each offering unique effects and ease of use. Fiber-reactive dyes bond well with cotton, producing bright, lasting colors. All-purpose dyes are versatile but less vibrant, while natural dyes create earthy, subtle tones.
| Dye Type | Vividness | Ease of Use |
|---|---|---|
| Fiber-Reactive | Brilliant | Moderate |
| All-Purpose | Moderate | Easy |
| Natural | Soft, muted | Requires prep |
Selecting the right dye helps you express your creativity and guarantees your masterpiece stands the test of time.
Protective Gear Requirements
Although traditional tie-dye can be a fun and creative activity, you’ll need the right protective gear to keep yourself safe and your workspace clean.
Start with gloves—nitrile or latex ones protect your hands from harsh dyes and chemicals. Wear an apron or old clothes to avoid permanent stains. Cover your work surface with plastic or newspaper to catch spills.
Safety goggles are a smart choice if you’re mixing powders or working with strong chemicals to protect your eyes. A mask helps prevent inhaling fine dye powders, especially when handling dry pigments.
Finally, work in a well-ventilated area to avoid inhaling fumes. By preparing with proper gear, you’ll enjoy the process without worrying about accidental stains or skin irritation.
Materials Required for Low Water Immersion
When you prepare for low water immersion tie-dye, you’ll need fewer materials than traditional methods.
Start with fiber-reactive dyes in powder form, your chosen fabric (preferably pre-washed cotton or rayon), and a large sealable plastic bag or container. You’ll also need soda ash to pre-soak the fabric, which helps the dye bond better.
Instead of buckets filled with water, just a small amount of water is necessary—enough to dampen the fabric inside the bag. Don’t forget disposable gloves to protect your hands and squeeze bottles or spray bottles to apply the dye precisely.
Finally, have plastic table covers or drop cloths ready to keep your workspace clean. This streamlined setup makes the process simpler and more eco-friendly, reducing water waste and cleanup time.
Step-by-Step Process of Traditional Tie-Dye
While low water immersion tie-dye uses minimal water and fewer materials, traditional tie-dye requires a different setup and technique.
First, you’ll start by dampening your fabric to help the dye absorb evenly. Next, fold, twist, or tie your fabric tightly with rubber bands to create distinct patterns.
Begin by dampening your fabric, then fold, twist, or tie it tightly with rubber bands for bold patterns.
Prepare your dye according to the instructions, making sure to wear gloves to protect your hands. Then, apply the dye directly onto the fabric sections, using squeeze bottles or brushes for precision.
After dyeing, wrap the fabric in plastic to keep it moist and let it sit for 6-8 hours or overnight for vibrant colors.
Finally, rinse out the excess dye in cold water until it runs clear, then wash and dry your piece to reveal your unique design.
How to Perform Low Water Immersion Dyeing
To get started with low water immersion dyeing, you’ll need to prepare your fabric by wetting it and mixing your dye with minimal water.
Then, you’ll place the fabric in a shallow container and add the concentrated dye, allowing it to absorb slowly.
Following these steps carefully guarantees vibrant colors with less water than traditional methods.
Preparing Fabric and Dye
Although low water immersion dyeing uses less water than traditional methods, you’ll still need to prepare your fabric and dyes carefully to secure vibrant, even colors.
Start by pre-washing your fabric to remove any sizing or residues that might block dye absorption. Then, soak it in a soda ash solution if using fiber-reactive dyes; this helps the dye bond better with the fibers.
When mixing your dyes, use concentrated dye pastes or powders dissolved in minimal water to maintain the low-water approach. Stir thoroughly to verify the dye is evenly mixed.
Prepare your dye containers or trays so you can easily access them during the process. Proper preparation sets the foundation for a successful low water immersion dyeing experience with rich, consistent results.
Steps for Immersion Process
You’ll need just a few simple steps to start low water immersion dyeing effectively.
First, prepare your fabric by folding or twisting it as desired, then secure it tightly with rubber bands.
Next, fill your dye pot with enough water to cover the bottom, usually around two inches. Add your fabric, making sure it’s partially submerged but not fully soaked. Pour your pre-mixed dye over the fabric, allowing the colors to spread naturally.
Gently stir the fabric occasionally to encourage even color distribution. Keep the fabric in the dye bath for 20 to 30 minutes, depending on desired intensity.
Finally, remove the fabric, rinse it with cold water until it runs clear, and then wash it separately. This method conserves water and creates unique, vibrant patterns.
Environmental Impact Comparison
When comparing low water immersion and traditional tie-dye, you’ll notice significant differences in their environmental footprints.
Low water immersion drastically reduces water consumption, using just a fraction of what traditional methods require. This means less wastewater generated, which lowers the risk of contaminating local water sources with dye chemicals. Additionally, low water immersion often uses concentrated dyes, minimizing chemical runoff.
Traditional tie-dye, on the other hand, demands large volumes of water for soaking, rinsing, and fixing colors, contributing to higher water waste and energy use for heating and treatment.
Color Vibrancy and Pattern Differences
You’ll notice that low water immersion and traditional tie-dye create different levels of color vibrancy.
Each method also produces distinct patterns, with varying complexity and sharpness.
Let’s explore how these differences affect your final design.
Vibrancy Levels Comparison
Several factors influence how vibrant colors appear in low water immersion and traditional tie-dye techniques.
When you use low water immersion, colors tend to be more saturated because the dye concentrates on the fabric without much dilution. In contrast, traditional tie-dye allows for more blending and softer hues due to the higher water content.
Consider these points to understand vibrancy differences:
- Dye concentration: Higher in low water immersion, boosting color intensity
- Water volume: More in traditional tie-dye, causing lighter shades
- Fabric absorption: Affects how deeply colors set in each method
- Dye application: Precise in low water immersion, more spread in traditional tie-dye
Knowing these will help you decide which technique matches your vibrancy goals.
Pattern Complexity Differences
Although both low water immersion and traditional tie-dye create unique designs, the complexity of patterns you achieve varies considerably between the two methods. Traditional tie-dye lets you craft intricate, multi-layered patterns with sharp contrasts, while low water immersion tends to produce softer, more fluid designs with less defined edges. You’ll find traditional tie-dye ideal if you want precise, bold shapes. On the other hand, low water immersion offers a more organic, blended look that’s perfect for subtle complexity.
| Feature | Traditional Tie-Dye |
|---|---|
| Pattern Sharpness | High |
| Detail Level | Intricate |
| Edge Definition | Clear |
| Color Overlap | Controlled |
| Overall Complexity | High |
Time and Effort Involved in Each Method
When comparing low water immersion and traditional tie-dye, the time and effort you invest can vary considerably.
Low water immersion often demands less setup and cleanup, making it quicker for you to start dyeing. Traditional tie-dye, however, involves more steps like folding, binding, and rinsing, which require patience and precision.
Here’s what to evaluate:
- Low water immersion reduces drying and preparation time.
- Traditional tie-dye needs careful fabric manipulation for sharp patterns.
- You spend less time mixing and handling dyes with low water immersion.
- Traditional methods demand longer waiting periods between dye applications.
Choosing between them depends on how much time and effort you want to dedicate to your creative process.
Cost Considerations for Both Techniques
Both low water immersion and traditional tie-dye come with distinct cost factors that can affect your budget.
With low water immersion, you’ll spend less on water and dye since the method uses smaller quantities, which can save money over time. However, you might invest more upfront in specialized equipment like containers designed for this technique.
Traditional tie-dye generally requires larger amounts of water and dye, increasing supply costs, but it usually demands minimal gear beyond basic materials you likely already have.
Also, consider that traditional tie-dye’s longer drying and setup times might add indirect costs if you’re working commercially.
Ultimately, your choice depends on balancing initial expenses against ongoing supply costs, so assess what fits your budget and project scale before deciding.
Creativity and Design Possibilities
Since low water immersion limits the amount of dye and fabric you work with at once, it encourages experimenting with subtle color blends and delicate patterns.
You’ll find it perfect for creating soft gradients and detailed motifs that might get lost in traditional tie-dye’s bolder style. This method invites you to focus on precision, giving you more control over each hue and shape.
On the other hand, traditional tie-dye lets you release vibrant, unpredictable bursts of color and classic spiral or bullseye designs.
With low water immersion, you can explore:
- Layering gentle washes of color for depth
- Combining muted tones for sophisticated looks
- Crafting intricate, small-scale designs
- Using fabric folds to highlight subtle textures
Both approaches offer unique creative freedoms depending on your vision.
Choosing the Best Method for Your Project
Exploring different creative styles helps you figure out which dyeing method suits your project best. If you want vibrant, bold patterns with a classic feel, traditional tie-dye might be your go-to. It’s perfect for casual wear and offers a hands-on, lively experience.
On the other hand, low water immersion uses less dye and water, making it eco-friendly and ideal for subtle, watercolor-like effects. This method works well if you prefer a softer, more artistic look.
Consider your fabric type, color intensity, and environmental impact when choosing. Also, think about your workspace and available materials—traditional tie-dye can get messy, while low water immersion is tidier.
Ultimately, pick the method that aligns with your style, sustainability goals, and the final look you want to achieve.
Frequently Asked Questions
Can Low Water Immersion Dyeing Be Used on All Fabric Types?
You can’t use low water immersion dyeing on all fabrics; it works best with natural fibers like cotton or silk. Synthetic fabrics often resist dye absorption, so you’ll want to check your fabric type before starting your project.
How Do Washing Instructions Differ Between the Two Methods?
You’ll want to wash your dyed fabric separately in cold water to prevent bleeding. Use mild detergent and avoid harsh chemicals. Both methods need gentle care, but low water immersion might require less rinsing during washing.
Are There Health Risks Associated With Traditional Tie-Dye Chemicals?
Think of traditional tie-dye chemicals as a storm you can weather if careful. You’ll want gloves and good ventilation because some dyes contain harmful substances that might irritate your skin or lungs if you’re not cautious.
Can Children Safely Participate in Low Water Immersion Dyeing?
You can safely let children join low water immersion dyeing since it uses less water and often milder dyes. Just make sure they wear gloves, work in a ventilated area, and avoid ingesting any materials.
What Are the Best Storage Practices for Dyed Fabrics?
You should store dyed fabrics in a cool, dry place, away from direct sunlight to prevent fading. Keep them folded loosely or hung to avoid creases, and make sure they’re completely dry to prevent mildew and color bleeding.