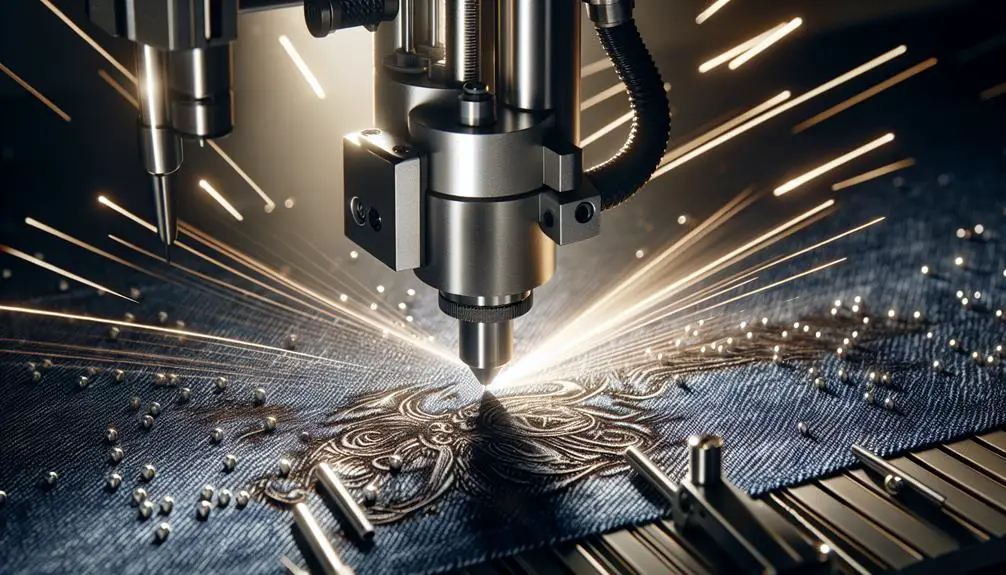
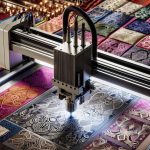
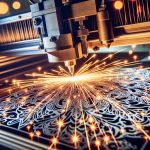
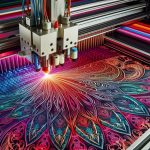
Laser engraving on textiles lets you craft detailed designs with ease. Start by selecting natural fibers like cotton or linen, ensuring they're clean and smooth. Next, create and align your design using vector format. Secure the fabric firmly to the laser bed. Adjust the laser settings for the specific fabric type—power, speed, and focus are key. Conduct a test run on scrap fabric to refine settings. After engraving, follow proper care instructions to maintain quality. By perfecting each step, you'll achieve stunning results and uncover additional tips to enhance your textile projects further.
Table of Contents
Key Takeaways
- Choose natural fibers like cotton or linen, and ensure the fabric is clean and smooth before engraving.
- Create or select vector design files and conduct test runs on scrap fabric to fine-tune laser settings.
- Securely fasten the fabric to the laser bed and align the design accurately.
- Adjust laser settings for fabric type, including power, speed, focus, and intensity, to avoid damage.
- Post-engraving, use gentle cleaning methods and follow storage and maintenance guidelines to preserve the textile quality.
Choosing the Right Fabric
When you're selecting the right fabric for laser engraving, it's important to assess how each material will react to the laser. Different fabrics offer unique customization options, and understanding these nuances can elevate your projects.
Start by considering the material properties—natural fibers like cotton or linen tend to char, while synthetic blends might melt if the laser's power isn't adjusted correctly.
To guarantee design compatibility, you need to think about how the fabric's texture and weave might affect the engraving outcome. Fine weaves, such as silk, can handle intricate designs better than coarse fabrics like burlap.
Remember, the fabric's color can also influence the engraving's visibility; lighter fabrics often show more contrast, making your designs pop.
Material considerations don't end with the type of fabric; you should also factor in the fabric's thickness and durability. Thicker materials may require multiple passes with the laser, while delicate fabrics might need lower power settings to avoid damage.
Preparing Your Design
After selecting the perfect fabric, it's time to focus on preparing your design to guarantee it looks stunning when engraved. Begin by gathering design inspiration. Browse through various sources like Pinterest, design websites, and textile magazines to find ideas that resonate with you. Think about the color options of your fabric as they can affect the visibility and aesthetics of the engraving.
Next, move on to graphic software. Programs like Adobe Illustrator or CorelDRAW are excellent tools for creating and editing your design. These platforms offer robust features that let you fine-tune every detail. Pay close attention to font selection if your design includes text. Opt for fonts that are clear and legible, even when scaled down. Script fonts can look elegant, but they mightn't always engrave well, so test them out first.
Once you have your design drafted, verify it's in a vector format. This guarantees the design won't lose quality when resized. Double-check all elements, including lines and shapes, to confirm they're clean and precise.
Preparing your design meticulously will set the stage for a flawless engraving, bringing your creative vision to life.
Setting Up Your Laser Engraver
Getting your laser engraver ready involves a few important steps to secure precision and safety. First, you need to confirm that your laser alignment is perfect. Misaligned lasers can lead to uneven engravings and potential damage to the machine. Carefully follow your manufacturer's instructions to adjust the laser until it's correctly aligned.
Next, check your power source. Make sure the laser engraver is plugged into a dependable power outlet to avoid any interruptions during the engraving process. An unstable power source can cause sudden shutdowns and impact the quality of your work.
Don't forget about safety precautions. Always wear appropriate protective gear, such as safety glasses, to shield your eyes from laser exposure. Keep a fire extinguisher nearby, especially when working with flammable textiles.
Adjusting Laser Settings
Now that your laser engraver is set up and ready, let's fine-tune the laser settings to achieve the best results on textiles.
First, you'll want to make power adjustments. Lower power settings are usually better for delicate fabrics, while higher power can be used for sturdier textiles. Finding the right balance prevents burning or damaging the material.
Next, let's look at speed modifications. Slower speeds allow the laser to penetrate deeper, creating more defined engravings. However, on finer fabrics, faster speeds can prevent overheating and scorching. Adjusting the speed correctly will guarantee you get clean, precise engravings without compromising the integrity of the fabric.
Focus calibration is essential. Make sure the laser beam is focused precisely on the textile's surface. Proper focus ensures that the laser energy is effectively concentrated, which enhances the engraving quality. Double-check the focus before starting your project.
Lastly, don't overlook beam alignment. An aligned beam ensures that the engraving is uniform across the entire textile. Misalignment can result in uneven engravings and wasted material.
Conducting Test Runs
Why not start with a few test runs to make sure your laser settings are perfect for the textile you're working with? Conducting test runs is important for optimizing speed, power, and adjusting focal length to achieve the best results. Begin by using a small scrap piece of the same textile you'll be engraving. This way, you won't risk damaging your main project.
Here's a simple process to follow:
- Optimize Speed and Power: Experiment with different combinations of speed and power settings. Start with low power and gradually increase it until you find the perfect balance.
- Adjust Focal Length: Ensuring the laser is correctly focused is essential. Adjust the focal length slowly, observing the changes in engraving quality.
- Examine Results: After each test run, closely inspect the engraved area. Check for clarity, depth, and any signs of burning or discoloration.
- Document Settings: Keep a record of the settings used for each test. This will help you quickly replicate successful runs in the future.
Positioning the Fabric
Properly positioning the fabric on your laser engraver's bed is vital for achieving precise and consistent results. Start by laying your fabric out flat, making sure it's free of wrinkles and folds. Smooth out any creases with your hands, as even small imperfections can impact fabric alignment and laser precision.
Use a ruler or a grid on your engraver's bed to line up the fabric edges; this step is crucial for guaranteeing accuracy.
Next, secure the fabric in place. You can use masking tape or magnets, depending on your machine's setup. The goal here is to achieve fabric stability so that it doesn't shift during the engraving process. Firmly press down on the edges where you've applied tape or magnets to make sure everything stays put.
Double-check the alignment by running a quick, low-power test pass. This allows you to verify that the fabric is positioned correctly and that your design will be precisely where you want it. Adjust as necessary and re-secure the fabric if any movement is detected.
Taking these additional steps ensures that your laser engraving results aren't only precise but also consistently high-quality.
Engraving the Design
Now that your fabric is positioned, it's time to focus on engraving the design.
You'll need to choose the proper settings, prepare the fabric, and execute the design with precision.
Let's break down each step to guarantee your engraving is flawless.
Choosing Proper Settings
Finding the right settings for laser engraving on textiles can make a world of difference in achieving crisp, detailed designs. Start by adjusting the laser strength and velocity. The strength determines how deeply the laser cuts, while velocity affects the time it takes. Higher strength with slower velocity can yield deeper engravings, but might scorch the fabric. Conversely, lower strength with faster velocity mightn't engrave deeply enough.
Next, focus on the beam concentration and intensity. Proper beam concentration ensures that the laser's energy is concentrated precisely where needed, creating cleaner lines. Adjust the concentration based on the fabric's thickness to avoid blurring. Intensity, or the number of laser passes per inch, impacts the design's resolution. Higher intensity produces finer details but takes longer.
Consider these key adjustments:
- Laser strength: Start with 50% and adjust based on material response.
- Velocity: Begin at 300mm/s and modify for desired depth.
- Beam concentration: Set according to fabric thickness.
- Intensity: Higher for intricate designs, lower for bold patterns.
Experimentation is crucial. Test on a fabric scrap to fine-tune settings before committing to the final piece.
Mastering these adjustments will help you achieve professional-grade laser engravings on textiles.
Preparing the Fabric
Before you start engraving, make sure the fabric is clean, smooth, and securely fastened to the laser bed. Any wrinkles or debris can interfere with the precision of your engraving, so take the time to prepare properly. For best results, your fabric selection is important. Different textiles react differently to laser engraving. Natural fabrics like cotton and linen typically yield clean, precise results, while synthetic fabrics might require more testing to avoid melting or discoloration.
Choose your fabric based on the end use of your engraved design. For instance, if you're creating intricate patterns for fashion, lightweight fabrics such as silk or satin might be ideal. For home decor projects, sturdier materials like denim or canvas can offer a more durable surface.
Your design inspiration should guide your fabric choice as well. Delicate, detailed designs often look best on finer, more tightly woven fabrics, whereas bold, simple patterns can stand out on rougher textures. Once you've selected the perfect fabric and prepped it, you're one step closer to creating a masterpiece. Remember, attention to detail in this preparatory stage sets the foundation for a successful engraving.
Executing the Design
Once your fabric is prepped, it's time to align your design on the laser bed and set the engraving parameters. This step is essential for flawless design execution. Begin by making sure that the fabric is securely fastened and flat on the laser bed to prevent any movement during the engraving process.
Next, load your design into the laser software and ensure it's properly aligned with the fabric. Focus on precision to achieve the best aesthetic appeal. Adjust the laser settings according to the type of material you've selected. Different fabrics require different power, speed, and frequency settings, so refer to your laser machine's guidelines.
Here are some key points to keep in mind:
- Material Selection: Follow the recommended settings for your specific fabric type to avoid damage.
- Design Execution: Verify that your design is scaled correctly and positioned accurately on the fabric.
- Test Runs: Conduct a small trial on a scrap piece of the same fabric to fine-tune your settings.
- Safety Precautions: Always wear protective gear and ensure proper ventilation during the engraving process.
Post-Engraving Care
After you've completed your laser engraving, it's important to focus on proper cleaning and maintenance to keep the design looking sharp.
Regular care will guarantee the longevity and durability of the engraved textile.
Let's walk through some simple steps to make sure your masterpiece lasts.
Cleaning and Maintenance
Proper cleaning and maintenance are important to preserving the quality and appearance of laser-engraved textiles.
After you've completed your engraving, it's important to adopt preventive measures and proper storage solutions to keep your fabric looking its best.
Firstly, always opt for gentle cleaning methods to avoid damaging the intricate engravings. Use mild detergents and cold water, and steer clear of bleach and harsh chemicals. Hand-washing is often preferable, but if machine washing is necessary, use the delicate cycle.
Secondly, fabric protection is vital. Avoid exposing the engraved textiles to direct sunlight for extended periods, as UV rays can fade the designs. Store your items in a cool, dry place to prevent mold and mildew.
To ensure thorough care, follow these tips:
- Store in breathable bags: Use cotton or linen storage bags instead of plastic to allow air circulation.
- Avoid overloading washing machines: Keep space for water and detergent to move freely around the fabric.
- Iron with caution: Use a low heat setting and place a cloth between the iron and the fabric to protect the engraving.
- Spot clean when possible: Address stains immediately with a mild detergent and a soft brush.
Longevity and Durability
To maximize the longevity and durability of your laser-engraved textiles, focus on consistent, gentle care practices. Start by following specific washing instructions to maintain the colorfastness of your fabric. Use mild detergents and cold water, avoiding bleach and harsh chemicals that can degrade the material and the engraving.
Wear and tear is inevitable, but you can minimize it by storing your textiles properly. Keep them away from direct sunlight, which can cause fading over time. When ironing, use a low heat setting and avoid direct contact with the engraved area to maintain its fade resistance.
Here's a quick reference table to guide your post-engraving care:
| Care Aspect | Recommendation |
|---|---|
| Washing Instructions | Use mild detergents and cold water |
| Colorfastness | Avoid bleach and harsh chemicals |
| Wear and Tear | Store away from direct sunlight |
| Care Aspect | Recommendation |
| Fade Resistance | Use low heat settings when ironing |
| Drying | Air dry or tumble dry on low heat |
| Storage | Fold neatly and avoid cramming in tight spaces |
Troubleshooting Common Issues
When you encounter issues with laser engraving on textiles, understanding common problems and their solutions can save you time and frustration. One of the primary concerns is troubleshooting thread tension and software glitches. Incorrect thread tension can lead to uneven engraving, while software glitches may cause unexpected interruptions. Verify your software is always updated and check thread tension regularly to maintain consistency.
Common engraving mistakes can also occur, but knowing effective troubleshooting techniques will help you overcome them. Here are a few tips:
- Blurry Engraving: This often results from improper focus. Double-check that your laser is accurately focused before starting.
- Inconsistent Depth: Uneven material thickness can cause this. Make sure your textile is flat and evenly placed on the engraving bed.
- Burn Marks: These can be minimized by adjusting the laser power and speed settings to suit the fabric type.
- Skipped Areas: Confirm the engraver's path is correctly programmed and the textile is securely fixed to avoid movement.
Frequently Asked Questions
Can Laser Engraving Damage the Laser Machine?
Can improper laser engraving hurt your machine? Absolutely. Ensuring material compatibility and appropriate engraving speed is crucial. Regular machine maintenance and adherence to laser safety protocols will keep your equipment in top condition and functioning efficiently.
What Safety Precautions Should I Take During Laser Engraving?
Maintain proper ventilation, wear eye protection, and stay aware of fire hazards. Always check material compatibility to avoid unexpected reactions. Prioritize safety to uphold a well-functioning laser machine and achieve professional engraving results.
How Long Does the Laser Engraving Process Typically Take?
Engraving is like painting a masterpiece. The time varies based on engraving speed and necessary adjustments. Material preparation and final touches also play a role. Typically, it takes anywhere from a few minutes to an hour.
Are There Any Specific Types of Lasers Better Suited for Textiles?
When choosing lasers for textiles, CO2 lasers are typically ideal due to their different wavelengths and high textile compatibility. However, fiber-based lasers can also be effective for certain fabrics, offering excellent engraving precision and adjustable laser power.
Can Laser Engraving Be Used on Multi-Layered Fabrics?
Yes, you can use laser engraving on multi-layered fabrics. For layered fabric applications, consider fabric texture to guarantee precise results. Different textures may require adjustments in laser settings for best engraving quality.
- How Does Ring Spun Cotton Affect Garment Fit and Shape Retention? - August 13, 2024
- What Are the Challenges in Producing Ring Spun Cotton? - August 13, 2024
- Is Ring Spun Cotton Suitable for Plus-Size Clothing? - August 13, 2024

