You can transform fabric into intricate designs with laser cutting, a precise and versatile technology. Start by uploading your design file to a computer-controlled laser cutter. It uses a high-powered beam to cut or engrave materials, creating detailed patterns. Choose a laser cutter that matches your material and project needs. Always test on scrap fabric to dial in the best settings. Ideal fabrics include cotton and silk, though most textiles can work with the right adjustments. Set up a well-ventilated workspace and keep experimenting with different techniques to enhance your creations. There's plenty more to learn about perfecting your craft!
Key Takeaways
- Choose natural fabrics like cotton and silk for best laser cutting results.
- Test and adjust power and speed settings on scrap fabric before cutting main materials.
- Ensure proper ventilation and air assist to improve edge quality and safety.
- Maintain a clean, organized workspace and regularly inspect equipment for optimal performance.
- Start with simple patterns and gradually experiment with different textiles and techniques.
How Laser Cutting Works
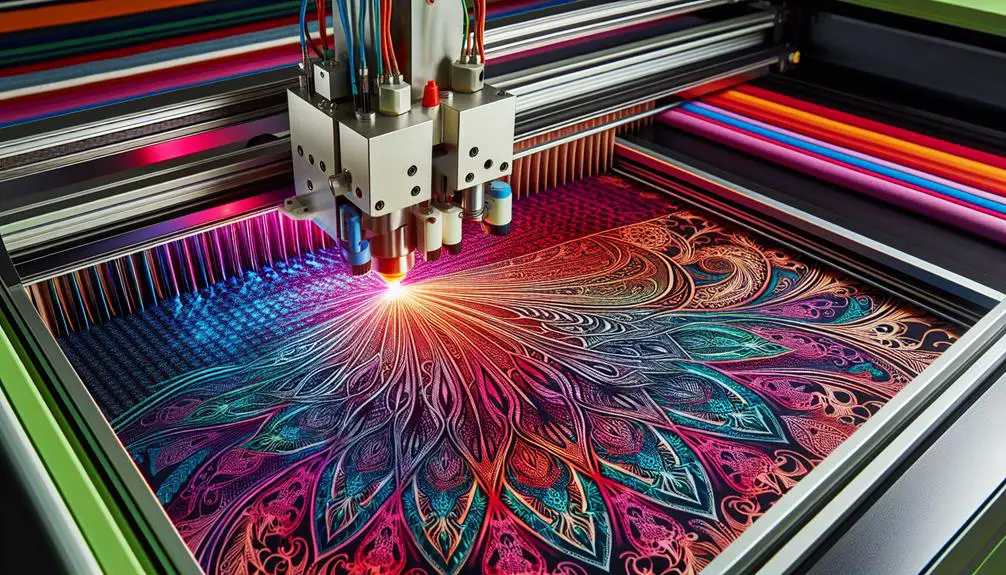
Laser cutting operates by utilizing a high-powered laser beam to accurately cut or engrave materials, including textiles. You'll notice that the laser cutting process is both captivating and effective. The laser beam, managed by a computer, moves across the material, following a pre-programmed design. This allows for remarkable precision, making it ideal for intricate textile applications.
As you immerse yourself in the world of laser cutting, you'll appreciate how the process commences with a design file. This file is loaded into the laser cutter's software, which then translates the design into specific movements for the laser. The machine utilizes a focused light beam to produce heat, which melts, burns, or vaporizes the material. For textiles, this means you can achieve neat, precise cuts without fraying edges.
Understanding the laser cutting process is essential if you want to excel in textile applications. Whether you're crafting bespoke clothing, home decor, or elaborate lace patterns, the laser's precision guarantees your designs come out flawless every time.
Additionally, the speed of the process can save you a significant amount of time compared to traditional cutting methods.
Choosing the Right Laser Cutter
When picking a laser cutter, you'll want to contemplate power and speed settings to match your textile needs.
Make sure to check if the machine is compatible with the materials you plan to use.
Don't forget to contemplate your budget and any ongoing costs.
Power and Speed Settings
To get the best outcomes from your laser cutting machine, you need to dial in the right power and speed settings for the specific textile you're working with. Fine-tuning these settings guarantees laser precision and avoids issues like burning or incomplete cuts. It's a delicate balance—too much power can scorch your fabric, while too little mightn't cut through.
Here's how to master the speed vs. power equation:
- Start with Test Cuts:
Always run a few test cuts on a scrap piece of your textile. This helps you fine-tune the settings without wasting your main material.
- Adjust Speed and Power:
If you notice burning, increase the speed or reduce the power. Conversely, if the cut isn't going through, decrease the speed or boost the power.
- Use Manufacturer Recommendations:
Many laser cutters come with suggested settings for different textiles. Use these as a starting point and adjust as needed.
- Observe and Adapt:
Each textile behaves differently. Pay attention to how your material responds and make small adjustments to find the sweet spot.
Material Compatibility Check
Not all laser cutters are created equal, so it's vital to confirm your machine is compatible with the specific textiles you're planning to work with. Different fabrics have unique properties, and understanding laser compatibility is critical for achieving clean cuts and fine details.
The first step in fabric selection is knowing what materials you'll be working with—whether it's delicate silk, robust denim, or synthetic blends.
Textile thickness plays a significant role in how well your laser cutter performs. Thicker fabrics may require more powerful lasers, while thinner, more delicate textiles might need finely tuned settings to avoid scorching or fraying. Always check the laser cutting restrictions of your machine. Some lasers are better suited for intricate patterns on light materials, while others excel in cutting through tough, layered fabrics.
When choosing a laser cutter, make sure it has adjustable settings to accommodate various textile thicknesses and types. Look for features like variable power levels and speed adjustments. These will give you the flexibility to handle a wide range of fabrics with precision.
Budget and Cost Considerations
Choosing the right laser cutter for your textile projects involves balancing your budget with the features you need. It's essential to take into account both financial considerations and the specific requirements of your projects. Start with some budget planning to outline what you're willing to spend and identify the must-have features versus nice-to-haves.
Here are some cost-saving tips to help you make an informed choice:
- Research Affordable Options: Look for models that offer the best value for your money. Sometimes, less expensive machines have all the features you need.
- Consider Maintenance Costs: Factor in the ongoing costs of upkeep and replacement parts. A more economical machine might end up costing more in the long run.
- Check for Warranties: A good warranty can save you a lot of money and hassle if something goes wrong.
- Buy Used or Refurbished: You can often find high-quality, pre-owned laser cutters at a fraction of the cost of new ones.
When making your decision, don't just look at the price tag. Weigh the benefits and drawbacks of each option to get the best balance between functionality and affordability. Your goal is to find a laser cutter that meets your needs without breaking the bank.
Best Materials for Laser Cutting
When it comes to laser cutting textiles, you'll find that natural fabrics like cotton and silk yield the best results. These materials aren't only easy to cut but also guarantee high cutting accuracy and clean edges.
In your fabric selection, consider how the material's thickness and density will impact the laser's performance. Thinner fabrics like chiffon and organza cut effortlessly, providing sharp, precise edges. However, thicker materials like denim or heavy canvas might require more power and can sometimes result in slightly charred edges.
Edge quality is another essential factor. For natural fibers, the edges tend to be smoother and less prone to fraying compared to synthetic fabrics. Polyester and nylon, for example, can melt slightly, which helps seal the edges but might leave a hardened edge that's less preferable for some applications.
Don't forget to test different materials to see how they react to the laser. Even within the same type of fabric, variations can occur. By experimenting, you'll develop a keen sense of which textiles offer the best balance of cutting accuracy and edge quality, ensuring your laser-cut projects always turn out beautifully.
Designing for Laser Cutting
When you're designing for laser cutting, start by selecting appropriate materials that work well with your specific laser cutter.
Next, create detailed digital patterns that guide the machine precisely.
Choosing Suitable Materials
Selecting the right materials for laser cutting can make a huge difference in the quality and finish of your textile projects. First, consider your fabric selection carefully, as different textiles respond uniquely to laser cutting. Natural fibers like cotton and silk often provide excellent cutting precision, while synthetic fabrics like polyester and nylon can melt or discolor.
Texture impact plays a significant role, too. A smooth fabric will typically yield cleaner cuts, whereas materials with more texture might result in slightly jagged edges. You'll also want to think about material durability. Fabrics that fray easily mightn't be the best choice unless you have a plan to seal the edges.
Here are some fabric types to try:
- Cotton: Great for crisp, clean cuts and highly versatile.
- Felt: Ideal for projects needing a bit more structure and less fraying.
- Polyester: Offers durability and flexibility but watch for melting.
- Denim: Sturdy and durable, perfect for heavy-duty applications.
Creating Digital Patterns
Creating digital patterns for laser cutting is an important step that sets the foundation for your textile project's success. You'll want to use digital design tools like Adobe Illustrator or CorelDRAW to create precise and intricate designs. These tools let you experiment with various shapes, lines, and details, giving you the freedom to create complex patterns easily.
Fabric manipulation is pivotal in the design process. Think about how your fabric will behave when cut. Will it fray or stretch? Understanding this helps you choose the right finishing techniques, like hemming or sealing edges, to make your project look polished and professional.
Here's a quick guide to help you get started:
| Step | Action | Tips |
|---|---|---|
| 1. Design | Use digital design tools | Experiment with shapes, lines, and intricacies |
| 2. Test Cut | Perform a small test cut on your fabric | Check for fraying, stretching, and overall behavior |
| 3. Adjust | Modify your design based on the test | Refine details and adjust for fabric manipulation |
| 4. Finalize | Prepare for printing and cutting | Choose appropriate finishing techniques |
Optimizing Cut Settings
Dialing in your laser cutter's settings is crucial for achieving clean, precise cuts on your textile projects. To master this, you need to focus on key areas like speed adjustments and power modifications. These settings can make or break the cutting precision and edge quality of your final product.
Here's what you need to keep in mind:
- Speed Adjustments: Start by experimenting with different speeds. Slower speeds can give you cleaner edges but might cause burning. Faster speeds might reduce burning but can compromise on precision.
- Power Modifications: Adjust the power settings to find the sweet spot. Too much power can burn the fabric, while too little won't cut through completely.
- Material Testing: Always test on a scrap piece of your fabric first. This saves you from ruining your main project and helps fine-tune your settings.
- Ventilation and Air Assist: Proper ventilation and using an air assist can greatly improve edge quality by reducing smoke and debris around the cutting area.
Setting Up Your Workspace
Start by choosing a well-ventilated area to guarantee both safety and comfort while you work. Proper airflow is essential for preventing the buildup of fumes and ensuring you breathe easily. Next, focus on workspace organization. Arrange your tools and materials efficiently so you can access them without hassle. A clutter-free space minimizes accidents and boosts productivity.
Don't forget about safety measures. Keep a fire extinguisher nearby and ensure your work area is free of flammable materials. Regularly inspect your equipment for wear and tear; this is crucial for maintaining peak performance and avoiding mishaps.
Setting up your ventilation system is another key step. Make sure your space has either an exhaust fan or a fume extractor to remove harmful particles from the air. This will not only keep you safe but also extend the lifespan of your equipment.
Here's a quick checklist to keep your workspace in optimum shape:
| Task | Frequency | Importance Level |
|---|---|---|
| Clean workspace | Daily | High |
| Check ventilation system | Weekly | High |
| Organize tools | Monthly | Medium |
| Inspect equipment | Bi-weekly | High |
Safety Precautions
Guaranteeing your safety while laser cutting textiles is vital to prevent accidents and health hazards. Let's delve into some key precautions you should always bear in mind.
First, adequate ventilation is essential to avoid inhaling harmful fumes produced by cutting certain fabrics. Make sure your workspace has good airflow, or consider using an exhaust system to keep the air clean.
Wearing protective gear is another necessity. Safety goggles will safeguard your eyes from the laser, and gloves can protect your hands from any debris or burns.
Training is equally significant. Before you begin, make sure you're well-versed in operating the laser cutter. Many unforeseen issues can arise, and knowing how to handle them can make all the difference.
Lastly, familiarize yourself with emergency procedures. Know where the fire extinguisher is and how to use it, and have a first aid kit readily available. Prompt responses can prevent minor issues from escalating.
Here's a quick checklist to keep things smooth and safe:
- Maintain proper ventilation in your workspace.
- Always wear protective gear like goggles and gloves.
- Receive adequate training on the laser cutter.
- Know the emergency procedures and have safety equipment handy.
Stay safe and happy cutting!
Optimizing Laser Settings
To get the best results from your laser cutter, you'll need to fine-tune the settings for each type of textile you work with. Start by focusing on speed adjustments and power calibration. These two factors are essential since different textiles require different levels of intensity and cutting speeds.
For instance, delicate fabrics like silk need lower power and slower speeds to prevent burning, while thicker textiles like denim can handle higher power and faster speeds.
Next, pay attention to beam focus. Ensuring your laser's beam is perfectly focused will give you cleaner cuts and finer details. Adjust the focal length according to the thickness of the fabric you're working on. Misaligned beams can lead to uneven cuts and frayed edges.
Kerf width, or the width of the cut made by the laser, is another important factor. A thinner kerf width is ideal for detailed patterns, while a broader kerf width might be better for simpler designs. You can adjust this by tweaking the laser's power and speed settings.
Always run a few test cuts on scrap pieces of fabric to dial in the perfect settings. Experimenting and adjusting as needed will help you master your laser cutting projects.
Common Laser Cutting Techniques
Now that you've optimized your laser settings, let's explore some common laser cutting techniques to enhance your textile projects. Embracing these methods can help you achieve precision and creativity in your designs.
Here are some popular techniques you should consider:
- Kiss Cutting: This technique is perfect for intricate designs. It involves cutting through the top layer of fabric without slicing the backing material. It's ideal for appliqué and multi-layered projects.
- Perforation Cutting: Create a series of small holes along your cut lines. This method is great for adding unique textures or creating tear-away sections in your designs, giving you innovative applications.
- Engraving: Not just for cutting, lasers can also engrave patterns onto textiles. By adjusting the power settings, you can add detailed, permanent designs to your fabric, aligning with the latest laser cutting trends.
- Edge Sealing: Advanced fabric cutting techniques often include edge sealing. The laser melts the edges of synthetic fabrics, preventing fraying and ensuring clean, professional finishes.
Troubleshooting Common Issues
When you're laser cutting textiles, you might run into a few common issues like burn marks or material warping.
Don't worry, though—there are straightforward solutions for both.
Let's go over how to keep your fabric looking crisp and smooth.
Burn Marks Solutions
If you're tired of dealing with pesky burn marks on your textiles, a few simple adjustments can make all the difference. Burn marks prevention is key, and there are several strategies you can use to keep your fabric looking pristine.
- Adjust Laser Settings: Lowering the laser power and increasing the cutting speed can significantly reduce the risk of burn marks. Experiment with these settings to find the optimal point for your specific textile.
- Use Masking Solutions: Applying a protective layer, like masking tape, to your fabric before cutting can help shield it from scorch marks. Just make sure the tape is appropriate for laser cutting to avoid residue.
- Try Alternative Finishing Techniques: If burn marks are still an issue, consider switching to different finishing methods, such as edge sealing or fabric stiffeners. These can help minimize the visibility of burns.
- Implement Cleaning Methods: After cutting, use gentle cleaning methods like brushing off debris or using a mild detergent to clean any remaining residue. This can help enhance the final appearance of your textiles.
Material Warping Fixes
Dealing with material warping during laser cutting can be frustrating, but a few tweaks can help you keep your textiles flat and flawless.
First, preventing material warping starts with monitoring humidity. Textiles are sensitive to moisture; too much or too little can cause them to warp. Keep your workspace at a consistent humidity level, ideally between 40-60%, to maintain fabric stability.
Next, using weights can be a simple yet effective solution. Place small, evenly distributed weights around the edges of your textile to keep it flat. This tactic works especially well for lightweight fabrics that tend to shift easily.
If weights aren't doing the trick, consider fabric tensioning techniques. Stretch the textile taut on a frame or use clamps to hold it in place. This method guarantees the fabric remains flat and stable during the cutting process.
Lastly, always check the alignment and tension of your fabric before you start cutting. A quick pre-check can save you from dealing with warping issues later on.
Tips for Beginners
Getting started with laser cutting for textiles can be both exciting and a bit overwhelming. To make the journey smoother, here are some handy tips to help you get the best results.
First, focus on fabric choice and cutting methods. Different fabrics react differently to laser cutting, so experiment with various materials to see what works best. Natural fibers like cotton and linen usually cut cleanly, while synthetic fabrics may melt or fray.
Second, immerse yourself in pattern creation and seek inspiration for projects. Start with simple patterns and gradually move to more intricate designs as you gain confidence. Look for inspiration in everyday objects, nature, or even online communities where fellow enthusiasts share their creations.
Here are a few more tips to keep in mind:
- Test cuts: Always run a small test cut on a scrap piece of fabric. This helps you adjust settings without wasting your main material.
- Ventilation: Ensure proper ventilation in your workspace to avoid inhaling fumes from certain fabrics.
- Settings log: Keep a record of your laser settings for different fabrics and patterns. It'll save you time in future projects.
- Maintenance: Regularly clean the laser cutter's lens and mirrors to preserve cutting precision.
Frequently Asked Questions
How Does Laser Cutting Benefit the Sustainability of Textile Production?
By using laser cutting, you'll reduce the environmental impact and achieve cost efficiency. Precision cutting guarantees minimal waste, and design flexibility allows for innovative creations, making your textile production more sustainable and eco-friendly.
Can Laser Cutting Be Used on Both Natural and Synthetic Fabrics?
Yes, you can use laser cutting on both natural and synthetic fabrics. The fabric compatibility is excellent, and you'll achieve impressive design precision, making it a versatile tool for any textile project. Enjoy mastering it!
What Are the Maintenance Requirements for a Laser Cutter?
For laser cutter maintenance, you'll need to regularly clean the machine and follow calibration procedures. Troubleshooting is essential to keep it running smoothly. Consistent maintenance guarantees peak performance and extends the lifespan of your equipment.
How Does Laser Cutting Compare to Traditional Textile Cutting Methods?
You'll find laser cutting offers superior precision cutting and greater cost efficiency compared to traditional methods. It reduces fabric wastage, speeds up production, and guarantees consistent results, making it a game-changer for mastering textile cutting.
Are There Any Industry-Specific Applications for Laser-Cut Textiles?
Imagine the precision of laser-cut fabrics in fashion design or the sleek, intricate patterns in automotive upholstery. You'll find these industry-specific applications elevate both aesthetics and functionality, setting new standards for quality and innovation.