To get accurate laser cuts on fabrics, start by selecting the right material. Natural fibers like cotton and silk work better than synthetics. Confirm your fabric is clean, wrinkle-free, and secure it using clips or an adhesive mat. Choose the correct laser type—CO2 lasers are great for organic materials. Test and calibrate your laser with scrap fabric to adjust settings for the cleanest cuts. Keep the fabric stable to avoid shifting. Seal edges post-cut to prevent fraying. Always follow safety precautions, like wearing protective gear and proper ventilation. Continue for more handy tips!
Key Takeaways
- Choose Natural Fibers: Opt for natural fabrics like cotton and silk over synthetics for cleaner laser cuts.
- Secure Fabric Properly: Use adhesive mats, weights, or clamps to prevent shifting during cutting.
- Calibrate Laser: Regularly calibrate the laser for focus and alignment to ensure precision.
- Test Before Cutting: Perform test cuts on scrap fabric to determine optimal settings for speed and power.
- Manage Edges: Adjust settings to seal fabric edges and prevent fraying for clean, durable cuts.
Choosing the Right Fabric
When you're starting with laser cutting, picking the right fabric is essential for achieving the best results. You'll want to carefully assess fabric selection, as some materials respond better to laser cutting than others. Natural fibers like cotton and silk often work well, while synthetic fabrics like polyester or nylon can sometimes melt or burn.
Understanding material compatibility is key. Fabrics with high plastic content may not cut cleanly, while tightly woven materials hold up better under the laser, offering clean, precise edges.
Think about your design considerations too—delicate patterns require fabrics that won't fray easily.
Your choice of fabric also influences sewing techniques. For instance, laser-cut edges on synthetic fabrics can seal themselves, making sewing easier. On the other hand, some natural fibers may need additional edge finishing to prevent fraying, impacting your overall workflow.
Preparing Your Fabric
Before you start laser cutting, make certain to properly prepare your fabric to achieve the best results. Begin by selecting the appropriate fabric types for your project. Natural fibers like cotton and linen cut cleanly, while synthetic fabrics such as polyester might melt if not handled correctly. Always test a small piece to understand how your chosen fabric responds to laser cutting techniques.
Next, make certain your fabric is clean and free from any wrinkles or folds. Iron it if necessary, as even small creases can affect the precision of your cuts. Secure the fabric on the laser bed using clips or a tacky mat to keep it flat and stable during the cutting process.
Also, consider pre-treating your fabric. Some fabrics benefit from a light spray of water or fabric stiffener to reduce fraying and ensure sharper edges. Just be sure to let it dry completely before cutting.
Understanding Laser Types
When you're laser cutting fabrics, it's important to understand the different types of lasers you can use.
CO2 lasers are great for organic materials, while fiber lasers work best on metals and thicker fabrics.
Knowing which laser and power to choose can make all the difference in your project's success.
CO2 Laser Benefits
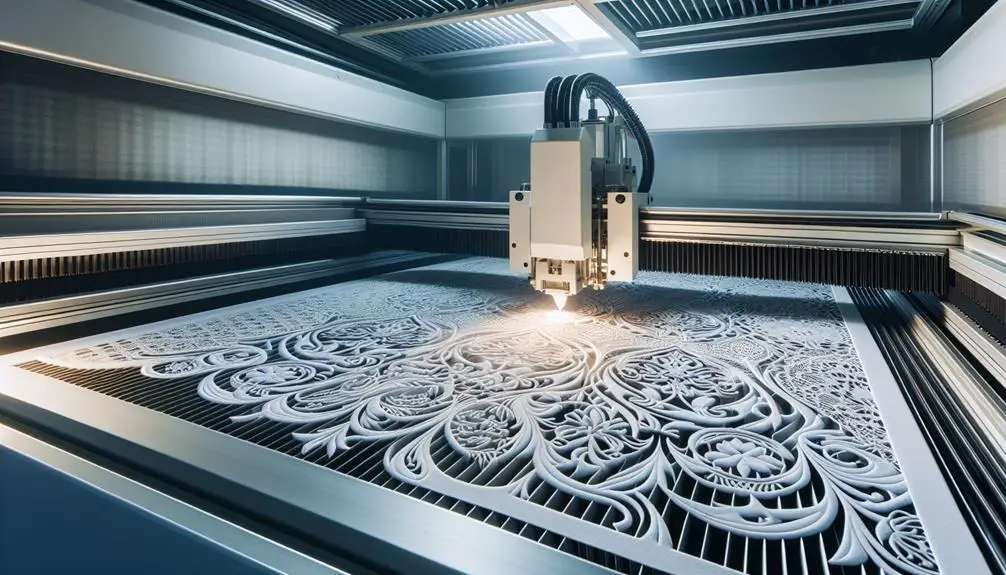
CO2 lasers offer several key advantages for cutting fabrics, making them a popular choice in the textile industry. One of the main CO2 advantages is their exceptional laser cutting precision. They can produce intricate designs and smooth edges, which are essential for high-quality fabric cutting techniques.
You'll find that CO2 lasers can handle a variety of fabrics, from delicate silks to durable denims, with remarkable accuracy.
When you're looking at fabric cutting techniques, the laser benefits of CO2 lasers include speed, efficiency, and versatility. They can cut through multiple layers of fabric simultaneously, which greatly boosts productivity. Plus, CO2 lasers minimize material waste by ensuring precise cuts every time. This means you can maximize your fabric usage, reducing costs and increasing overall efficiency.
Another benefit is the non-contact nature of CO2 lasers. Since there's no physical blade involved, there's less wear and tear on the machinery, meaning lower maintenance costs and longer equipment lifespan.
Additionally, the heat generated by the laser seals the fabric edges as it cuts, preventing fraying and creating a clean, professional finish.
Fiber Laser Applications
While CO2 lasers offer remarkable precision and efficiency, fiber lasers bring their own unique advantages to the table, especially when it comes to cutting and engraving a wide variety of materials. Fiber lasers excel in laser cutting techniques that involve advanced materials, providing superior precision cutting and fabric customization.
You'll find fiber lasers particularly useful for several reasons:
- Versatility: Fiber lasers can handle a broad spectrum of advanced materials, including metals and composites, making them ideal for projects that involve more than just fabrics.
- Speed: These lasers operate at higher speeds compared to their CO2 counterparts, allowing you to complete intricate designs in less time without sacrificing quality.
- Durability: Fiber lasers have a longer lifespan and require less maintenance, ensuring consistent performance and reducing downtime.
When you're aiming for precision cutting, fiber lasers offer unmatched accuracy, making them perfect for detailed fabric customization. You can achieve clean edges and intricate designs easily, which is essential for creating high-quality, customized fabric pieces.
Choosing Laser Power
Choosing the right laser power is necessary to achieving the best results for your fabric cutting projects. Different fabrics require different laser types, and understanding this can greatly improve your outcomes.
When you're selecting laser power, consider the fabric compatibility first. Natural fabrics like cotton and wool typically need lower power settings, while synthetic fabrics, such as polyester, might require a bit more.
Pay attention to power efficiency. Using too much power can scorch or melt delicate fabrics, while too little power mightn't cut through the fabric cleanly.
Precision control is another vital factor. A laser with adjustable power settings allows you to fine-tune the cutting process, ensuring clean edges and intricate details without damaging the material.
Speed optimization goes hand-in-hand with power settings. Higher power doesn't always mean faster cutting; sometimes, a balanced approach yields the best results.
For fine fabrics, slower speeds with moderate power often produce cleaner cuts. Conversely, thicker fabrics might benefit from higher speeds and power settings to avoid excessive heat buildup.
Setting Up Your Machine
Getting your laser cutting machine ready is a straightforward process that sets the stage for great results. First, focus on machine calibration. Ensuring your machine is correctly calibrated is essential for precision cutting. Follow the manufacturer's guidelines to fine-tune the alignment and focus of your laser. This step helps you achieve clean, accurate cuts every time.
Next, don't skip regular maintenance. Routine checks and cleaning extend the lifespan of your machine and keep it running smoothly. Here are three maintenance tips to keep in mind:
- Clean the Optics: Dust and debris can affect the laser beam's quality. Use a microfiber cloth and appropriate cleaning solutions to keep the lenses and mirrors spotless.
- Check the Exhaust System: A well-maintained exhaust system prevents the buildup of fumes and particles, ensuring a safer and cleaner workspace.
- Lubricate Moving Parts: Applying the right lubricant to gears and rails reduces friction and wear, promoting seamless operation.
Adjusting Laser Settings
Fine-tuning your laser settings is vital for achieving sharp, accurate cuts on different fabric types. Start with speed control. Adjusting the speed of the laser head is essential; too fast, and you mightn't cut through the material, too slow, and you risk burning it. Find a balance that works for the fabric's density and weave.
Next, precision adjustment is key. Manually calibrate the laser's power settings to match the material thickness. Thicker fabrics will need more power, while delicate ones require less to avoid damage. Always run a few test cuts on scrap pieces to dial in the best settings.
Beam focus is another crucial factor. Properly focusing the laser beam ensures a clean cut. Many machines come with an auto-focus feature, but double-check the focus manually for best results. Adjust the beam focus according to the material thickness; a well-focused beam will produce sharper edges and reduce fraying.
Securing Your Fabric
Securing your fabric properly is essential to prevent shifting and guarantee precise cuts. You want your laser cutting results to be as accurate as possible, so ensuring the fabric stays in place is a must.
Here are three effective ways to master fabric securing for precision cutting:
- Adhesive Mats: Use adhesive mats to hold your fabric securely. These mats provide a sticky surface that prevents movement, ensuring perfect cuts. Just press the fabric onto the mat, and you're good to go.
- Weights and Clamps: Strategically place weights or clamps around the edges of your fabric. This method is particularly useful for larger pieces, as it keeps the fabric taut and stable during the cutting process. Make sure the weights or clamps don't interfere with the laser path.
- Temporary Adhesives: Spray or apply a temporary adhesive to the back of your fabric. This technique offers a firm grip without leaving residue. It's perfect for delicate fabrics that might be damaged by other securing methods.
Testing and Calibration
Before you start the actual cutting, it's important to test and calibrate your laser to guarantee peak performance and accuracy. Begin by performing a series of calibration techniques that adjust your laser's focus and alignment. This step is critical because even a slight misalignment can impact the precision of your cuts.
Start by running a precision test on a scrap piece of fabric similar to your final material. Use this test to check the laser's power settings, speed, and focus. Adjust these settings until you achieve a clean cut without any burnt edges. If you notice inconsistencies, recalibrate your laser by adjusting the lens and mirrors, ensuring they're perfectly aligned.
Next, create a simple test pattern, like a small grid or intricate design, to evaluate the consistency of the cuts. This pattern helps you identify any issues with the laser's movement or focus. Make minor adjustments as necessary and retest until you're satisfied with the precision.
Managing Frayed Edges
To keep your fabric edges from fraying, you'll want to seal them properly and use the right laser settings. Adjusting the laser's speed and power can make a big difference in how cleanly your fabric cuts.
Don't forget to experiment to find the best combination for your specific material.
Seal Cut Edges
One of the biggest benefits of laser cutting fabrics is that it simultaneously seals the cut edges, effectively managing any fraying issues. This is achieved through a process known as heat sealing, which provides both edge finishing and fabric protection.
When you use a laser cutter, the heat generated by the laser melts the edges of the fabric, preventing the threads from unraveling. This guarantees that your projects not only look professional but also last longer.
Here are three key advantages of laser cutting that help in sealing cut edges:
- Precision Cutting: The laser cutter offers unmatched precision, allowing you to make intricate designs without worrying about frayed edges. This means you can create complex patterns with clean, sharp lines.
- Consistent Quality: Every cut you make will be consistent, ensuring uniform edge finishing across multiple pieces. This is especially useful for large projects where consistency is essential.
- Time Efficiency: Because the laser cutter seals the edges as it cuts, you save time on additional edge finishing processes, allowing you to focus more on the creative aspects of your project.
Utilizing a laser cutter for your fabric projects means embracing a tool that both simplifies and enhances your work.
Use Proper Settings
While sealing cut edges is a fantastic benefit of laser cutting, using the proper settings on your laser cutter is equally important to manage frayed edges effectively. First, you'll want to experiment with different speed and power settings. Finding the best speed settings for your specific fabric can make a significant difference. Too much power or too slow a speed can burn the edges, while too little can lead to incomplete cuts and fraying.
Fabric compatibility also plays an important role. Not all fabrics respond the same way to laser cutting, so it's vital to test each type you plan to use. Natural fibers like cotton or silk might require different settings compared to synthetics like polyester or nylon. Starting with a test piece can save you from ruining an entire project.
Don't rush this process. Take your time to note down the settings that work best for each fabric type. This way, you can replicate the results consistently.
Post-Cutting Care
After you've finished cutting your fabric with a laser, it's important to take a few steps to guarantee the edges remain clean and durable. Proper post-cutting care ensures your fabric stays in excellent condition and retains its vibrant colors.
First, focus on fabric preservation and storage. Place your fabric in a cool, dry area away from direct sunlight to prevent discoloration and fading. Sunlight can cause colors to bleach out over time, so use opaque storage bins or cover the fabric with a breathable cloth.
Second, inspect the cut edges. Laser cutting often seals the edges, but it's still a good idea to check for any fraying or loose threads. If needed, gently trim any excess threads with sharp scissors to maintain a clean edge.
Third, consider treating the fabric with a fabric sealant or fray-check product to further reinforce the edges. This step is especially helpful for fabrics prone to fraying, such as silk or chiffon.
Here's a quick post-cutting care checklist:
- Store properly: Use cool, dry, and dark storage.
- Inspect edges: Trim any loose threads.
- Seal edges: Apply fabric sealant if necessary.
Safety Precautions
Securing your fabric edges are neat and safe is important, but don't forget to prioritize safety when using a laser cutter. Start by wearing the right safety gear. Protective glasses are vital to shield your eyes from the laser beam and prevent potential injuries. Gloves can safeguard your hands from accidental burns or cuts, but make sure they're suitable for the task and won't impede your dexterity.
Next, consider the ventilation requirements. Laser cutting fabric produces smoke and potentially harmful fumes. Guarantee your workspace has a proper ventilation system to extract these fumes effectively. If your setup allows, work in a well-ventilated area, or use an exhaust fan designed for laser cutters to maintain air quality.
Also, never leave the laser cutter unattended while it's in operation. Fires can start quickly, especially when working with flammable fabrics. Keep a fire extinguisher nearby and know how to use it.
Lastly, always read and follow the manufacturer's guidelines and safety instructions for your specific laser cutter model. This assures you're using the machine correctly and safely. By taking these precautions, you'll not only protect yourself but also achieve the best results in your fabric cutting projects.
Frequently Asked Questions
Can Laser Cutting Create Intricate Designs on Delicate Fabrics?
Yes, you can create intricate patterns on delicate materials with laser cutting. Its precision cutting makes fabric artistry possible, allowing you to achieve stunning designs without damaging the fabric. You'll love the results!
How Does Laser Cutting Compare to Traditional Fabric Cutting Methods?
Did you know laser cutting can be up to 50% faster than traditional methods? It offers superior speed vs accuracy, and it's often more cost-effective, especially for intricate designs that are harder to achieve manually.
What Is the Average Lifespan of a Laser Cutting Machine?
You can expect a laser cutting machine to last around 10 years, depending on maintenance requirements. Technology advancements have made these machines more cost-effective and reduced their environmental impact, ensuring long-term benefits and efficiency.
Are There Specific Brands of Laser Cutters Recommended for Fabric?
For fabric compatibility and low maintenance requirements, you should consider brands like Epilog, Trotec, and Boss. They're known for their precision and ease of use, making them ideal for anyone aiming for mastery in fabric cutting.
Can Laser Cutting Be Used on Multi-Layered Fabrics Simultaneously?
Imagine slicing through a stack of delicate fabrics like a hot knife through butter. Yes, laser cutting can handle multi-layered fabrics simultaneously. You'll achieve layered fabric cutting with impressive precision, making your projects more efficient.