When you think about enhancing your crafting projects, starch might not be the first thing that comes to mind, but it can significantly elevate your materials. You can choose from liquid, spray, or powdered starch depending on whether you're working with fabric or paper. By applying starch correctly, you can achieve a pleasing stiffness or added durability to your creations. But before you jump into your next project, consider how different techniques can yield unique results. The possibilities are more varied than you might expect, and exploring them could change the way you craft.
Key Takeaways
- Choose the appropriate starch type (liquid, spray, powdered) based on your crafting project requirements for optimal results.
- Apply starch using techniques like dipping, spraying, or brushing to achieve desired stiffness and finish on fabric or paper.
- Experiment with layering materials and starch mixtures to enhance strength and create unique textures in your crafts.
- Ensure complete drying of starch-applied materials to maintain shape and durability before handling or embellishing.
Understanding Starch Types
To craft effectively with starch, it's essential to understand the different types available and how each can enhance your projects. The three main types of starch you'll encounter are liquid starch, spray starch, and powdered starch. Each serves unique purposes, so knowing their characteristics can make a significant difference in your crafting.
Liquid starch is versatile and easy to use, perfect for soaking fabric or paper to create a stiff finish. It's great for projects that require a more controlled application, like making fabric bowls or stiffened lace.
Spray starch, on the other hand, offers convenience and precision. You can quickly apply it to specific areas, making it ideal for crisping up fabric edges or adding body to smaller crafts.
Stiffening Fabric for Crafts
When you're ready to stiffen fabric for your crafts, knowing the types of starch available is crucial.
You'll also want to familiarize yourself with effective application techniques and tips for finishing and caring for your projects.
Let's explore how to achieve the perfect stiffness for your fabric creations.
Types of Starch Available
Starch comes in various forms, each offering unique benefits for stiffening fabric in your crafting projects. The most common types include liquid starch, spray starch, and powdered starch.
Liquid starch is versatile and easy to use. You can mix it with water to achieve your desired stiffness level, making it great for larger projects or when you want to soak the fabric completely.
Spray starch, on the other hand, provides a quick and convenient option. It's perfect for touch-ups or smaller items, allowing you to control the amount you apply without any mess. Just remember to hold the can at the recommended distance for even coverage.
Powdered starch is another option, which you can dissolve in water to create a stiffening solution. It's often favored for its affordability and long shelf life.
Additionally, some specialty starches, like corn starch or rice starch, can offer unique textures and finishes, enhancing your projects even further.
Choosing the right type of starch depends on your specific needs and the fabric you're using. Experiment with different options to find the best fit for your crafting style!
Application Techniques Explained
Applying starch effectively can transform your fabric projects, giving them the desired stiffness and structure. To start, choose the right type of starch based on your project needs. For a light hold, use a spray starch; for a firmer finish, opt for liquid starch mixed with water.
Next, prepare your workspace. Lay down a protective covering to catch any excess starch. If you're using liquid starch, mix a solution according to the package instructions.
Dip your fabric into the solution, ensuring it's fully saturated, then wring out the excess liquid. Alternatively, you can spray the starch directly onto the fabric, holding the bottle about 6-8 inches away for even coverage.
Once the fabric is coated, shape it as desired. You can mold it into forms, create pleats, or stiffen edges. Allow it to dry flat or hang it up, depending on the look you want. If you need extra stiffness, repeat the application after the first layer dries.
Finishing and Care Tips
To ensure your stiffened fabric maintains its shape and quality, proper finishing and care are essential after your crafting project is complete. Start by allowing your fabric to dry completely before handling it further. This step prevents any distortions or wrinkles. Once dry, it's important to store your stiffened fabric correctly to avoid damage.
Here's a quick guide to help you with finishing and care:
| Action | Description |
|---|---|
| Drying | Let the fabric air dry flat. |
| Storage | Keep it in a cool, dry place, away from direct sunlight. |
| Cleaning | If necessary, spot clean with a damp cloth; avoid soaking. |
If you want to maintain the stiffness over time, consider reapplying starch as needed. Just remember to test any cleaning methods on a small area first to avoid ruining your project. Following these tips will help your crafted pieces look beautiful and last longer, preserving the time and effort you put into them.
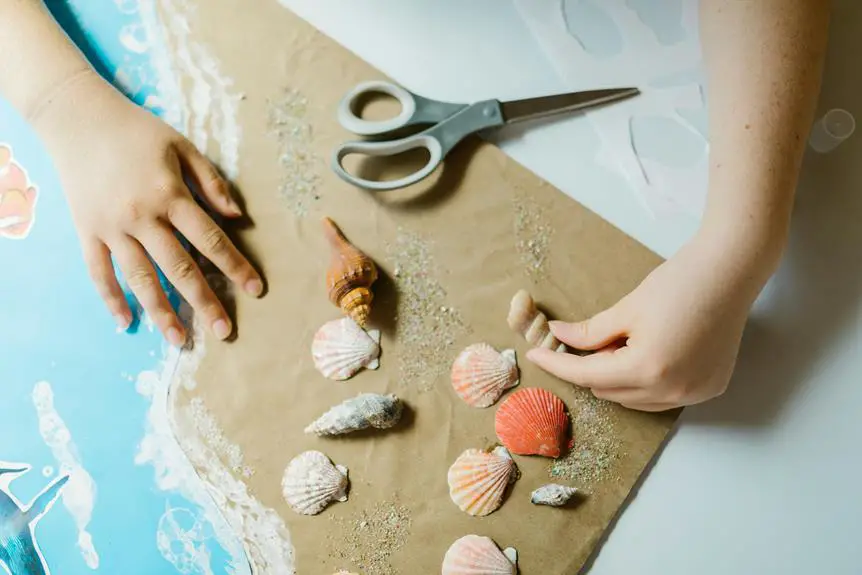
Enhancing Paper Projects
When you starch paper, you give it added strength and durability for your projects.
This technique allows you to create stiffened designs that hold their shape while also enhancing texture and finish.
Let's explore how you can elevate your paper crafts with these simple methods.
Starching Paper for Strength
Starching paper not only reinforces its structure but also enhances the overall durability of your projects. When you apply starch, you create a stronger, more resilient paper that can withstand wear and tear.
Here's how you can effectively use starch to strengthen your paper crafts:
- Choose the Right Starch: Opt for a fabric starch or a DIY starch made from cornstarch mixed with water. The consistency matters, so make sure it's not too thick or too watery.
- Prepare Your Paper: Before applying starch, ensure your paper is clean and free from dust or debris. This will help the starch adhere better and provide a uniform finish.
- Application Technique: Use a brush or a sponge to apply the starch evenly across the paper. Start from one corner and work your way across, ensuring you cover the entire surface without saturating it.
Once the starch is dry, you'll notice a noticeable increase in strength and flexibility. This method is perfect for various projects, from scrapbooking to card making, giving your creations a professional touch.
Creating Stiffened Paper Designs
Creating stiffened paper designs can transform ordinary crafts into stunning, structured pieces that stand out in any project.
To begin, gather your materials: paper, starch, a mixing bowl, and a paintbrush. Start by mixing a solution of starch and water, following the instructions on the starch package. You want a consistency similar to a thick paste.
Once your mixture is ready, dip your paper into the starch solution. Make sure it's fully saturated but not overly soaked. Gently squeeze out any excess starch, then lay the paper flat on a clean surface or a drying rack. Use your paintbrush to shape the paper into your desired form, whether it's a flower, a bow, or any other design.
After shaping, let the paper dry completely. As it dries, the starch will create a firm structure, allowing your designs to maintain their shape. You can also layer multiple pieces for added stiffness.
Once dry, you can embellish your stiffened designs with paint, glitter, or other decorative elements. Enjoy the process, and watch how your creations elevate to a whole new level of artistry!
Texture and Finish Enhancement
Enhancing the texture and finish of your paper projects can elevate their visual appeal and tactile experience, making them truly stand out. Using starch in your crafting process can transform ordinary paper into something extraordinary.
Here are three ways you can utilize starch for texture and finish enhancement:
- Smooth Finish: Apply a starch solution to your paper before drying. This will give it a glossy finish, perfect for cards or framed art.
- Textured Effects: Mix starch with some paint or ink, and use it as a medium to create unique textures. You can achieve raised patterns or interesting brush strokes that add depth to your project.
- Durability: By starching your paper, you not only enhance its look but also make it more durable. This is particularly useful for items like bookmarks or decorative boxes that need to withstand handling.
Experimenting with these techniques will help you discover how starch can significantly improve your paper projects.
Creating Sculptures With Starch
Using starch as a base material allows you to mold intricate sculptures that can capture intricate details and textures. Start by mixing starch with water to create a thick paste. You can use cornstarch or any suitable starch for this project. Once you have your paste, shape it into your desired form, whether it's an animal, abstract design, or any other figure.
As you work, don't hesitate to layer the starch to build depth and dimension. This layering technique helps you achieve a more sculptural appearance. You can also use tools like sculpting knives or your fingers to refine the details. Remember, the paste dries quickly, so work efficiently to avoid it hardening before you finish your design.
Once you're satisfied with your sculpture, let it dry completely. This may take several hours or even days, depending on the thickness. Once dry, you can paint or embellish your sculpture to enhance its aesthetic. Starch sculptures can be surprisingly durable, making them suitable for home décor or gifts.
Embrace your creativity and enjoy the process of bringing your ideas to life with starch!
Tips for Using Starch
When working with starch, it's helpful to keep a few key tips in mind to ensure your projects turn out as intended. Here are three important pointers to consider:
- Choose the Right Starch: Different projects may require different types of starch. For instance, liquid starch is great for fabric stiffening, while powdered starch works well for paper crafting.
- Test Before You Commit: Always test your starch mixture on a small sample of your material first. This way, you can see how it reacts and make any adjustments if necessary.
- Layer for Strength: When applying starch, consider layering your materials. This technique not only adds strength but also allows for more intricate designs. A few thin layers often yield better results than one thick layer.
Safety Considerations in Crafting
Safety is crucial in crafting, especially when working with materials like starch that can create messes or cause allergic reactions. Always read labels and know what you're using. If you're sensitive to certain ingredients, check for potential allergens in starch products.
When working with starch, ensure your workspace is adequately protected. Use a drop cloth or old newspapers to catch spills and prevent slips. Starch can become slippery when wet, so clean up spills immediately to avoid accidents.
It's also vital to work in a well-ventilated area, especially if you're using sprays or other products that might release fumes. Wearing gloves can help protect your skin from irritation, and goggles can shield your eyes from splashes.
Keep your crafting space organized. Store materials properly and keep tools out of reach of children and pets.
Lastly, if you're using heat, like when starch is applied to fabrics, be cautious. Hot tools can cause burns, so always use them safely and follow instructions closely.
Frequently Asked Questions
Can I Use Starch on Non-Fabric Materials?
Yes, you can use starch on non-fabric materials. It helps create a stiff finish or protective coating on surfaces like paper or cardboard. Just test on a small area first to ensure desired results.
How Do I Store Leftover Starch Mixture?
To store leftover starch mixture, pour it into an airtight container and keep it in the refrigerator. It'll last about a week. When you're ready to use it again, just shake it well!
Is Starch Eco-Friendly for Crafting?
Yes, starch is generally eco-friendly for crafting. It's biodegradable and made from renewable resources. When you choose starch-based materials, you're making a sustainable choice that benefits both your projects and the environment.
Can Starch Be Used in Food-Related Crafts?
Yes, you can definitely use starch in food-related crafts! It helps create edible decorations, like sugar sculptures or fondant, and can even stabilize certain ingredients, making your creations look and taste amazing. Enjoy crafting delicious treats!
What Is the Shelf Life of Starch?
Starch typically lasts for about two to three years if stored properly in a cool, dry place. However, always check for any signs of spoilage, like discoloration or an off smell, before using it.