When you're looking to explore block printing on fabric, you'll want to start with a solid understanding of the basics. You'll need to gather your materials and prepare your fabric properly to ensure the best results. Selecting your design and mastering the application technique can significantly influence the final look. But what happens after you've created your masterpiece? The care you provide your printed fabric can make all the difference in preserving its vibrancy and ensuring longevity. Let's take a closer look at each step.
Key Takeaways
- Prepare your fabric by pre-washing and ironing to ensure optimal ink adhesion and a smooth printing surface.
- Choose suitable materials like wooden, linoleum, or rubber blocks and absorbent fabrics such as cotton or linen.
- Design your block prints by sketching patterns and finalizing ideas for scale and placement on the fabric.
- Use a brayer to apply fabric ink evenly on blocks, pressing firmly onto the fabric to transfer the design.
Understanding Block Printing Basics
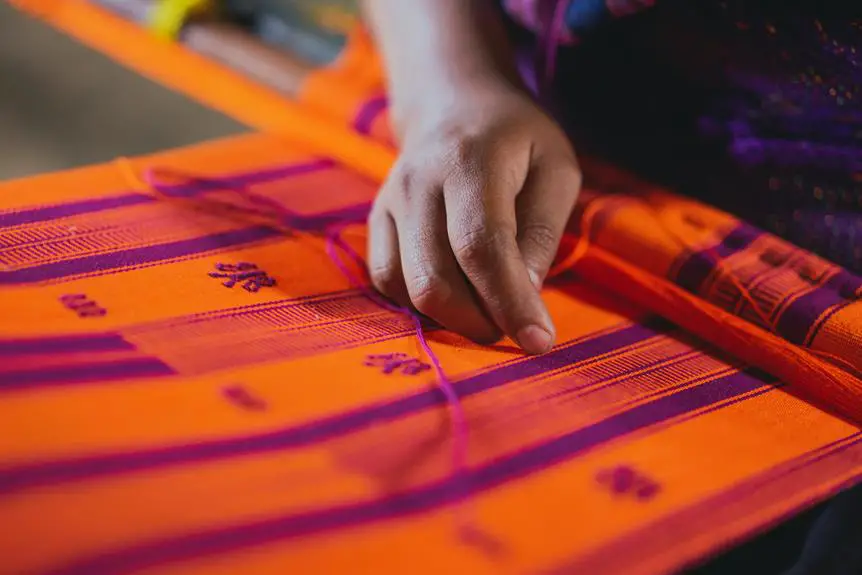
Block printing is a traditional technique that allows you to create intricate designs on fabric by transferring ink from a carved block. This hands-on art form dates back centuries and has roots in various cultures. You'll find that the process is both accessible and rewarding, making it a great way to personalize your textiles.
To get started with block printing, you'll need to understand a few key concepts. The first is the importance of the carved block itself. The design can be simple or complex, but the quality of the carving will directly impact the final print. When you press the block onto the fabric, ensure even pressure for a consistent result.
Next, consider the type of ink you'll be using. Different inks yield various finishes, from vibrant colors to subtle tones. Experimenting with these can lead to unique outcomes.
Materials Needed for Block Printing
To successfully create beautiful block prints on fabric, you'll need a few essential materials that will make the process easier and more enjoyable.
First, grab some block printing stamps or carved blocks. These can be made of wood, linoleum, or rubber, and they come in various designs to suit your style.
Next, choose your fabric; cotton, linen, or canvas works best for absorbing ink. You'll also need fabric ink or paint specifically designed for printing. This ensures the colors stay vibrant and withstand washing.
Don't forget a brayer or roller to apply the ink evenly onto your block. A flat surface, like a table or a printing mat, will help you work more comfortably.
Additionally, you might want to have some newspaper or scrap paper handy to test your stamps and avoid any mishaps. Lastly, keep a few rags or paper towels nearby for quick clean-ups and to wipe your stamps.
With these materials in hand, you're ready to dive into the exciting world of block printing and bring your creative visions to life!
Preparing Your Fabric
Before you start block printing, it's crucial to prepare your fabric properly.
You'll want to choose the right material, pre-wash it to remove any sizing, and iron it to ensure a smooth surface.
Getting these steps right sets the foundation for a successful printing experience.
Choosing the Right Fabric
Selecting the right fabric is crucial for achieving the best results in your block printing project. The fabric you choose influences how well the ink adheres, the vibrancy of the colors, and the overall texture of your final piece. Natural fibers like cotton, linen, and silk are ideal, as they absorb ink better than synthetic options. When you touch and feel the fabric, you want it to inspire creativity and excitement for your project.
Here's a quick reference to help you choose the perfect fabric:
| Fabric Type | Benefits |
|---|---|
| Cotton | Highly absorbent, versatile |
| Linen | Strong, textured finish |
| Silk | Smooth, luxurious appearance |
| Canvas | Durable, great for upholstery |
| Jersey | Stretchy, comfortable feel |
Pre-Washing Techniques
Pre-washing your fabric removes any chemicals or finishes that could interfere with the ink during block printing. It's essential to prep your fabric properly to achieve the best results.
Start by checking the care label to determine the best washing method. If your fabric is machine washable, toss it in the washer with a mild detergent. Avoid fabric softeners, as they can leave a residue that affects ink adhesion.
For delicate fabrics, hand washing is a safer option. Fill a basin with lukewarm water and add a small amount of gentle detergent. Swirl the fabric around to loosen any dirt or finishes, then rinse thoroughly with clean water.
Once washed, it's crucial to let your fabric air dry completely. This ensures that any remaining moisture doesn't affect your block printing process.
If you're using natural fibers, consider soaking the fabric in a solution of vinegar and water before washing. This can help set the fibers and enhance the ink's vibrancy.
Ironing and Stretching
Ironing and stretching your fabric will ensure a smooth surface, making it easier for you to achieve clean and crisp prints. Before you start block printing, take a moment to prepare your fabric properly. Here are three essential steps to follow:
- Iron the Fabric: Use a hot iron to remove any wrinkles. This creates a flat surface that helps your block prints adhere better, ensuring clean lines and details.
- Stretch the Fabric: If you're working with a fabric that tends to lose its shape, consider stretching it over a frame or a flat surface. This not only prevents distortion during printing but also helps maintain the integrity of your design.
- Secure the Edges: Use masking tape or fabric clips to hold the edges of your fabric in place. This prevents shifting while you print, keeping your patterns aligned and consistent.
Designing Your Block Print
Creating a unique design for your block print starts with brainstorming patterns and motifs that resonate with your style. Think about the themes or emotions you want to convey. Are you drawn to geometric shapes, floral designs, or maybe something abstract? Once you have a few ideas, sketch them out. This will help you visualize how they'll look when printed.
To organize your thoughts, consider using a simple table to categorize your design elements. Here's an example:
| Motif Type | Description | Color Palette |
|---|---|---|
| Floral | Various flower shapes | Pastels or Brights |
| Geometric | Triangles and circles | Monochrome or Bold |
| Abstract | Random shapes and lines | Earth Tones |
This table can guide you in choosing the right motifs and colors. Once you finalize your ideas, you can refine them further by considering scale and placement on your fabric. Remember, the more personal and thoughtful your design, the more it will stand out. Enjoy the creative process, and let your imagination flow!
Applying the Print Technique
To apply your block printing technique effectively, gather all your materials and prepare your workspace to ensure a smooth printing process. You'll want to make sure everything is within reach, so you can focus on creating beautiful prints.
Here are three essential items you need to have ready:
- Fabric and Block: Choose your fabric and block design wisely. Make sure your fabric is pre-washed and ironed to avoid any surprises during printing.
- Ink or Paint: Select fabric ink or paint that works best for your project. Test it on a scrap piece of fabric to ensure it adheres well and meets your expectations.
- Brayer or Roller: Use a brayer or roller to evenly apply ink onto your block. This ensures a consistent print every time.
Once you have everything set up, start by inking your block thoroughly. Press it firmly onto the fabric, applying even pressure. Carefully lift the block to reveal your print, and repeat the process until your design is complete. Enjoy the satisfaction of watching your fabric transform with each impression!
Caring for Your Block Printed Fabric
Caring for your block printed fabric ensures that your vibrant designs last and look great over time.
Start by washing your fabric gently. Use cold water and a mild detergent to prevent fading. Avoid harsh chemicals or bleach, as these can damage the print's integrity. Hand washing is ideal, but if you use a machine, opt for a gentle cycle.
When drying, skip the dryer. Instead, hang your fabric to air dry away from direct sunlight, which can cause colors to fade. Iron your fabric on the reverse side to protect the prints. Use a low heat setting and place a cloth between the iron and the fabric for added protection.
For storage, keep your block printed fabric in a cool, dry place. Avoid folding it in a way that creates creases on the printed areas. Instead, roll it loosely or use acid-free tissue paper to prevent any damage.
Regularly inspect your fabric for any signs of wear. If you notice any fading or damage, consider spot cleaning or consulting a professional cleaner who understands block printed materials.
Following these steps will help maintain the beauty and longevity of your block printed fabric.
Frequently Asked Questions
Can I Use Any Type of Fabric for Block Printing?
Yes, you can use various types of fabric for block printing, but natural fibers like cotton and linen work best. They absorb ink better, ensuring your designs come out vibrant and clear. Experiment and see what you prefer!
How Do I Fix Mistakes in My Block Print?
When you make a mistake in your block print, don't panic. You can carefully remove excess ink with a damp cloth or touch up with fabric paint. Just let everything dry completely before using the fabric again.
What Types of Ink Are Best for Fabric Printing?
For fabric printing, use fabric inks like water-based or acrylic inks. They bond well with fibers, ensuring durability. Avoid standard craft inks, as they may wash out or fade quickly, compromising your printed design's longevity.
Can Block Printing Be Done on Paper?
Yes, you can definitely do block printing on paper! It's a fun way to create unique designs. Just choose the right ink and block, and you're ready to start your printing adventure. Enjoy experimenting!
How Long Does Block Printing Ink Take to Dry?
Block printing ink typically takes about 24 hours to dry completely, but it can feel dry to the touch within a few hours. Always check the manufacturer's recommendations for specific drying times and conditions.