To smooth out puckering and wrinkles along seams, start by adjusting your sewing machine settings—use a longer stitch length and balanced tension. Choose the right needle for your fabric type, and avoid pulling the fabric while sewing. After sewing, press seams with a warm iron and consider using a tailor’s ham for curved areas. Finally, let garments rest to allow seams to settle; you’ll discover even more effective tips as you continue exploring.
Key Takeaways
- Use a warm iron with steam to gently press seams and relax fibers, reducing puckering and wrinkles.
- Adjust sewing machine settings by using a longer stitch length and balancing tension to prevent uneven seams.
- Choose appropriate needle types for fabric: use sharp needles for wovens and ballpoint needles for knits to minimize fabric bunching.
- Store garments flat or rolled with acid-free tissue paper to maintain shape and prevent creasing over time.
- Regularly inspect and gently clean seams to prevent wear and maintain a smooth appearance.
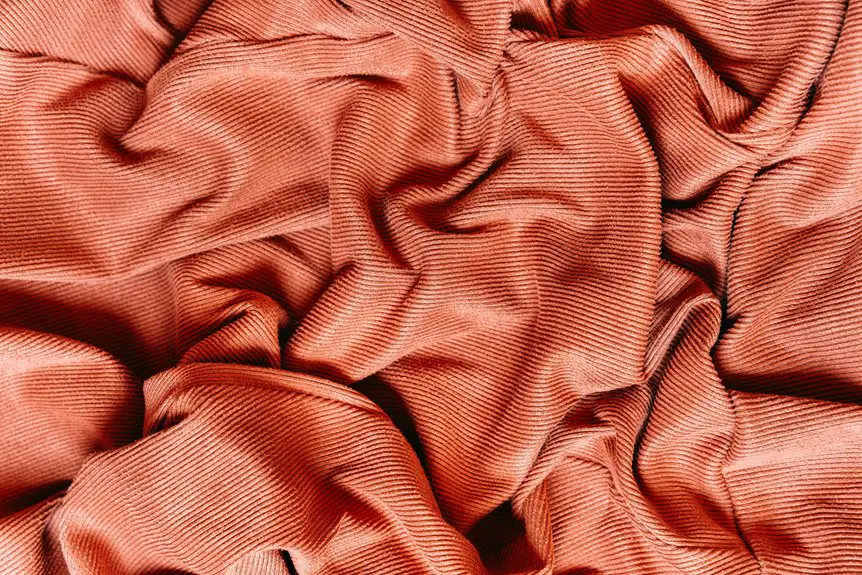
Understanding Puckering and Wrinkles
Puckering and wrinkles can be frustrating issues when sewing, and understanding their causes is essential for achieving a smooth finish.
One common culprit is fabric tension; if your fabric is too tight while you sew, it’ll create uneven gathers. Another factor is needle choice; using the wrong needle type can cause the fabric to stretch or bunch.
Fabric tension and needle choice are key factors that can lead to uneven gathers and fabric bunching while sewing.
Additionally, poor alignment of seams can lead to unwanted puckers, especially if you’re working with multiple layers.
Finally, your sewing technique matters; if you pull the fabric while sewing, you might inadvertently create wrinkles.
Preventive Measures for Seam Puckering
To prevent seam puckering, start by choosing the right fabric for your project.
Lightweight or stretchy materials often require special stitch techniques to maintain a smooth finish.
Let’s explore how these choices can make a big difference in your sewing results.
Fabric Selection Tips
Choosing the right fabric is essential for preventing seam puckering, as certain materials naturally lend themselves to a smoother finish. Opt for fabrics with a bit of stretch, like knits or blends, which help maintain their shape. Lightweight cottons and silks also work well, as they drape nicely without pulling.
Here’s a quick comparison of fabric types:
| Fabric Type | Puckering Resistance |
|---|---|
| Cotton Woven | Moderate |
| Knit | High |
| Silk | High |
| Polyester Blend | Low |
Proper Stitch Techniques
After selecting the right fabric, the next step in preventing seam puckering involves mastering proper stitch techniques. By focusing on these techniques, you can guarantee your seams lay flat and smooth.
- Use a longer stitch length for lightweight fabrics to minimize tension.
- Adjust your sewing machine tension to match the fabric’s thickness.
- Employ a straight stitch for most seams, as it’s less prone to puckering.
- Consider using a walking foot to evenly feed multiple layers of fabric.
- Pin or baste your seams before sewing to keep them aligned.
Implementing these techniques will help you achieve a professional finish and keep those pesky puckers at bay.
With practice, you’ll gain confidence in your sewing skills!
Adjusting Your Sewing Machine Settings
Adjusting your sewing machine settings can make a significant difference in your sewing projects.
Start by checking your stitch length; a longer stitch can help reduce puckering, especially on delicate fabrics.
Also, make certain your tension is balanced. Too tight can gather fabric, while too loose can lead to uneven seams.
Experiment with different needle sizes and types to find what works best for your fabric; a sharp needle works wonders on woven materials, while a ballpoint needle is ideal for knits.
Finally, consider lowering the presser foot pressure if your fabric is lightweight—this helps prevent it from being pulled too much during sewing.
With these adjustments, you’ll notice smoother seams and a more polished finish in your projects.
Selecting the Right Sewing Tools
When it comes to sewing, having the right tools can make all the difference in your experience and results.
Selecting the appropriate sewing tools guarantees smoother seams and helps prevent puckering. Here are five essential tools you shouldn’t overlook:
- Quality Sewing Machine: Invest in a reliable machine suited for your fabric types.
- Sharp Needles: Use the correct needle for your project to avoid snagging.
- Fabric Scissors: Keep a good pair of fabric scissors for clean cuts.
- Measuring Tools: Accurate measuring tools like rulers and tape measures help confirm precision.
- Seam Ripper: Don’t underestimate the value of a seam ripper for corrections.
With these tools at your disposal, you’ll be better equipped to tackle any sewing project with confidence!
Effective Post-Sewing Techniques
Once you’ve finished sewing, it’s essential to implement effective post-sewing techniques to guarantee your garment looks polished and professional.
Start by pressing your seams with a warm iron, using steam to relax the fabric fibers. This step helps eliminate puckering and smooths out wrinkles. For curved seams, use a tailor’s ham to maintain the shape while pressing.
Don’t forget to trim any excess threads for a clean finish. If you notice any stubborn puckering, consider using a seam roll to gently manipulate the fabric.
Finally, allow your garment to rest for a few hours or overnight; this can help the seams settle properly.
Proper Fabric Handling and Preparation
Proper fabric handling and preparation is essential for achieving the best results in your sewing projects. By taking the time to prepare your fabric properly, you can minimize puckering and guarantee smooth seams.
Here are some key steps to follow:
- Pre-wash your fabric to remove shrinkage and chemicals.
- Iron your fabric before cutting to eliminate wrinkles.
- Cut on a flat surface, using sharp scissors or a rotary cutter for clean edges.
- Pin or baste your seams to hold fabric in place and prevent shifting.
- Test stitches on a scrap piece to find the right tension and stitch length.
Design and Pattern Considerations
Design and pattern considerations play an essential role in achieving smooth seams and a polished finish in your sewing projects. Start by selecting patterns that have appropriate seam allowances; too narrow can lead to puckering.
Pay attention to the fabric type and its stretch characteristics; lighter fabrics may require different handling than heavier ones. When drafting your patterns, guarantee grainlines are aligned correctly to avoid distortion.
Consider using stabilizers for delicate fabrics, which can help maintain seam integrity. Additionally, choose seam types that complement your fabric; French seams or flat-felled seams can provide added strength and prevent fraying.
Finally, make necessary adjustments to the fit before cutting, as a well-fitted garment minimizes excess fabric and reduces the risk of puckering.
Tips for Maintaining Smooth Seams Over Time
To keep your seams looking sharp over time, it’s crucial to adopt regular maintenance practices.
Proper storage techniques can also make a big difference in preserving that smooth finish.
Let’s explore some straightforward tips to help you maintain those flawless seams.
Regular Maintenance Practices
While it might be tempting to overlook seam maintenance once your project is complete, regular upkeep is crucial for preserving their integrity and appearance.
By adopting a few simple practices, you can guarantee your seams stay smooth and wrinkle-free over time.
- Check seams regularly for signs of wear or puckering.
- Gently press seams with an iron on the appropriate setting.
- Use a fabric refresher spray to eliminate minor wrinkles.
- Hand wash or machine wash on a gentle cycle to reduce stress on seams.
- Store finished projects flat or rolled to avoid creasing.
Proper Storage Techniques
Proper storage techniques play an essential role in maintaining the smoothness of your seams over time.
First, always store your garments in a cool, dry place to prevent moisture buildup, which can lead to wrinkles. Use padded hangers for delicate fabrics to avoid stretching and distortion.
For heavier items, fold them neatly and place them in breathable storage bins. Avoid overcrowding your closet; give your clothes room to breathe.
If you’re storing items long-term, consider using acid-free tissue paper between layers to prevent creasing.
Finally, keep your storage area clean and free from dust and pests, which can damage your seams.
Frequently Asked Questions
Can I Use a Fabric Steamer for Puckering?
Absolutely, you can use a fabric steamer for puckering! Just hold it a few inches away, letting the steam work its magic. You’ll find it’s a quick way to freshen up your seams.
What Types of Fabric Are Most Prone to Puckering?
Certain fabrics, like cotton, linen, and silk, are more prone to puckering due to their natural fibers and weaves. When you sew, you’ll notice these fabrics can easily form wrinkles along seams if not handled properly.
How Do I Identify the Right Needle Size for My Fabric?
Like Goldilocks, you’ll want the needle just right! To identify the perfect needle size, consider your fabric type; lighter fabrics need finer needles, while heavier ones require thicker needles for smooth sewing and minimal damage.
What Is the Best Way to Store Fabrics to Prevent Wrinkles?
To prevent wrinkles, store fabrics flat or rolled, not folded. Use breathable containers, like cotton bags or bins with ventilation. Keep them away from direct sunlight and humidity to maintain their quality and appearance.
How Do I Know if My Thread Tension Is Too Tight?
To check if your thread tension’s too tight, observe the stitching. If you see puckering or uneven stitches, it’s likely too tight. Adjust the tension until the stitches lie flat and evenly on the fabric.