To set color in batik fabric, start by pre-washing your natural fiber cloth to remove oils that block dye absorption. Apply wax carefully to create patterns that resist dye and test your chosen fiber-reactive or acid dye on a small swatch. Fix the color with heat, steam, or chemical fixatives like soda ash, then rinse gently in cold water and dry away from direct sunlight. Handle your batik with care to keep colors vibrant and last longer. Keep going to uncover more helpful tips for flawless results.
Key Takeaways
- Pre-wash and evenly dampen natural fiber fabric like cotton or silk before dyeing to ensure vibrant color absorption.
- Apply wax carefully to block dye areas and prevent color bleeding, using a tjanting tool or brush for precise patterns.
- Use fiber-reactive dyes for cotton and acid dyes for silk, testing a small swatch for intensity and compatibility.
- Fix colors by steaming, heat setting with an iron, or using chemical fixatives like soda ash or vinegar for durability.
- Rinse fabric in cold water until clear, wash gently with mild soap, and dry away from direct sunlight to preserve colors.
Understanding the Importance of Color Setting in Batik
Although batik fabric is admired for its vibrant patterns, the true beauty depends on how well the colors are set. If you don’t set the colors properly, they can fade or bleed, ruining your design’s crisp lines and rich hues.
Setting color guarantees durability, making your batik last through washes and wear. It also preserves the contrast between different dye areas, keeping your patterns sharp and defined.
Setting color ensures your batik’s vibrant patterns stay sharp and durable through countless washes.
Without this essential step, the dyes remain unstable and susceptible to smudging, which compromises the overall look. By understanding why color setting matters, you’ll appreciate the care needed to maintain batik’s traditional charm.
This knowledge helps you handle your fabric confidently, guaranteeing the colors stay vivid and your artwork stands the test of time.
Preparing Fabric Before Dyeing
Before you start dyeing, picking the right fabric is essential for vibrant colors.
You’ll want to pre-wash your fabric to remove any sizing or oils that can block the dye.
Then, apply your wax resist carefully to create the designs that will hold the color in place.
Choosing the Right Fabric
Choosing the right fabric plays an essential role in achieving vibrant and lasting colors in batik dyeing. You want a fabric that absorbs dye well and holds wax resist effectively. Here’s what to take into account:
- Natural Fibers: Cotton, silk, and rayon work best since they absorb dye deeply and evenly.
- Weave Tightness: Choose fabrics with a medium to tight weave to prevent dye bleeding under the wax.
- Fabric Weight: Opt for lightweight to medium-weight fabric; too heavy fabric might resist dye penetration.
- Color Base: Start with a white or light-colored fabric to guarantee your batik colors pop vividly.
Picking the right fabric sets the foundation for successful dyeing and guarantees your batik design shines with clarity and brilliance.
Pre-Washing Techniques
Three essential steps help you prepare your fabric for dyeing and guarantee the colors set properly.
First, soak your fabric in warm water with a mild detergent to remove any sizing, dirt, or oils that could block the dye. Let it sit for about 30 minutes, then rinse thoroughly.
Next, you’ll want to make sure the fabric is evenly damp but not dripping wet, which helps the dye absorb consistently.
Finally, iron the fabric to smooth out wrinkles and restore its natural texture. This step prevents uneven dye patches and helps maintain your design’s clarity.
Skipping pre-washing can cause blotchy colors or weak dye adherence, so don’t rush this vital preparation stage before moving on to your batik process.
Applying Wax Resist
Once your fabric is clean and prepped, you’ll apply wax resist to create the batik design and control where the dye penetrates. Here’s how to do it:
- Melt the wax: Use a double boiler to gently melt your beeswax or paraffin wax, ensuring it stays fluid but not too hot.
- Draw your design: Dip a tjanting tool or brush into the wax and carefully apply it onto the fabric following your pattern.
- Let it dry: Allow the wax to cool and harden completely, forming a barrier that repels dye.
- Check coverage: Inspect your design for any gaps or thin spots and reapply wax if necessary to prevent dye seepage.
Applying wax resist precisely sets the stage for vibrant, well-defined colors in your batik fabric.
Choosing the Right Dye for Batik Fabric
When you select a dye for batik fabric, consider how well it bonds with the fabric’s fibers and withstands the waxing process.
Fiber-reactive dyes work best with cotton and natural fibers, offering vibrant, long-lasting colors that resist fading after multiple washes. Acid dyes suit silk and wool, providing rich hues that penetrate deeply without stripping wax.
Avoid dyes that require excessive heat or aggressive chemicals, as they can damage the wax resist or fabric. Also, choose dyes compatible with the fabric’s texture and your intended colorfastness.
Testing a small swatch before the full project helps guarantee your dye choice delivers the desired intensity and durability.
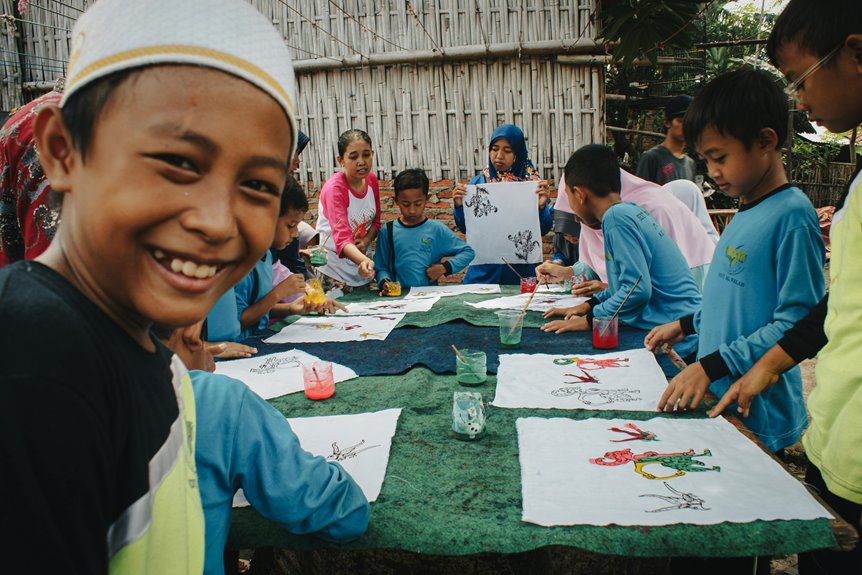
Techniques for Applying Color to Batik
Start by applying color carefully to your batik fabric, using techniques that enhance both the design and the dye’s vibrancy.
Here are four effective methods to try:
- Brush Painting – Use fine brushes to apply dye precisely, allowing you to fill small areas with vibrant color.
- Dipping – Submerge your fabric in dye baths for even, bold color coverage; multiple dips can intensify hues.
- Sponging – Dab dye gently with a sponge for textured, layered effects that add depth to your patterns.
- Spraying – Mist dye lightly over the fabric for subtle color gradients or to blend shades smoothly.
Experiment with these techniques to find the best way to bring your batik designs to life with rich, lasting color.
Using Wax to Preserve Patterns During Dyeing
You’ll start by carefully applying wax to the areas you want to keep free from dye, using tools like tjanting or brushes.
Once the dyeing is complete, you’ll remove the wax by melting it off with heat or boiling the fabric.
Mastering these steps guarantees your patterns stay crisp and vibrant throughout the process.
Wax Application Techniques
Mastering wax application techniques lets you create intricate patterns that resist dye and bring your batik fabric to life.
To get started, follow these key steps:
- Heat the wax properly so it’s fluid but not too hot, ensuring smooth application without burning.
- Use the right tools, like canting for fine lines or brushes for broader strokes, depending on your design.
- Apply wax carefully along your pattern, making sure to cover all areas you want to preserve from dye absorption.
- Work quickly but precisely—wax hardens fast, so steady hands and timing are essential to maintain clean lines.
Wax Removal Process
Once the wax has done its job protecting your design during dyeing, removing it properly reveals the true beauty of your batik fabric.
To start, gently place the fabric between layers of absorbent paper, like newsprint or brown paper bags. Press with a warm iron—not too hot, or you risk damaging the fabric—to melt the wax, which the paper will absorb.
Replace the paper as it becomes saturated to avoid smudging. Alternatively, you can boil the fabric in hot water, which loosens the wax, allowing it to float to the surface.
After boiling, rinse thoroughly to remove any remaining residue. Make certain the fabric dries completely before any further treatments.
Removing the wax carefully guarantees your intricate patterns shine through with crisp, vivid contrast.
Methods for Fixing Dye to Fabric
Although applying dye creates vibrant patterns on batik fabric, fixing the color so it lasts requires specific techniques.
You need to lock in the dye to prevent fading or bleeding. Here are four effective methods you can use:
- Heat Setting: Use an iron or dryer to apply heat, which helps the dye bond with the fibers.
- Chemical Fixatives: Apply substances like soda ash or vinegar to stabilize the color.
- Steam Fixing: Expose the fabric to steam, which enhances dye absorption and colorfastness.
- Sun Drying: Let the fabric dry in indirect sunlight to naturally set the dye without harsh exposure.
Washing and Rinsing Batik Fabric After Dyeing
After you’ve fixed the dye, you need to carefully wash and rinse your batik fabric to remove excess dye and prevent bleeding. Start by rinsing the fabric in cold water until it runs clear. Then, wash it gently with mild soap in lukewarm water. Avoid scrubbing to protect the wax design. Finally, rinse thoroughly and hang to dry away from direct sunlight.
| Step | Purpose |
|---|---|
| Cold Water Rinse | Removes loose dye |
| Mild Soap Wash | Cleans fabric without damage |
| Final Rinse | Guarantees no soap or dye residue remains |
Following these steps guarantees your batik fabric retains its vibrant colors and intricate patterns without unwanted bleeding or fading.
Tips for Maintaining Vibrant Colors in Batik Fabric
To keep your batik fabric looking vibrant for years, you’ll want to handle it with care and follow a few simple maintenance tips.
First, always wash your batik fabric in cold water to prevent colors from fading.
Second, use mild detergents without bleach or harsh chemicals that can strip the dyes.
Third, avoid direct sunlight when drying; instead, hang it in the shade to preserve the colors.
Fourth, iron your batik on the reverse side with a low heat setting to prevent damage.
By sticking to these steps, you’ll maintain the brilliance of your batik fabric and enjoy its beautiful patterns longer.
Taking these precautions helps protect your investment and keeps your fabric looking fresh and vibrant every time you wear or use it.
Frequently Asked Questions
Can Natural Dyes Be Used Effectively in Batik Fabric Coloring?
You can definitely use natural dyes effectively in batik fabric coloring. Just make certain you fix the colors properly with mordants and set them well to guarantee vibrant, long-lasting designs that won’t fade easily over time.
What Safety Precautions Are Needed When Working With Batik Dyes?
Imagine handling vibrant dye like a chef with hot oil—you wouldn’t skip gloves! You shouldn’t, either. Wear gloves, work in ventilated spaces, and avoid inhaling fumes to keep yourself safe while dyeing your fabric beautifully.
How Does Humidity Affect the Batik Dyeing Process?
Humidity affects how your batik colors develop and dry. Too much moisture can cause colors to bleed or not set properly, while low humidity might speed drying, leading to uneven dye absorption and less vibrant results.
Are There Eco-Friendly Alternatives to Traditional Batik Dyeing Chemicals?
You can choose eco-friendly alternatives like natural dyes from plants, fruits, and vegetables. These reduce chemical impact and still produce vibrant colors. Plus, using biodegradable waxes helps keep your batik process sustainable and earth-friendly.
Can Batik Techniques Be Applied to Synthetic Fabrics?
You can apply batik techniques to synthetic fabrics, but you’ll need special dyes and heat-setting methods for color to adhere properly. Synthetic fibers react differently, so test small samples before committing to your project.