Start by carefully evaluating the damage, cleaning dirt and oils gently, then conditioning the leather to restore moisture. For small cracks, apply leather filler, let it dry, sand smoothly, and match the color with dye. Larger tears need backing fabric support and a matching patch glued securely before sealing. Finish with sanding, coloring, and a protective finish to guarantee durability. Keep exploring these steps to master effective, long-lasting leather upholstery repairs.
Key Takeaways
- Assess the damage carefully, identifying crack depth, tear size, and leather type before starting repairs.
- Clean the affected area using mild leather cleaner and dry thoroughly before any repair work.
- Fill small cracks with leather filler, let dry, sand lightly, and apply matching dye for seamless blending.
- For larger tears, insert backing fabric, use a matching leather patch, and bond edges with strong adhesive.
- Finish by sanding, applying colorant in thin layers, and sealing with a flexible leather finish to protect repairs.
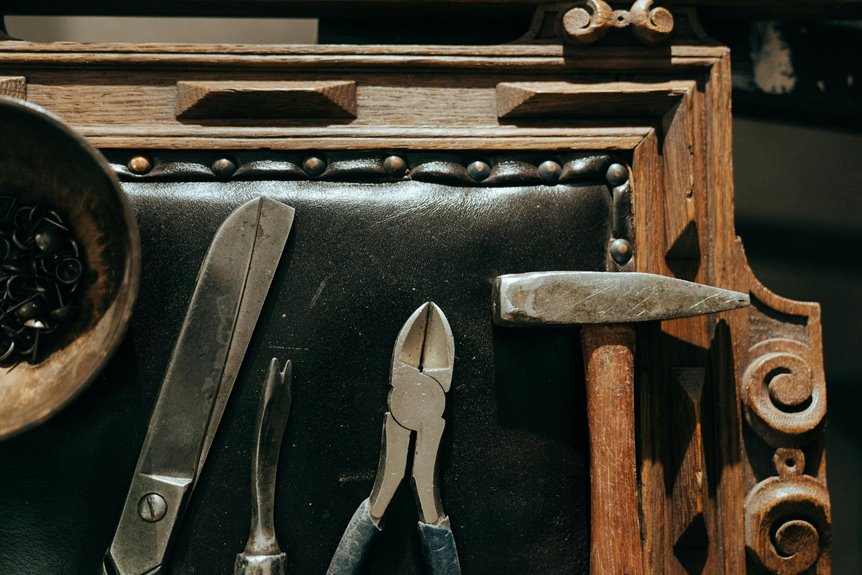
Assessing the Damage and Preparing the Leather Surface
Before you begin repairing leather upholstery, you need to carefully assess the damage to determine the best approach.
Examine the affected area closely, looking for cracks, tears, or worn spots. Check how deep or extensive the damage is, as this will guide your repair method. Make sure to identify the type of leather you’re working with since different types may require specific treatments.
Next, prepare the leather surface by removing any loose fibers or dirt around the damaged area, but don’t clean or condition it yet—that comes later. Use a soft brush or cloth to gently clear away debris without causing further harm.
Gently remove loose fibers and dirt from the damaged leather before cleaning or conditioning it.
Proper assessment and preparation set the foundation for a successful repair, so take your time and be thorough.
Cleaning and Conditioning the Leather Before Repair
Three essential steps will help you clean and condition leather before repair to guarantee the best results.
First, use a soft cloth and a mild leather cleaner to gently remove dirt, oils, and debris. Avoid harsh chemicals that can damage the leather.
Second, let the leather dry completely in a well-ventilated area, away from direct sunlight or heat sources that can cause further drying or cracking.
Third, apply a quality leather conditioner evenly using a clean cloth. This restores moisture, flexibility, and durability, preparing the surface for repair. Conditioning also helps prevent future damage by maintaining the leather’s natural oils.
Taking these careful steps assures your repair materials will adhere properly and that the leather upholstery looks smooth and well-maintained after the repair.
Filling Cracks and Repairing Small Tears
Small cracks and tears in leather upholstery can quickly worsen if left unattended, but you can fix them effectively with the right tools and techniques.
Start by cleaning the damaged area thoroughly to remove dirt. Next, use a leather filler designed for small cracks; apply it with a palette knife, pressing gently to fill gaps. Let the filler dry completely, then sand it lightly with fine-grit sandpaper to smooth the surface.
For small tears, align the edges carefully and use a flexible adhesive to bond them. After the filler or adhesive has set, apply a matching leather dye to blend the repair with the surrounding area.
Finish by conditioning the leather to restore suppleness and protect your work. This method keeps your upholstery looking neat and prevents further damage.
Techniques for Mending Larger Tears and Holes
While filling cracks and fixing minor tears can restore your leather’s appearance, larger tears and holes need a sturdier approach to guarantee durability and a seamless look.
Start by trimming loose threads and cleaning the damaged area thoroughly.
Next, insert a backing fabric beneath the tear to provide support. Cut a leather patch slightly larger than the hole, matching its color and texture as closely as possible.
Use a strong adhesive to secure the patch under the tear, pressing firmly to eliminate air bubbles.
Once the patch is in place, carefully glue the torn edges over it, ensuring they align perfectly.
This technique strengthens the repair and prevents further damage, setting a solid foundation before you move on to finishing touches like sanding and coloring.
Finishing Touches: Sanding, Coloring, and Sealing the Repair
After securing the patch and aligning the edges, you’ll want to smooth the surface by sanding the repair area gently with fine-grit sandpaper. This step removes any roughness and helps the repair blend seamlessly with the surrounding leather.
Next, apply a leather colorant that matches your upholstery. Use a sponge or airbrush for even coverage, building thin layers until you achieve the desired tone. Allow each layer to dry completely before applying the next.
Finally, seal the repair with a flexible leather finish or sealer to protect the color and restore the leather’s natural texture. This finishing coat prevents cracking and fading, ensuring your repair remains durable and discreet over time.
These steps complete a professional-looking leather restoration.
Frequently Asked Questions
Can I Repair Leather Upholstery Myself Without Professional Tools?
You can definitely repair leather upholstery yourself without professional tools. With some basic supplies like leather glue, filler, and colorant, you’ll fix minor cracks and tears effectively. Just follow step-by-step guides and take your time.
How Often Should I Condition Leather Upholstery to Prevent Damage?
You should condition your leather upholstery every 3 to 6 months to keep it supple and prevent damage. If your environment is dry or sunny, consider conditioning more often to maintain its softness and durability.
Are There Specific Types of Leather That Can’t Be Repaired at Home?
You might find some delicate or exotic leathers, like suede or nubuck, tricky to fix at home. They need special care and professional repair to avoid further damage, so it’s best to consult experts.
What Products Are Safest for Pets and Children Around Repaired Leather?
When it comes to pet and child safety, you can’t put all your eggs in one basket. Choose non-toxic, water-based leather repair kits and sealants—they’re gentle, eco-friendly, and keep your family safe while fixing up your leather.
How Long Does a Typical Leather Repair Last Before Needing Touch-Ups?
You can expect a typical leather repair to last anywhere from 1 to 5 years, depending on usage and care. You’ll want to touch it up sooner if it faces heavy wear or exposure to sunlight.