To repair cigarette burns in fabric or car upholstery, first assess the damage size and fabric type. Clean the area gently with mild soap and water, then trim loose fibers. For small holes, use fabric glue or adhesive patches that match color and texture. Larger burns may need stitching or specialized fillers, especially for leather. Blend repairs with matching dye or conditioner to make them less noticeable. If you want to restore your upholstery professionally, there are detailed techniques and tips to explore.
Key Takeaways
- Assess the burn size and fabric type to determine if surface repair or patching is needed.
- Clean the area gently with mild soap and water, then let it dry before starting repairs.
- For small burns, use fabric glue or patch kits that match upholstery texture and color.
- Trim loose fibers and apply leather adhesive or filler for leather upholstery burns.
- Blend repairs with matching dye or conditioner and protect with a finish or spray to ensure durability.
Assessing the Damage on Fabric and Upholstery
How bad is the burn on your fabric or upholstery? Start by examining the size and depth of the damage. Is it a small surface scorch or a deep hole?
Check if the burn has caused discoloration or weakened the fabric fibers. You’ll also want to identify the type of fabric—natural fibers like cotton react differently than synthetics.
Look closely for any surrounding damage, such as melted threads or frayed edges. If the burn is minor and the fibers remain mostly intact, you can likely repair it yourself.
However, extensive burns or large holes may require professional help or patching. Taking a careful, detailed look at the damage will guide you on the best repair approach and prevent worsening the problem.
Gathering Essential Repair Tools and Materials
Before you start fixing the burn, make sure you have the right tools like scissors, needles, and matching fabric or patches.
You’ll also want to prepare your workspace and follow safety steps to protect yourself and your furniture. Gathering everything beforehand will make the repair process smoother and more effective.
Basic Repair Tools
Although repairing cigarette burns might seem challenging, having the right tools makes the process much easier. You’ll need a few basics to get started: a pair of sharp scissors for trimming burnt edges, tweezers to carefully remove charred fibers, and a needle with matching thread for precise stitching.
A fabric adhesive or patching glue helps secure repairs without bulky seams. Keep a small brush or cotton swab handy to apply glue neatly. Additionally, a fine sandpaper or emery board can smooth rough edges around the burn.
Don’t forget a clean cloth to blot excess glue or clean the area before repair. With these basic tools on hand, you’ll tackle cigarette burn repairs confidently and restore your fabric effectively.
Fabric and Upholstery Materials
Now that you have your basic tools ready, it’s important to understand the types of fabric and upholstery materials you’ll be working with. Different materials react differently to heat and repair techniques, so identifying them helps you choose the right approach. Here’s a quick guide:
| Material Type | Characteristics & Repair Notes |
|---|---|
| Cotton | Natural fiber, breathable, easy to patch |
| Polyester | Synthetic, heat-sensitive, use low heat |
| Leather | Durable, needs special adhesive or filler |
| Velvet | Soft pile fabric, careful with texture |
| Microfiber | Synthetic, stain-resistant, use gentle glue |
Knowing these details guarantees your repair matches the original fabric’s look and feel, making the burn less noticeable.
Safety and Preparation Steps
Gathering five essential tools will make repairing cigarette burns in fabric much easier and safer. First, grab a pair of sharp scissors to trim damaged fibers neatly.
Next, have a fabric adhesive or patch kit ready to bond repair materials securely. You’ll also need a fine needle and matching thread for precise stitching.
Don’t forget a small piece of matching fabric to cover larger burns. Finally, keep a soft brush or cloth handy to clean the area before you start.
Before working, verify you’re in a well-ventilated space and wear gloves to protect your skin from adhesives. Clear the workspace of flammable items and keep a fire extinguisher nearby, just in case.
Preparing properly helps you work efficiently and avoid accidents during the repair.
Cleaning the Area Around the Burn
Before you begin repairing the burn, clean the area around it thoroughly to remove any dirt, oils, or loose fibers. This step guarantees the patch or filler adheres properly and the repair looks seamless. Here’s how to do it:
- Vacuum the surrounding area gently to remove loose debris.
- Dampen a clean cloth with mild soap and warm water.
- Blot the fabric carefully without rubbing to avoid spreading the burn damage.
- Let the area air dry completely before moving on.
Taking these precautions helps you achieve a neater, longer-lasting repair.
Skipping this step might cause the fix to peel or discolor over time, so don’t rush it.
Cleanliness is key for a successful restoration.
Repairing Small Cigarette Burns on Fabric
First, check the size of the cigarette burn to decide the best way to fix it.
You’ll want to pick a repair method that matches the damage without making it obvious.
Finally, focus on blending the fabric so the repair looks natural and seamless.
Assess Burn Size
Determining the size of the cigarette burn is essential to choosing the right repair method. To assess it accurately, you’ll want to:
- Measure the burn’s diameter with a ruler or tape measure.
- Examine the fabric’s depth to see if the damage goes through one or multiple layers.
- Check the surrounding area for any discoloration or fabric weakening.
- Compare the burn size to common repair kits’ capacity or patch sizes you have on hand.
Choose Repair Method
You’ll find that small cigarette burns, typically under half an inch, can often be fixed with simple methods like fabric glue or patch kits.
Start by choosing fabric glue if the burn has only caused minor holes or fraying. This method lets you mend the fabric directly without needing a patch.
For slightly larger burns, a patch kit with adhesive backing works well, especially when you match the fabric color and texture. If the damage is on a visible area, pick a patch that blends well or plan to cover it later.
Avoid using heavy adhesives that can stiffen the fabric. By selecting the right repair method based on the burn size and fabric type, you’ll guarantee a cleaner, more durable fix that maintains your fabric’s appearance.
Blend Fabric Seamlessly
Although small cigarette burns may seem minor, blending the fabric seamlessly is key to making repairs nearly invisible. To achieve this, you need to carefully match the damaged area with the surrounding fabric texture and color.
Here’s how you can blend fabric seamlessly:
- Trim away any loose or burnt threads without enlarging the hole.
- Use a fabric glue or adhesive designed for textiles to secure a small patch or fibers taken from an inconspicuous area.
- Gently press the patch into place, ensuring it aligns perfectly with the fabric pattern.
- Let the adhesive dry fully, then lightly brush or steam the area to restore texture and hide repair lines.
Fixing Larger Holes in Fabric Upholstery
Larger holes in fabric upholstery require a bit more attention than small burns. First, trim any burnt or frayed edges around the hole to create a clean working area.
Next, find a fabric patch that closely matches your upholstery in color and texture. Cut the patch slightly larger than the hole.
Apply fabric adhesive around the hole’s edges, then carefully place the patch underneath or over the damaged area, depending on the upholstery’s thickness. Press firmly and let it dry completely.
For extra durability, use a needle and thread to sew around the patch edges with small, tight stitches that blend in.
Once repaired, gently brush the area to blend the patch with the surrounding fabric, restoring your upholstery’s appearance.
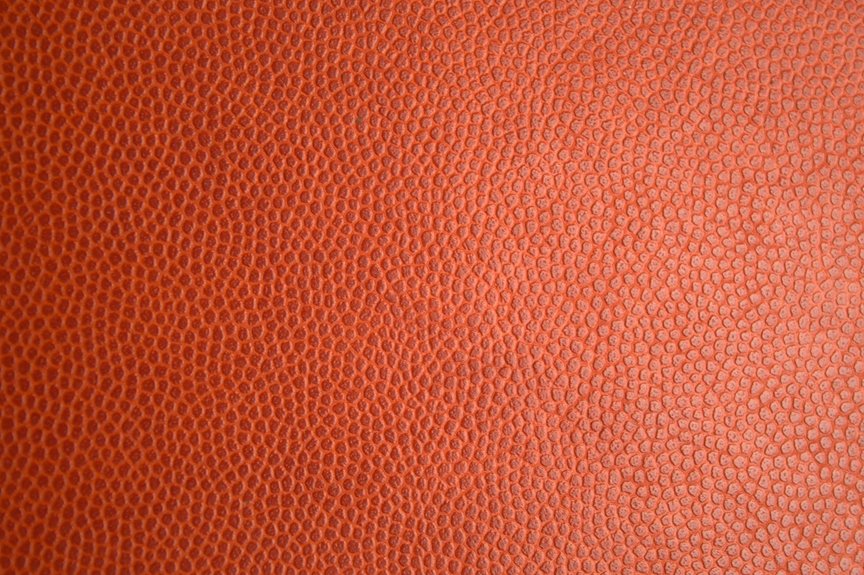
Techniques for Repairing Leather Cigarette Burns
When dealing with leather cigarette burns, you’ll need to act quickly to prevent further damage. Here’s how to repair them effectively:
- Clean the Area: Gently wipe the burn with a damp cloth and mild soap to remove dirt and oils.
- Trim Loose Fibers: Carefully snip away any charred or loose leather edges to create a smooth surface.
- Apply Leather Filler: Use a leather repair compound or filler to fill in the burn hole, smoothing it with a palette knife.
- Color Match and Seal: Once dry, apply a leather dye that matches your upholstery, then seal it with a leather finish to protect the repair.
Using Fabric and Leather Patches for Damage Coverage
Since some burns leave holes or uneven damage that fillers can’t fully fix, using fabric or leather patches offers a practical way to cover and strengthen the affected area.
First, select a patch that closely matches your fabric or leather’s color and texture. Cut the patch slightly larger than the burn to guarantee full coverage.
For fabric, you can use iron-on adhesive or fabric glue to attach the patch; press firmly and let it dry completely.
For leather, use a specialized leather adhesive and clamp the patch in place until it sets. Trim any excess material carefully.
Patches provide durable protection against further damage and maintain the upholstery’s appearance. This method is especially useful for larger burns where simple fillers won’t hold up effectively.
Blending Repairs to Match Original Fabric or Leather
Although patches can effectively cover burns, you’ll want to blend repairs seamlessly to keep your fabric or leather looking natural. Here’s how to do it right:
- Match the Color: Use fabric or leather dye that closely resembles the original shade.
- Texture Adjustment: Lightly sand or use a fabric brush to match the patch’s texture to the surrounding area.
- Feather the Edges: Blend the patch edges into the existing material with fabric glue or a leather conditioner.
- Apply Finish: Seal the repair with a protective spray or leather finish to unify sheen and protect the area.
Preventative Tips to Avoid Future Cigarette Burns
To protect your fabric or leather from future cigarette burns, you need to adopt simple habits and use protective tools. First, always use ashtrays and never hold a lit cigarette near upholstery. Second, consider applying fire-retardant sprays designed for fabrics. Finally, set rules like no smoking indoors or in cars.
| Habit | Tool | Benefit |
|---|---|---|
| Use ashtrays | Fire-retardant spray | Reduces burn risk |
| No indoor smoking | Protective covers | Shields upholstery |
| Extinguish fully | Portable ashtrays | Prevents stray embers |
Frequently Asked Questions
Can Cigarette Burns Cause Health Risks if Left Unrepaired?
Oh sure, let those cigarette burns fester like a fine mold collection! But seriously, while they don’t directly harm your health, they can harbor bacteria and allergens, so you’d better fix them before your upholstery becomes a germ haven.
Are There Any Professional Services for Cigarette Burn Repairs?
You can find professional services specializing in cigarette burn repairs for fabric and car upholstery. They’ll assess damage, match materials, and restore your items skillfully, saving you time and ensuring a seamless, quality repair result.
How Long Does It Typically Take for a Repair to Dry?
Think of drying time like a sunset fading—usually, repairs dry within a few hours. You’ll want to wait at least 4 to 6 hours, but full curing might take up to 24 hours before using the fabric again.
Can Cigarette Burns Be Repaired on Synthetic Fabrics?
Yes, you can repair cigarette burns on synthetic fabrics. You’ll need special adhesives or fabric patches designed for synthetics, and sometimes heat tools help fuse the material. Just be careful to match texture and color for best results.
Is It Possible to Prevent Cigarette Burns With Fabric Treatments?
You’d think fabric treatments would turn your upholstery into a cigarette-proof fortress, right? While some sprays reduce burn damage, they can’t fully prevent burns. So, don’t rely on them; stay cautious instead.