Much like Michelangelo saw the angel in the marble and carved until he set it free, you'll need to approach laser cutting and engraving on fabrics with precision and vision. Start by choosing the right fabric—natural or synthetic—and make sure it's of high quality. Then, familiarize yourself with design software to simplify intricate elements and tailor them to different fabric types. Adjust the laser cutter's settings for power, speed, and frequency, and always conduct thorough testing beforehand. But there's more to mastering this craft; understanding engraving depth and fine-tuning your techniques for clean edges are just the beginning.
Table of Contents
Key Takeaways
- Conduct test cuts on fabric scraps to fine-tune power and speed settings.
- Use high-quality design software like Adobe Illustrator or CorelDRAW for precise design preparation.
- Secure fabric properly to prevent movement during laser cutting or engraving.
- Balance power and speed settings based on fabric type for clean cuts and clear engravings.
- Perform regular lens cleaning and calibration checks for optimal engraving quality.
Choosing the Right Fabric
Selecting the right fabric is vital for achieving the best results with laser cutting and engraving. You'll want to start by exploring various fabric options. Natural fabrics like cotton, silk, and wool are often preferred because they cut cleanly and engrave well. Synthetic fabrics, such as polyester or nylon, can also be used, but they may melt or discolor if not handled correctly.
Next, consider the specific fabric considerations that will impact your project's success. Pay attention to the fabric's thickness, weave, and color. Thicker fabrics might require slower cutting speeds, while tightly woven fabrics can yield more precise engravings. Dark-colored fabrics usually show engravings more distinctly compared to lighter ones.
Fabric compatibility is another vital factor. Ensure the fabric you choose is compatible with your laser cutter's capabilities. Some fabrics may release harmful fumes when cut, so always check the manufacturer's guidelines.
When it comes to fabric sourcing, opt for high-quality materials from reliable suppliers. This guarantees consistency in your projects and reduces the risk of unexpected issues.
Preparing Your Design
Carefully preparing your design is vital for achieving the best results in laser cutting and engraving on fabrics. First, you'll want to choose the right design software. Programs like Adobe Illustrator, CorelDRAW, or AutoCAD are excellent choices due to their robust features and precision. Make sure your design is clean and well-defined, as any errors can translate directly onto your fabric. Save your files in compatible formats such as DXF, AI, or SVG, which are widely accepted by most laser cutting machines.
Before committing to the final cut, conduct fabric testing. Different materials react uniquely to laser cutting and engraving, so it's important to assess material compatibility. Test small sections of your chosen fabric to observe how it responds to the laser. Look for signs of burning, melting, or fraying, and adjust your design or fabric choice accordingly.
Additionally, consider the intricacies of your design. Fine details mightn't translate well on thicker or more delicate fabrics. Simplifying complex elements can lead to more precise and aesthetically pleasing results.
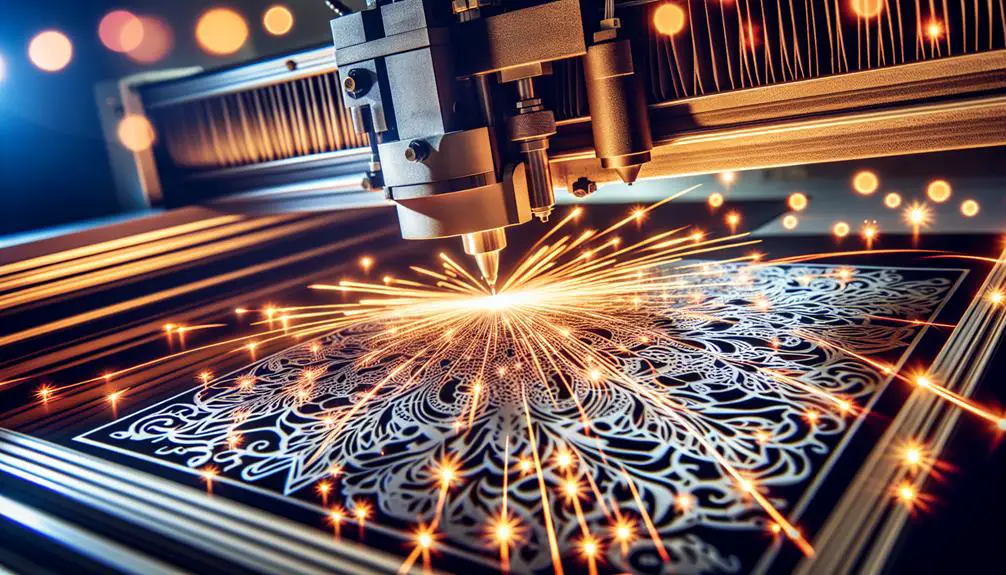
Setting Up the Laser Cutter
When setting up your laser cutter, start by choosing the proper settings for power, speed, and frequency based on your fabric type.
Next, make certain to secure the fabric correctly to prevent any movement during the process.
These steps guarantee precise and clean cuts or engravings every time.
Choosing Proper Settings
Dialing in the right settings for your laser cutter is crucial to achieving perfect cuts and engravings on fabrics. You'll need to fine-tune parameters like speed, power, and frequency to match the fabric you're working with. This not only guarantees clean cuts but also preserves the integrity of the fabric.
Here's a quick guide to help you master these settings:
- Speed and Power Settings: Start with a test piece of your fabric. Adjust the speed and power incrementally to find the sweet spot where the fabric cuts cleanly without burning. For delicate fabrics, use lower power and higher speed.
- Frequency Adjustments: Different fabrics respond uniquely to laser frequency. For example, synthetic fabrics may require a different frequency setting than natural ones. Experiment with frequency adjustments to achieve best results.
- Troubleshooting Issues: If you notice fraying or incomplete cuts, revisit your settings. Sometimes, minor tweaks can resolve these issues. Advanced techniques like multi-pass cutting can also help with thicker fabrics.
- Safety Precautions: Always consider fabric compatibility and safety precautions. Certain fabrics can release harmful fumes when cut, so ensure proper ventilation and use materials that are laser-safe.
Securing Fabric Correctly
Properly securing your fabric on the laser cutter's bed is necessary to guarantee precise cuts and engravings. To begin, make sure that your fabric is laid out flat and free of wrinkles. Achieving perfect fabric tension and alignment is vital; even the slightest shift can result in misaligned cuts or skewed engravings.
Start by using clamping techniques. Secure the edges of the fabric to the laser cutter's bed with clamps, ensuring they're evenly spaced. This will help keep the fabric taut and prevent any movement during the cutting or engraving process.
Next, consider pinning techniques for added stability. Use pins to anchor the fabric, especially around intricate design areas. This will further reduce any chance of the fabric shifting. Confirm the pins are placed outside the cutting or engraving areas to avoid any interference with the laser.
Double-check your fabric alignment by measuring from multiple points to confirm it's square with the laser bed. A ruler or a straight edge can be particularly useful for this step. By mastering fabric tension, alignment, and effectively using clamping and pinning techniques, you'll set the stage for flawless laser cutting and engraving results.
Adjusting Power and Speed
To achieve the best outcomes in laser cutting and engraving on fabrics, you must carefully adjust both the power and speed settings of your machine. These settings play a pivotal role in defining the quality and precision of your work. Incorrect settings can lead to problems, but with some troubleshooting and advanced techniques, you can overcome these challenges.
Here are four essential tips to help you master power and speed adjustments:
- Start with Test Cuts:
Always begin with small test cuts on a fabric scrap. This helps you fine-tune your settings without ruining your main project. Adjust the power and speed incrementally until you achieve clean cuts or sharp engravings.
- Balance Power and Speed:
High power settings can cut through fabric easily, but too much power can burn it. Conversely, low power with high speed mightn't cut through at all. Finding the right equilibrium is key to achieving precise results.
- Consider Fabric Type:
Different fabrics react differently to laser cutting. Delicate fabrics like silk require lower power and speed, while thicker materials like denim can handle higher settings.
- Experiment with Creative Applications:
Use varied settings to create unique artistic designs. Play around with power and speed to explore creative possibilities and add intricate details to your projects.
Engraving Techniques
To master engraving techniques on fabrics, you need to focus on finding the best power settings for your laser cutter. Start by experimenting with different power levels to achieve the desired depth and clarity.
Additionally, prepare your design carefully to make sure it translates well onto the fabric, paying attention to details like line thickness and complexity.
Optimal Power Settings
Choosing the finest power settings for laser engraving on fabrics guarantees precise and clean results. You'll want to start with power calibration to optimize your machine delivers consistent performance. Here's how you can master this critical step:
- Test Runs:
Always run test engravings on a fabric scrap. Begin with lower power settings and gradually increase until you achieve the desired depth and clarity. This helps you avoid burning the fabric.
- Adjust Speed and Power Together:
Balancing speed and power is key. Lower power with slower speed often results in fine, detailed engravings. Conversely, higher power with faster speed can cover larger areas quickly but may sacrifice detail.
- Material-Specific Settings:
Different fabrics respond uniquely to laser engraving. For example, delicate materials like silk require much lower power settings compared to sturdier fabrics like denim. Keep a log of optimal settings for each type of fabric you work with.
- Troubleshooting Tips:
If you notice inconsistent results, revisit your power calibration. Check for any obstructions in the laser path and optimize the lens is clean. Sometimes, adjusting the focus can make a significant difference in engraving quality.
Design Preparation Tips
Before you start engraving, make certain your design is optimized for the specific fabric you're working with. Begin by choosing the right fabric; delicate fabrics require different settings than sturdier ones. Use design software to tailor your image, paying close attention to color contrast and image resolution. High-quality images guarantee crisp, detailed engravings.
When preparing your design, follow these guidelines:
| Step | Action | Tip |
|---|---|---|
| 1. Fabric Selection | Choose the appropriate fabric | Test on scrap pieces to see how it reacts |
| 2. Design Software | Use a powerful design software | Adobe Illustrator or CorelDRAW are great |
| 3. Color Contrast | Adjust color contrast for better visibility | High contrast makes details stand out |
| 4. Image Resolution | Use high-quality images | Aim for at least 300 DPI |
The design software you use can make a huge difference. Programs like Adobe Illustrator or CorelDRAW offer robust tools for tweaking your designs. Enhance color contrast to guarantee the engraving stands out on your chosen fabric. High-quality images (at least 300 DPI) will produce the best results, capturing fine details and avoiding pixelation.
Cutting Techniques
Mastering cutting techniques with a laser cutter allows you to achieve precise, intricate designs on various fabrics. To make sure you get the best results, focus on both fabric safety and cutting precision.
Let's delve into some key aspects to master these techniques:
- Fabric Safety:
Always prioritize fabric safety. Certain synthetic fabrics can release harmful fumes when cut. Guarantee your workspace is well-ventilated and you're using the appropriate protective gear.
- Cutting Precision:
Achieving high cutting precision starts with correctly calibrating your laser cutter. Adjust the focal length and laser intensity to match the type of fabric you're using. Test on scrap material first to avoid costly errors.
- Fabric Compatibility:
Not all fabrics respond equally to laser cutting. Natural fabrics like cotton and silk generally handle well, while some synthetics might melt or burn. Research the compatibility of your chosen fabric to prevent unwanted results.
- Cutting Speed:
The cutting speed is essential for achieving clean cuts. Slower speeds provide finer details but can cause burning if too slow. Faster speeds reduce burning but may sacrifice detail. Experiment with different speeds to find the perfect balance for your fabric.
Post-Processing and Finishing
After cutting your fabric, it's significant to focus on post-processing techniques to guarantee your final product looks professional and polished.
Start by examining the edges for any fraying. Applying a fabric treatment like fray check can help seal the edges, preventing unwanted unraveling.
Next, consider color customization. Using fabric dyes or paints, you can add vibrant hues or subtle tones to enhance your design.
Ironing techniques play an essential role in achieving a smooth, wrinkle-free appearance. Set your iron to the appropriate temperature for your fabric type, and use a pressing cloth to avoid direct heat damage. This step ensures your fabric lays flat, making it easier to add further details.
Embellishment options are vast and can enhance your project to the next level. Think about adding sequins, beads, or even embroidered patches. These elements bring texture and dimension, making your creation truly unique.
Frequently Asked Questions
What Safety Precautions Should I Take While Operating a Laser Cutter?
When operating a laser cutter, prioritize fire safety and eye protection. Prioritize adequate ventilation and use the correct settings for your material. Don't forget to regularly check equipment and have a fire extinguisher nearby.
Can Laser Cutting and Engraving Be Done on Multilayer Fabrics?
Did you know that laser cutters can achieve precision cutting within 0.1mm tolerance? You can definitely work on layered fabrics, enabling fabric etching and expanding your design possibilities to create intricate, multi-dimensional masterpieces.
How Do I Troubleshoot Common Laser Cutting Issues Like Incomplete Cuts or Burns?
To troubleshoot incomplete cuts or burns, adjust your laser settings and ensure proper material preparation. Improve ventilation to prevent fire hazards and maintain a clean workspace. Regularly check and calibrate equipment for peak performance.
What Maintenance Does a Laser Cutter Require for Consistent Performance?
For consistent performance, regularly clean and calibrate your laser cutter. Maintain proper ventilation to prevent overheating. Frequently check the alignment of mirrors and lenses. Proper maintenance guarantees high-quality cuts and extends your machine's lifespan.
Are There Specific Fabrics That Are More Eco-Friendly for Laser Cutting?
A stitch in time saves nine. You should prioritize sustainable materials like organic cotton, hemp, and bamboo. These eco-friendly options guarantee you're environmentally responsible while achieving precision and quality in laser cutting and engraving.

- How Does Ring Spun Cotton Affect Garment Fit and Shape Retention? - August 13, 2024
- What Are the Challenges in Producing Ring Spun Cotton? - August 13, 2024
- Is Ring Spun Cotton Suitable for Plus-Size Clothing? - August 13, 2024


