To make batik fabric, you’ll need plain cotton or silk, wax, a tjanting tool or brush, and fabric dyes. Start by washing and securing your fabric tightly for smooth wax application. Use hot wax to draw your design, then apply dyes in layers, letting each dry before more wax or dye. After dyeing, remove wax with warm soapy water and dry your fabric. Keep going, and you’ll uncover tips on complex patterns, dye mixing, and the best tutorial channels to enhance your craft.
Key Takeaways
- Use cotton or silk fabric and pre-wash it for better dye absorption before starting wax application.
- Apply hot wax with a canting tool for fine lines or brushes/stamps for broader batik patterns.
- Choose fiber reactive dyes for cotton or acid dyes for silk, testing colors in small batches first.
- Plan your batik design on paper, layer wax and dye carefully, and remove wax with warm soapy water.
- Follow YouTube channels like “Batik Baba” and “The Art of Batik” for step-by-step tutorials and tips.
Essential Materials Needed for Batik Fabric
Before you begin creating batik fabric, you’ll need to gather some essential materials that make the process possible.
First, you’ll want plain cotton or silk fabric, as these absorb dye well. Next, get wax—either beeswax or paraffin wax—since it acts as a resist during dyeing.
Start with plain cotton or silk fabric and choose beeswax or paraffin wax to create your batik designs.
You’ll also need a tjanting tool or brushes to apply the wax with precision. Prepare a pot or double boiler to melt the wax safely.
For coloring, select fabric dyes or colored inks designed for textiles. Don’t forget gloves to protect your hands and newspapers or plastic sheets to cover your workspace.
Having a container for hot water to clean tools will help, too. These materials set the foundation for your successful batik project.
Preparing Your Fabric for Wax Application
Before you start applying wax, choose a fabric that absorbs dye well, like cotton or silk.
Make sure to pre-wash it to remove any sizing or chemicals that might interfere with the wax and dye.
Then, stretch and secure your fabric tightly to keep your design crisp and prevent any movement.
Selecting the Right Fabric
Choosing the right fabric is essential for achieving vibrant and lasting batik designs. You want a material that absorbs wax and dye well, ensuring your patterns stay sharp and colors pop. Natural fibers like cotton, silk, and rayon are your best bets—they hold wax effectively and allow dyes to penetrate deeply.
When selecting fabric, consider these points:
- Texture: Smooth fabrics like cotton and silk give clean wax lines.
- Weight: Medium-weight fabrics handle wax application without tearing.
- Color: Choose a light-colored base to make your batik colors stand out.
Picking fabric carefully sets a strong foundation, making your batik creation process smoother and your results more striking.
Pre-Washing Techniques
Although it might seem like a small step, pre-washing your fabric plays an essential role in ensuring your batik designs turn out crisp and vibrant. It removes sizing, dirt, and oils that can resist wax and dyes, leading to uneven patterns. Use mild detergent and avoid fabric softeners to keep fibers ready for wax absorption. After washing, air-dry or tumble dry on low heat.
| Step | Purpose | Tips |
|---|---|---|
| 1. Rinse fabric | Remove loose dirt | Use cold water |
| 2. Wash fabric | Remove sizing & oils | Mild detergent only |
| 3. Rinse again | Remove detergent residue | Multiple rinses if needed |
| 4. Dry fabric | Prepare for wax application | Air dry or low heat tumble dry |
| 5. Iron fabric | Smooth surface for wax | Use medium heat |
Stretching and Securing Fabric
Once your fabric is clean, dry, and smooth, it’s time to stretch and secure it tightly to prevent wrinkles and movement during wax application. This step is essential because any slack can cause the wax to bleed or create uneven patterns.
Start by placing your fabric over a sturdy frame or stretching board. Use tools like clamps, tacks, or nails to hold the fabric firmly in place. Make sure the fabric is taut but not overstretched to avoid distortion.
Here’s what you’ll need to focus on:
- Stretch fabric evenly across the frame, avoiding sagging areas
- Secure edges tightly using clips or small nails for stability
- Check tension regularly to maintain a smooth working surface
Techniques for Applying Wax on Fabric
Several methods exist for applying wax on fabric, each offering unique effects and levels of detail.
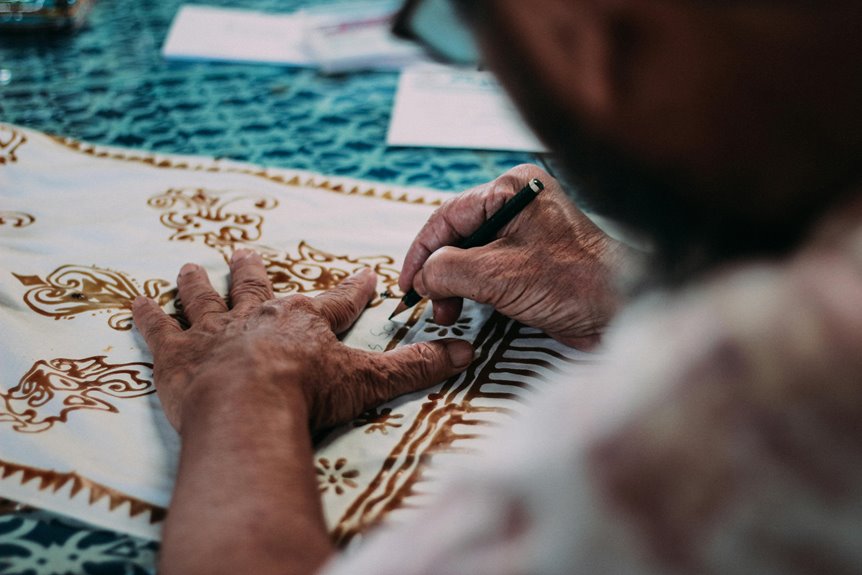
You can use a canting, a small spouted tool, to draw fine lines and intricate designs with hot wax. For bolder patterns, a brush or stamp works well, giving you broader coverage and quicker application.
When using stamps, dip them into the melted wax and press firmly onto the fabric to create repeated motifs. Remember to keep the wax at the right temperature—too hot, and it’ll drip; too cool, and it won’t spread evenly.
You should also work swiftly before the wax hardens to maintain crisp edges. Practicing these techniques will help you master the balance between precision and creativity in your batik designs.
Choosing and Mixing Fabric Dyes
Now that you’ve mastered waxing, it’s time to pick the right dyes for your fabric.
Understanding different types of fabric dyes and how to mix them will help you achieve vibrant, lasting colors.
Let’s explore the options and techniques to make your batik truly stand out.
Types of Fabric Dyes
Choosing the right fabric dye is crucial to achieve vibrant and lasting colors in your batik project. You’ll want to take into account the type of dye that best suits your fabric and desired effect.
Here are three common types of fabric dyes you can use:
- Fiber Reactive Dyes: Perfect for natural fibers like cotton, these dyes bond chemically, offering bright, wash-fast colors.
- Acid Dyes: Ideal for protein fibers such as silk and wool, providing rich, vibrant hues.
- Direct Dyes: Easy to use and suitable for cotton, but less colorfast compared to fiber reactive dyes.
Each dye type requires specific handling and preparation, so choose one that matches your fabric and desired durability.
This guarantees your batik art stays vivid and beautiful over time.
Dye Mixing Techniques
Although picking the right dye is essential, mastering dye mixing techniques will let you create custom colors that perfectly suit your batik design.
Start by selecting high-quality fabric dyes, preferably those designed for cotton or silk, depending on your material. Use small test batches to experiment with color ratios before committing to larger quantities.
Mix your dyes in separate containers, combining primary colors like red, blue, and yellow to achieve secondary and tertiary shades. Remember to keep track of your measurements to replicate successful mixes.
Adjust the intensity by adding water to dilute or increasing dye concentration for deeper hues. Stir thoroughly to guarantee even color distribution.
Step-by-Step Wax-Resist Dyeing Process
The wax-resist dyeing process involves several precise steps that transform plain fabric into vibrant batik art.
Discover how precise steps turn simple fabric into vibrant, intricate batik art through wax-resist dyeing.
First, you prepare your fabric by washing and stretching it on a frame.
Next, you use hot wax to draw your design, carefully outlining shapes and patterns with a canting tool or brush.
After the wax sets, you immerse the fabric in dye, letting the color absorb into the unwaxed areas. The wax prevents dye from reaching certain parts, creating contrast.
Key steps to visualize:
- Applying melted wax in intricate patterns on the fabric
- Dipping the fabric into dye baths for vibrant color absorption
- Reapplying wax on dyed sections for multi-layered designs
This careful layering of wax and dye builds your unique batik masterpiece.
Removing Wax and Revealing Your Design
Once you’ve completed all your dyeing and waxing layers, it’s time to remove the wax and reveal your design.
Start by placing your fabric between sheets of absorbent paper or newspaper. Then, gently iron over the paper using a warm iron. The heat will melt the wax, which the paper will absorb, lifting it away from the fabric.
Replace the paper frequently to prevent smudging. Alternatively, you can boil the fabric in hot water to melt the wax, but this may soften your design’s edges.
After wax removal, rinse your fabric thoroughly in warm, soapy water to get rid of any residual wax. Finally, hang your fabric to dry.
This step brings your batik design to life, showcasing the contrast between dyed and waxed areas clearly.
Tips for Creating Complex Batik Patterns
When you want to create complex batik patterns, planning each layer carefully becomes essential. You’ll need to visualize the design in stages, applying wax and dye methodically.
Start by sketching your pattern on paper, breaking it down into sections that correspond to each color or detail you want to add.
Begin by sketching your design, dividing it into sections for each color or detail to add.
Keep these tips in mind:
- Use fine-tipped canting tools for detailed lines and sharp edges.
- Apply wax in thin layers to avoid cracking and unwanted bleeding during dyeing.
- Let each dye layer dry completely before adding wax for the next color to maintain crisp boundaries.
Recommended YouTube Channels for Batik Tutorials
If you’re enthusiastic to master batik techniques quickly, several YouTube channels offer clear, step-by-step tutorials that can guide you through every stage of the process.
Channels like “Batik Baba” provide detailed demonstrations on traditional wax application and dyeing methods. “The Art of Batik” breaks down complex patterns into manageable steps, perfect for beginners and advanced crafters alike.
You’ll also find “Creative Batik Studio” useful for exploring modern designs and experimenting with colors. These channels often include tips on tools, fabric selection, and troubleshooting common issues.
Frequently Asked Questions
Can Batik Fabric Be Machine Washed Without Damaging the Design?
You shouldn’t machine wash batik fabric, as it can damage the design. Instead, hand wash it gently in cold water with mild detergent to preserve the colors and patterns. Avoid harsh scrubbing or bleaching agents.
What Types of Fabrics Work Best for Batik Besides Cotton?
You’ll find silk, rayon, and linen work well for batik besides cotton. These fabrics absorb wax and dye beautifully, letting your designs pop. Just remember, each fabric needs gentle handling during waxing and dyeing.
How Long Does the Entire Batik Process Typically Take?
Think of batik as a slow dance between wax and dye—it usually takes you several hours to a couple of days, depending on complexity. You’ll wait through waxing, dyeing, drying, and sometimes multiple repeats for vibrant patterns.
Are There Eco-Friendly Alternatives to Traditional Batik Wax?
You can use eco-friendly alternatives like soy wax, beeswax, or plant-based waxes instead of traditional paraffin. These options reduce environmental impact and still let you create beautiful, sustainable batik fabric designs without harmful chemicals.
Can Batik Techniques Be Used on Clothing as Well as Fabric?
Of course, you can’t wear a batik curtain, right? Batik techniques work beautifully on clothing as well as fabric, turning ordinary outfits into wearable art. So, go ahead—make your wardrobe a masterpiece!