To make batik fabric with glue, start by washing and ironing cotton or silk material for a smooth base. Use white school glue to draw your design with a fine brush or squeeze bottle, keeping lines thin to avoid cracking. Let the glue dry completely, then apply fabric dye on uncovered areas for vivid colors. Once dry, peel off excess glue gently. Careful cleaning and ironing preserve your creation—explore creative uses and care tips to maximize your batik’s beauty.
Key Takeaways
- Pre-wash and iron natural cotton or silk fabric to remove chemicals and create a smooth surface for glue batik.
- Use white school glue or fabric glue as a resist, applying thin, even layers with a fine-tipped bottle or brush.
- Let the glue dry completely before applying fabric dyes or textile paints on exposed areas for vibrant color effects.
- After colors dry, gently peel off dried glue flakes and clean residue with a damp cloth to reveal the batik pattern.
- Wash fabric gently by hand with cold water and mild detergent, dry flat in shade, and iron on low heat for durability.
Materials Needed for Glue Batik
To create glue batik, you’ll need a few essential materials that help you achieve the distinctive resist patterns. Start with a plain cotton or silk fabric, as these absorb dye well.
Begin your glue batik journey with plain cotton or silk fabric for vibrant, lasting dye absorption.
Grab a bottle of white school glue or fabric glue—it acts as your resist. You’ll also want a set of fabric dyes or textile paints in your favorite colors.
Prepare a paintbrush or squeeze bottle for applying the glue precisely. Have a flat surface covered with plastic or newspaper to protect your workspace.
Keep some water and paper towels nearby for quick cleanups. Finally, wear gloves to avoid staining your hands and an apron or old clothes to protect yourself from dye splashes.
With these materials ready, you’re set to bring your glue batik design to life.
Preparing Your Fabric for Glue Batik
Before you start applying glue, make sure you pick the right fabric for your batik project.
You’ll need to pre-wash and dry it to remove any finishes that might block the glue.
Finally, iron the fabric to create a smooth surface for the best results.
Choosing the Right Fabric
Choosing the right fabric sets the foundation for successful glue batik. You’ll want natural fibers like cotton, silk, or linen because they absorb dyes and glue better than synthetics.
These materials also hold up well during the dyeing process and give your design vibrant, lasting colors. Avoid polyester or blends with high synthetic content, as glue may not adhere properly, and colors might appear dull or uneven.
Pick a lightweight to medium-weight fabric—too thick, and the glue won’t penetrate well; too thin, and it might tear easily. Also, choose a light-colored base to make your patterns pop.
Pre-washing and Drying
Once you’ve selected the perfect fabric, the next step is getting it ready for glue batik by pre-washing and drying.
Pre-washing removes any sizing, dirt, or chemicals that might prevent the glue from adhering properly. Use a mild detergent and cold water to wash your fabric gently by hand or in a machine on a delicate cycle.
Avoid fabric softeners, as they can leave residues. After washing, hang the fabric to air dry or lay it flat on a clean surface.
Make certain it’s completely dry before moving on, since damp fabric can cause the glue to spread unevenly or not stick well.
Proper pre-washing and drying guarantee your glue batik design will be vibrant and long-lasting.
Ironing for Smooth Surface
Three simple steps can make a huge difference in preparing your fabric for glue batik: ironing it thoroughly to create a smooth, wrinkle-free surface. Wrinkles can cause uneven glue application, which affects your design’s crispness. Set your iron to the appropriate temperature for your fabric type and use a pressing cloth to protect delicate fibers. Iron in long, steady strokes, ensuring every inch is flat.
| Step | Action | Tip |
|---|---|---|
| 1. Heat Setting | Choose fabric type | Avoid too high heat |
| 2. Protection | Use pressing cloth | Prevents direct contact |
| 3. Technique | Iron evenly & slowly | Focus on stubborn wrinkles |
Proper ironing sets the stage for flawless glue batik results.
Designing Your Batik Pattern
Now that your fabric is ready, it’s time to choose the style of your batik pattern.
Think about whether you want geometric shapes, floral designs, or something abstract.
Sketch your ideas on paper to create clear templates before applying them to the fabric.
Choosing Pattern Styles
Although selecting a pattern might seem overwhelming at first, choosing the right design sets the foundation for your batik fabric’s unique character.
Start by deciding whether you want geometric shapes, floral motifs, or abstract designs. Consider how complex or simple you want your pattern to be; intricate details can look stunning but may require more patience.
Think about the fabric’s purpose—bold, repetitive patterns work well for clothing, while delicate, scattered designs suit decorative pieces. You can also mix styles for a more dynamic look, but keep balance in mind to avoid clutter.
Ultimately, pick a style that resonates with you and complements your color choices. This thoughtful selection helps your glue batik project stand out beautifully.
Sketching Design Templates
Start by sketching your design templates to bring your batik pattern ideas to life. This step helps you visualize the final look and plan your glue application precisely. Use a pencil and paper or a digital tool to draft your motifs. Keep your sketches simple but clear, focusing on shapes that suit the glue resist technique.
Don’t hesitate to experiment with patterns until you find one that excites you.
Here are some tips for effective sketching:
- Begin with basic shapes and gradually add details
- Make certain designs are bold enough to resist dye with glue
- Consider repeating patterns for a cohesive fabric look
- Use symmetry or asymmetry based on your style preference
- Label areas where you’ll apply glue to avoid confusion later
Your sketches will guide your entire batik process.
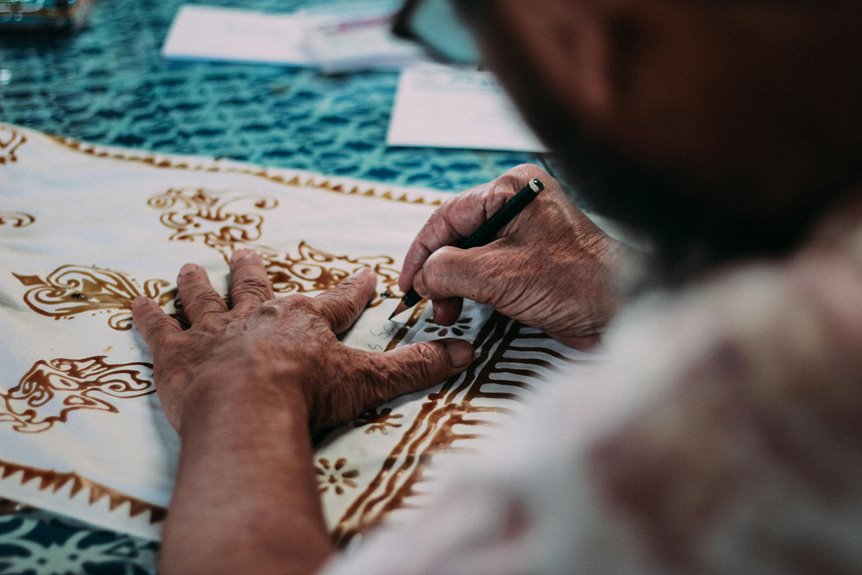
Applying Glue to Create Batik Designs
Before you apply glue to your fabric, make certain your workspace is clean and well-ventilated to avoid any mishaps. Use a fine-tipped bottle or brush to trace your sketch carefully. Steady your hand as you outline, since the glue defines the resist areas that stop dye from penetrating. Work patiently and avoid thick glue layers to prevent cracking.
| Step | Tip |
|---|---|
| Prepare fabric | Iron fabric for smoothness |
| Load applicator | Use fine tips for details |
| Apply glue | Trace design slowly |
| Manage glue | Keep layer thin and even |
| Final check | Inspect for gaps or breaks |
This method guarantees crisp, clean lines that create stunning batik patterns.
Letting the Glue Dry Properly
Give your glue at least one to two hours to dry completely, depending on the thickness of your application and the humidity in your workspace. Proper drying guarantees that the glue forms a solid resist, preventing dye from seeping through your design.
To help the glue dry evenly and effectively, follow these tips:
- Place your fabric flat on a clean, dry surface.
- Avoid touching the glue while it’s drying to maintain the design’s integrity.
- Keep the workspace well-ventilated but free from strong drafts.
- Use a fan on low speed if humidity is high, but don’t blow directly on the fabric.
- Check the glue’s texture; it should feel firm and slightly tacky, not wet or sticky.
Patience here sets the stage for beautiful, sharp batik patterns.
Adding Color to Your Batik Fabric
Once your glue has dried completely, you’re ready to bring your batik fabric to life with color. Use fabric dyes or paints to apply vibrant hues to the exposed fabric areas. You can use brushes, sponges, or even spray bottles for different effects. Remember to apply colors gently to avoid disturbing the glue patterns.
| Dye Type | Application Method | Drying Time |
|---|---|---|
| Fabric Dye | Brush or Sponge | 30 minutes |
| Fabric Paint | Brush | 1 hour |
| Spray Dye | Spray Bottle | 15-20 minutes |
Try blending colors or layering them for richer designs. Work in a well-ventilated space and wear gloves to protect your hands. Once colored, let the fabric dry fully before moving on.
Removing Excess Glue and Finishing Touches
After your fabric has dried completely, you’ll want to remove the excess glue carefully to reveal the crisp batik patterns underneath.
Start by gently peeling off any large glue flakes that lift easily. For stubborn spots, use a damp cloth to soften the glue before wiping it away.
Once the glue is removed, check for any missed areas and clean them up. Finally, give your fabric a light ironing to set the colors and smooth out wrinkles.
Here’s a quick checklist for finishing touches:
- Gently peel off dried glue flakes
- Use a damp cloth for stubborn glue
- Inspect for missed glue spots
- Lightly iron the fabric on low heat
- Allow fabric to air dry completely before use
These steps guarantee your batik fabric looks vibrant and polished.
Tips for Maintaining Your Glue Batik Fabric
Although your glue batik fabric looks stunning fresh off the drying rack, proper care is essential to keep its vibrant colors and intricate patterns intact.
Always wash your fabric gently by hand using cold water and mild detergent to prevent colors from fading or bleeding. Avoid wringing or twisting; instead, press out excess water carefully.
Hand wash with cold water and mild detergent; gently press out water without wringing to preserve colors.
Dry your fabric flat in the shade to protect it from direct sunlight, which can cause fading. When ironing, use a low heat setting and place a cloth between the iron and fabric to avoid damaging the glue-resist areas.
Store your batik fabric in a cool, dry place, away from moisture and direct light. Following these steps will help preserve your beautiful glue batik fabric for years to come.
Creative Ideas for Using Your Batik Fabric
Taking good care of your glue batik fabric guarantees it stays vibrant and beautiful, giving you more opportunities to get creative with it.
Once you have a stunning piece, you can transform it into unique items that showcase your handiwork. Here are some creative ideas to inspire you:
- Sew it into a stylish tote bag for everyday use.
- Create decorative pillow covers to brighten up any room.
- Design a one-of-a-kind scarf or headband.
- Frame a section as wall art for a personal touch.
- Use fabric scraps to craft bookmarks or coasters.
These projects not only highlight your batik fabric’s beauty but also let you enjoy your art daily.
Immerse yourself and explore how versatile your handmade fabric can be!
Frequently Asked Questions
Can Glue Batik Techniques Be Used on Other Materials Besides Fabric?
You can definitely try glue batik techniques on other materials like paper, wood, or canvas. Just remember, different surfaces might react differently, so experiment to see how the glue and dyes interact before committing to a big project.
How Long Does Glue Batik Fabric Typically Last Without Fading?
Imagine your vibrant batik shirt still looking fresh after two years of casual wear. Typically, glue batik fabric lasts about 1-3 years without fading if you avoid harsh washing and direct sunlight. You’ll want gentle care!
Is Glue Batik Safe for Children’s Craft Projects?
You can use glue batik for kids’ crafts, but make sure the glue is non-toxic and washable. Always supervise children to avoid ingestion or skin irritation, and test materials on a small area first for safety.
Can Glue Batik Fabric Be Machine Washed?
You’d think glue batik fabric would survive a machine wash, but it usually can’t. The glue resists water, so washing might ruin your design. To keep it intact, hand wash gently instead, okay?
What Types of Glue Work Best for Batik Designs?
You’ll want to use washable white school glue or fabric glue for batik designs. These types resist cracking and peeling while holding dye out effectively. Avoid super glue since it’s too rigid and not washable.