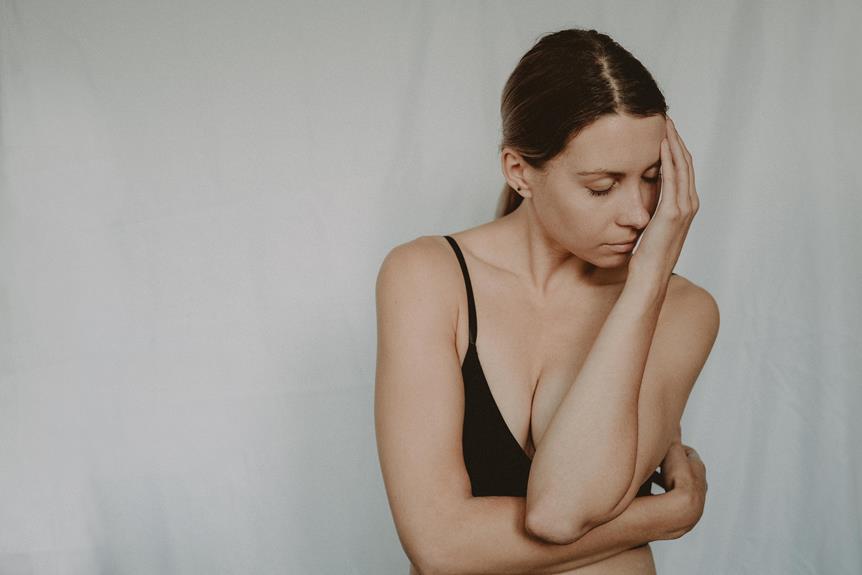
If you're looking to create a bra with a cleavage cover, this guide will walk you through the process step by step.
Start by selecting the right fabric and taking accurate measurements to ensure a perfect fit.
Then, create a custom pattern and add supportive elements for comfort and shape.
Sewing the cleavage cover and attaching adjustable straps are crucial steps for achieving the desired look and fit.
Finally, add the finishing touches with hooks and closures, and don't forget to try it on and make any necessary adjustments.
This comprehensive guide will empower you to craft a bra that meets your exact specifications.
Key Takeaways
Choose smooth and stretchy fabric for comfort and a secure fit.
Take accurate measurements to ensure a properly fitting bra with cleavage cover.
Customize the bra pattern and add supportive elements like underwire or boning.
Sew the cleavage cover and attach adjustable straps for personalized comfort and support.
Choosing the Right Fabric
You should select a smooth and stretchy fabric for making a bra with cleavage cover to ensure a comfortable and secure fit. When choosing fabric types for this purpose, consider stretch fabrics that provide ample coverage. Fabrics like spandex, lycra, or nylon blends are excellent choices as they offer both the necessary stretch and coverage.
These materials conform to the body's shape, ensuring a comfortable and supportive fit while also providing the coverage needed for a cleavage cover bra.
Stretch fabrics are essential for comfort in a bra with cleavage cover. They allow for ease of movement and prevent any constriction that could lead to discomfort. Additionally, these fabrics offer a secure fit, which is vital for a garment intended to provide coverage and support.
Taking Accurate Measurements
When taking accurate measurements for your bra with cleavage cover, start by measuring around your ribcage and under your bust. These measurements will ensure a proper fit and comfortable wear. Here's a step-by-step guide to help you take accurate measurements for your bra style:
Measurement
Your Measurement (inches)
Ribcage
Underbust
Bust
Band size
Cup size
First, use a soft measuring tape to measure around your ribcage, just below your bust. Make sure the tape is snug but not too tight. Next, measure around the fullest part of your bust. Subtract the ribcage measurement from the bust measurement to determine your cup size. The difference corresponds to the following cup size: 1 inch – A cup, 2 inches – B cup, 3 inches – C cup, 4 inches – D cup, and so on. Lastly, calculate your band size by rounding off your ribcage measurement to the nearest even number. By taking these accurate measurements, you can ensure that your bra with cleavage cover fits perfectly and provides the support you need.
Creating the Bra Pattern
Now that you have taken accurate measurements, the next step is to create the bra pattern.
In this section, we'll discuss the important points of bra cup measurements and adjusting for coverage.
Let's dive into the process of creating a customized bra pattern that fits you perfectly.
Bra Cup Measurements
First, carefully measure your bust and underbust using a soft measuring tape, ensuring accuracy for the bra cup pattern. To get the most accurate measurements, wrap the tape snugly around the fullest part of your bust and just under your bust where your bra band sits. Take note of these measurements as they'll determine the size and shape of your bra cups.
When creating the bra pattern, it's crucial to consider the measuring technique to ensure a proper fit. If your measurements fall in between standard sizes, adjustments may be necessary to achieve the perfect fit. Understanding how to adjust the pattern based on your measurements is essential for creating a bra that provides the desired support and comfort.
Adjusting for Coverage
To adjust for coverage and create the bra pattern, measure the desired amount of cleavage cover based on your personal preference and style.
When creating the bra pattern, consider the level of cleavage enhancement you want to achieve. There are various coverage options to choose from, such as low, moderate, or full coverage, depending on your comfort and style.
To determine the coverage level, consider the placement of the cups and the distance between them. Ensure that the pattern accounts for the desired coverage while providing ample support.
You can customize the pattern to suit your preferences, whether you prefer a more discreet or enhanced cleavage look. By adjusting the pattern for coverage, you can create a bra that meets your specific needs and style.
Adding Supportive Elements
When creating a bra with cleavage cover, consider adding supportive elements, such as underwire or boning, to ensure proper structure and comfort. These elements contribute to a supportive fit, enhancing both comfort and style.
Underwire, for instance, provides additional support and shape to the bra, helping to lift and separate the breasts for a more flattering silhouette. It's important to ensure that the underwire is properly encased within the bra to prevent it from poking or digging into the skin.
Similarly, boning can be strategically placed along the sides or at the center front of the bra to provide additional support and structure. When incorporating boning, it's crucial to use flexible, lightweight materials that allow for ease of movement while still maintaining the desired shape.
Sewing the Cleavage Cover
Start sewing the cleavage cover by aligning the edges of the fabric and pinning them together securely. This step ensures that the cover will fit seamlessly into the bra and provide the desired cleavage enhancement.
Use the following sewing techniques to create a professional-looking cleavage cover:
Straight Stitching: Sew along the pinned edges using a straight stitch on your sewing machine. Ensure that the stitches are neat and even to maintain the clean lines of the cover.
Trim Excess Fabric: After sewing, carefully trim any excess fabric to prevent bulkiness. This will help the cleavage cover lay flat against the body when worn.
Press Seams: Use an iron to press the seams open. This will give the cleavage cover a polished look and ensure that it lays smoothly against the skin when inserted into the bra.
Topstitching: Consider adding topstitching along the edges of the cleavage cover for a professional finish. This not only reinforces the seams but also adds a decorative touch to the cover.
Attaching Adjustable Straps
After sewing the cleavage cover, you'll need to attach adjustable straps to the bra to ensure a comfortable and customizable fit. Begin by determining the ideal placement for the adjustable straps on the back of the bra. Typically, this is about 1-2 inches from the side seams. Secure the straps in place by sewing them securely to the back of the bra, ensuring that they're evenly positioned on both sides.
Next, adjust the strap length to fit your specific needs. Slide the adjuster to make the straps shorter or longer, depending on your comfort and support preferences. It's essential to ensure that the straps are adjusted evenly to maintain proper support and prevent discomfort.
When attaching the adjustable straps, it's crucial to use high-quality materials and secure stitching to withstand the tension and movement they'll experience. Check the adjusters periodically to make sure they're staying in place and the straps remain at the desired length.
Finishing Touches: Hooks and Closures
To attach the hooks and closures, carefully align them at the center back of the bra and secure them in place with sturdy stitching. This ensures a secure and comfortable fit for the wearer. When attaching the closures, ensure that they're evenly spaced and aligned to maintain the integrity of the bra design.
Here are some tips for adding hooks and closures to your cleavage-enhancing bra:
Choose the Right Closure: Select a closure that suits the design and support needs of your bra. Options such as hook-and-eye closures or clasps provide secure fastening for different styles of bras.
Consider Underwire Options: If your bra design includes underwire for added support and shaping, ensure that the closure is compatible with the underwire placement. This will contribute to the overall comfort and effectiveness of the bra.
Test the Fit: Before finalizing the closure placement, have the wearer try on the bra to ensure the hooks and closures align properly and provide a snug fit without causing discomfort.
Reinforce the Stitching: After aligning the closures, reinforce the stitching to ensure durability and longevity, especially if the bra is intended for regular wear.
Trying on and Adjusting the Fit
Try on the bra and adjust the fit to ensure it contours to your body comfortably and provides the desired cleavage coverage. When trying on the bra, pay attention to the comfort level and make fit adjustments as necessary. Ensure that the band is snug but not too tight, and the cups fully encapsulate the breasts without any spillage. It's important to move around and raise your arms to check for any discomfort or shifting of the bra.
Consider your style preferences and aesthetic appeal when adjusting the fit. Some may prefer a higher cleavage line, while others may opt for a more natural look. Make adjustments to the straps to achieve the desired lift and cleavage. Additionally, evaluate the overall aesthetic appeal of the bra on your body, ensuring that it complements your shape and provides the desired silhouette.
Fit Adjustments
Comfort Level
Snug band
No discomfort
Proper cup size
Easy movement
Adjustable straps
Secure support
Cleavage coverage
Natural look
Aesthetic appeal
Complements shape
Frequently Asked Questions
How Do I Choose the Right Bra Size for Me?
To choose the right bra size, follow these bra fitting tips: Measure your band size and cup size accurately, try on different styles, and ensure a proper fit with no gaps or spillage.
Can I Use Any Type of Fabric for Making the Cleavage Cover?
You can use a variety of fabric options for making the cleavage cover, such as cotton, lace, or satin. Consider using stretchy materials for comfort and proper fit. Sewing techniques will vary based on the fabric chosen.
What Is the Best Way to Ensure That the Bra Provides Enough Support?
To ensure the bra provides enough support, focus on proper bra construction. Pay attention to band snugness and underwire fit. For cleavage enhancement, consider design elements like padding and shaping to achieve the desired look.
Are There Any Special Techniques for Sewing the Cleavage Cover to Ensure a Smooth Finish?
To achieve a seamless look for the cleavage cover, focus on precise sewing techniques. This will ensure a smooth finish and a professional result. Take your time and pay attention to detail for the best outcome.
How Can I Make Sure the Adjustable Straps Are Comfortable and Secure?
To ensure comfortable and secure adjustable straps, choose a fabric with stretch and durability. Implement support techniques like reinforced stitching and proper strap placement. Regularly test and adjust the fit to guarantee comfort and support.
Rohan is an entrepreneur and blogger that is an expert on fabrics. He has started and grown numerous businesses in the fabric industry. He is passionate about sharing his knowledge of fabrics with others and helping them find the perfect fabric for their needs. Rohan's blog provides valuable information on a variety of topics related to fabrics, including how to select the right fabric for a project, care for fabrics, and where to find the best deals on fabric.