You might be surprised at how easily you can enhance your sewing projects with embroidery. By choosing the right fabric and mastering a few basic stitches, you can bring your creations to life in a way that truly reflects your style. Think about where you want to place your designs—on a tote bag, a shirt, or perhaps a home decor item. But before you rush in, there are some essential tools and techniques you'll want to consider to make the process smoother and more enjoyable—let's explore those next.
Key Takeaways
- Choose lightweight fabrics like cotton or linen to enhance the visibility of your embroidery details.
- Use basic stitches such as straight stitch and satin stitch to create varied textures and fills in your designs.
- Plan your embroidery placement strategically on items like pockets or collars for added visual interest.
- Experiment with color combinations that complement your fabric and reflect your personal style.
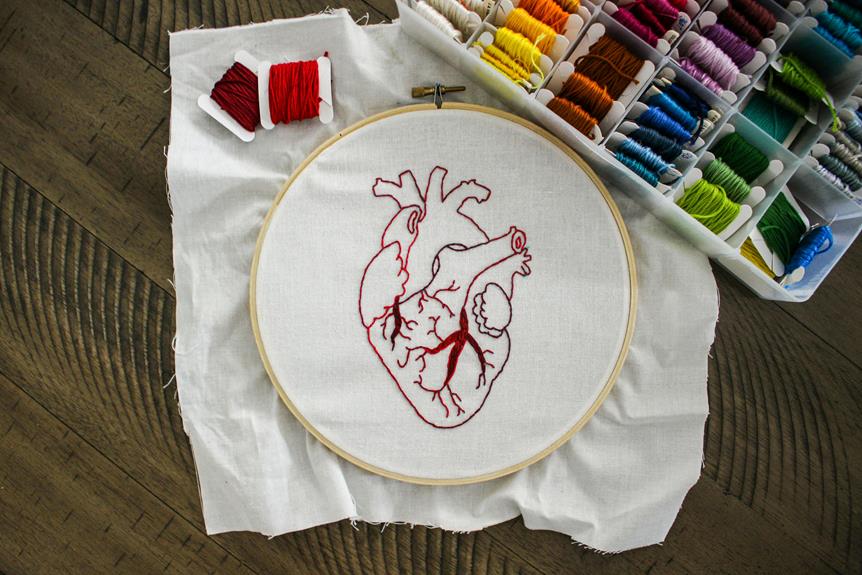
Choosing the Right Fabric
Choosing the right fabric for your embroidery project can make all the difference in achieving a professional look.
When selecting a fabric, consider its weight and texture. Lightweight fabrics like cotton or linen are excellent choices for detailed embroidery, as they allow your stitches to stand out. Heavier fabrics, such as denim or canvas, can work too, but be prepared for a different stitching experience.
You'll also want to think about the fabric's weave. A tighter weave holds stitches better and prevents puckering, while a looser weave may create unexpected results. Test a small swatch before diving into your project to see how your chosen fabric interacts with your embroidery thread.
Color is another crucial factor. Choose a fabric color that complements your thread but doesn't overpower it. Neutral tones often provide a great backdrop, allowing your design to shine.
Basic Embroidery Stitches
Mastering a few basic embroidery stitches can significantly enhance your sewing projects and bring your designs to life. You don't need to be an expert to get started; just focus on a few key stitches that are versatile and easy to learn.
The straight stitch is the foundation of embroidery. Simply bring your needle up from the back and down into the fabric, creating a straight line.
Next, try the backstitch, which is perfect for outlining. You'll create a continuous line by alternating between going back to the last stitch and then moving forward.
Another great stitch is the satin stitch. This one fills shapes beautifully. Just work your needle back and forth within the shape, keeping the stitches close together.
The French knot adds texture and dimension. To make one, wrap the thread around your needle, push it down through the fabric, and pull tight.
Once you've practiced these stitches, you'll find endless ways to incorporate them into your projects. So grab your needle and thread, and let your creativity flow!
Designing Your Embroidery Pattern
When you start designing your embroidery pattern, consider how the elements will come together to create a cohesive look. Begin with a theme or concept that resonates with you—this could be floral, geometric, or even abstract. Sketch out your ideas on paper, playing with various shapes and sizes until you find a combination that feels balanced.
Next, think about the placement of your design. Visualize how it'll fit within the context of your project. Is it a centerpiece, or will it complement other elements? This will help you determine the scale and complexity of your pattern.
Don't shy away from experimenting with color; choose hues that enhance your theme while ensuring they work well together.
Once you've settled on a design, refine it by simplifying complex elements. A clean, straightforward pattern often has a more striking impact than one that's overly intricate.
Lastly, remember that your pattern should reflect your personal style, so trust your instincts throughout the process. By thoughtfully considering these aspects, you'll create an embroidery pattern that not only enhances your project but also showcases your creativity.
Tools and Supplies Needed
To successfully incorporate embroidery into your sewing projects, you'll need a few essential tools and supplies that make the process smoother and more enjoyable.
First, get yourself a good embroidery hoop. This keeps your fabric taut and makes stitching easier. You'll also want a variety of embroidery needles. Look for ones specifically designed for hand embroidery, as they have larger eyes to accommodate different thread types.
Next, stock up on embroidery threads in various colors. Cotton floss is a popular choice, but you might also consider specialty threads like metallics or variegated options for added flair.
Don't forget sharp scissors for precise cutting and a fabric marker or chalk for marking your designs. A sturdy fabric is crucial too; cotton or linen works well for most projects. If you're working with delicate fabrics, be mindful of stabilizers to prevent puckering.
Lastly, consider having a pattern guide or reference handy. This will help you keep track of your stitches and ensure your design comes out just right.
With these tools and supplies, you're well on your way to adding beautiful embroidery to your sewing projects!
Techniques for Integration
With the right tools and supplies in hand, you can explore various techniques to seamlessly integrate embroidery into your sewing projects. Here are some methods you can try:
| Technique | Description | Best For |
|---|---|---|
| Appliqué | Sew fabric shapes onto your base fabric, then embellish with embroidery. | Jackets, bags, home decor |
| Direct Embroidery | Stitch designs directly onto your fabric before assembling your project. | T-shirts, quilts |
| Patchwork | Combine embroidered patches with regular fabric pieces for a unique look. | Jeans, jackets, accessories |
Start by planning where you want the embroidery on your project. For instance, you might want to place a floral design on a pocket or a monogram on a collar. Use a water-soluble stabilizer to prevent puckering during the embroidery process. Afterward, you can remove it easily, leaving a clean finish. By using these techniques, you'll add texture and personality to your creations without overwhelming the overall design. Remember to experiment and have fun while integrating embroidery into your sewing projects!
Embellishing Different Projects
Embellishing different projects allows you to personalize each piece, transforming basic items into unique expressions of your creativity. Whether you're working on clothing, home decor, or accessories, embroidery adds a special touch that makes your work stand out.
Here are three projects you can embellish with embroidery to ignite your passion:
- Tote Bags: Personalize your tote by adding floral motifs or your initials. It not only makes your bag unique but also reflects your style when you're out and about.
- Clothing: Revamp plain shirts or jeans with embroidered patches or delicate designs. This can turn a simple outfit into a statement piece, showcasing your artistic flair.
- Home Decor: Enhance pillow covers or table runners with beautiful embroidery. This adds warmth and character to your living space, making it feel more inviting and truly yours.
Caring for Embroidered Items
Caring for your embroidered items ensures they stay vibrant and intact for years to come. Start by always reading the care label before washing. Most embroidered pieces can be machine washed, but it's best to use a gentle cycle with cold water to prevent fading and damage. If you can, place your item inside a mesh laundry bag to protect the embroidery from snagging.
When it comes to drying, air drying is the safest option. If you must use a dryer, opt for a low heat setting. Avoid ironing directly over the embroidery; instead, turn your item inside out and use a low heat setting on the reverse side. You can place a thin cloth between the iron and the embroidery for extra protection.
For stains, treat them as soon as possible. Use a gentle stain remover and test it on a hidden area first. If you're unsure, hand washing with mild soap can be a safer choice.
Lastly, store your embroidered items in a cool, dry place away from direct sunlight to prevent fading. With these simple care tips, your embroidered creations will continue to shine beautifully.
Frequently Asked Questions
Can I Use Embroidery on Stretchy Fabrics?
Yes, you can use embroidery on stretchy fabrics! Just make sure to choose the right stabilizer and needle. This helps maintain the fabric's elasticity while ensuring your design stays intact without puckering or distortion.
How Do I Fix Mistakes in My Embroidery?
To fix mistakes in your embroidery, carefully remove the flawed stitches using a seam ripper. Then, re-stitch the area, ensuring your tension and technique are consistent. Practice makes perfect, so don't get discouraged!
What Thread Types Are Best for Embroidery?
When choosing thread types for embroidery, you'll want to consider cotton for its versatility, rayon for its sheen, and polyester for durability. Each offers unique textures and colors, enhancing your embroidery's overall appearance and longevity.
Can I Combine Machine and Hand Embroidery?
Yes, you can definitely combine machine and hand embroidery! Mixing techniques adds depth and texture to your projects. Experiment with different patterns and stitches to create unique designs that showcase your personal style and creativity.
Is There a Specific Order for Embroidering on a Project?
There isn't a strict order for embroidering, but starting with the base fabric is smart. You can outline first, then fill in details. Just ensure you secure your threads well to prevent any unraveling.