To fold a flawless bullseye tie-dye pattern, start by laying your pre-washed fabric flat and smooth. Pinch the exact center firmly, then pull the fabric upward, creating a cone shape. Use rubber bands to secure the fabric at equal intervals along the cone, adjusting tightness for crisp rings. Make sure bands are evenly spaced to keep the pattern balanced. Apply dye carefully between bands for vivid circles. Follow these steps closely, and you’ll soon master the whole process with ease.
Key Takeaways
- Lay fabric flat and smooth on a clean surface, ensuring no wrinkles for even dye absorption.
- Find and firmly pinch the exact center point by folding fabric in half both ways for symmetry.
- Gather fabric evenly around the pinch point and twist gently to create a tight, balanced bundle.
- Secure fabric with evenly spaced rubber bands, adjusting tightness to control ring sharpness.
- Check band spacing visually to ensure distinct, clear bullseye rings before applying dye.
Gather Your Materials and Prepare Your Workspace
Before you begin folding your bullseye tie-dye, gather all the essential materials like plain white fabric, rubber bands, dye colors, gloves, and plastic covers. Having everything ready guarantees a smooth process without interruptions.
Set up your workspace in a well-ventilated area, preferably covered with plastic or newspaper to protect surfaces from dye stains. Keep your gloves on to avoid staining your hands and have paper towels handy for quick cleanups.
Arrange your dye bottles within easy reach, and fill containers with water for rinsing if needed. Organizing your space not only keeps things tidy but also lets you focus on creating precise folds for a sharp bullseye pattern.
When all materials and your workspace are prepared, you’re ready to move forward confidently.
Choose the Right Fabric for Your Bullseye Pattern
With your materials gathered and workspace set, the next step is selecting the best fabric to bring out the bullseye tie-dye pattern vividly. Choosing the right fabric guarantees your colors pop and the design stays sharp. Here’s what to take into account:
- Cotton: It’s the top choice because it absorbs dye well and produces bright, lasting colors.
- Rayon and Bamboo: These natural fibers also take dye beautifully but can be more delicate.
- Avoid Synthetic Blends: Polyester and other synthetics resist dye, resulting in dull or patchy patterns.
Stick to natural, light-colored fabrics to make your bullseye design stand out.
The fabric’s texture and weave also influence how crisp your folds appear, so pick something smooth and tightly woven for the best results.
Pre-Wash and Dry Your Fabric Properly
Properly pre-washing and drying your fabric guarantees the dye adheres evenly and prevents unwanted color bleeding later.
Start by washing your fabric in cold water without fabric softener to remove sizing, dirt, and oils that block dye absorption. Use a mild detergent and avoid bleach, which can weaken fibers.
After washing, dry your fabric completely; damp fabric won’t hold the dye well and can cause colors to run. You can air-dry or tumble dry on low heat, but make certain the fabric is fully dry before you begin folding.
Taking these steps guarantees your bullseye tie-dye pattern will be vibrant and crisp, setting a solid foundation for the rest of your project.
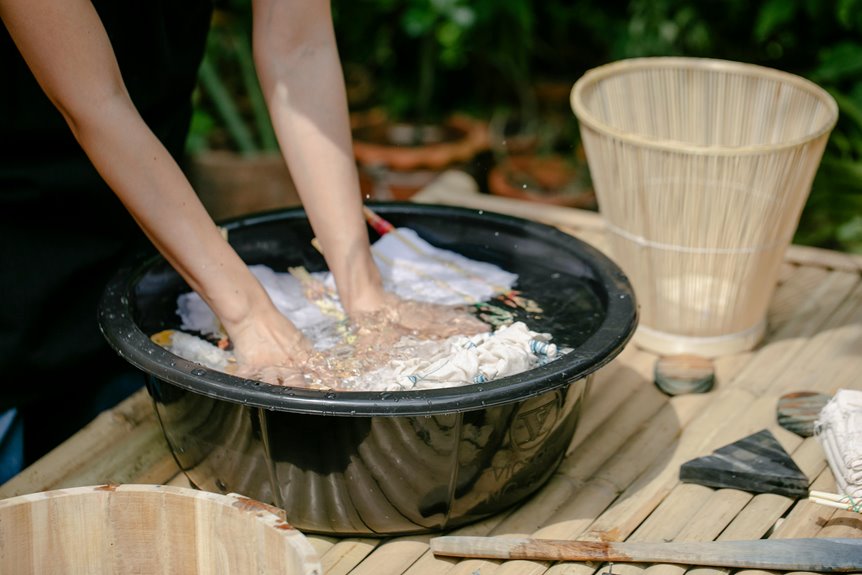
Lay Out Your Fabric Flat and Smooth
A flat, smooth surface is essential for creating a clear bullseye tie-dye pattern. When your fabric lies evenly, you guarantee the dye spreads uniformly without unwanted wrinkles or folds that could distort the design.
Start by choosing a clean, large workspace like a table or floor. Lay your fabric down gently, smoothing out any creases with your hands.
Here’s why this step matters:
- Prevents uneven dye absorption – Wrinkles can cause blotchy spots.
- Maintains pattern symmetry – A smooth base helps keep your bullseye centered and balanced.
- Simplifies folding – Flat fabric is easier to pinch and twist precisely for the next step.
Taking the time to create a smooth foundation sets you up for a flawless bullseye pattern.
Pinch the Center Point for the Bullseye
First, find the exact center of your fabric by folding it in half both ways.
Once you’ve located the center point, pinch it firmly between your fingers.
Hold this pinch securely to create the foundation for your bullseye pattern.
Finding the Exact Center
To create a perfect bullseye tie-dye, you’ll need to find the exact center of your fabric by pinching it firmly. This center point acts as the anchor for your pattern, so precision matters. Here’s how to nail it:
- Fold in Half Twice: Fold your fabric neatly in half, then fold it in half again. The corner where all folds meet is your center.
- Pinch the Point: Grab that meeting corner firmly between your thumb and forefinger, lifting it off the surface.
- Check for Symmetry: Verify the fabric layers align evenly around your pinch point to keep your bullseye balanced.
Finding the exact center sets the stage for a flawless bullseye that radiates perfectly outward.
Securing the Pinch Point
Three strong folds will help you maintain control as you secure the pinch point for your bullseye tie-dye.
First, firmly pinch the exact center of your fabric where you previously found the center. Grip it tightly between your thumb and forefinger to prevent slipping.
Next, lift the fabric straight up, letting the rest hang down naturally. This creates the signature bullseye spiral.
While holding the pinch point, use your other hand to gather the fabric evenly, smoothing out wrinkles and aligning the layers.
Once gathered, twist the fabric gently to tighten the pinch and keep it secure. You can then fasten the pinch point with rubber bands or string, making sure it’s snug enough to hold the folds in place during dye application.
Twist and Pull the Fabric Upward From the Center
Once you’ve laid your fabric flat, grab the center firmly and start twisting it in a circular motion while simultaneously pulling upward. This motion creates the iconic spiral foundation of your bullseye tie-dye.
Start by gripping the fabric center, twisting and pulling upward to form the classic bullseye spiral.
Keep twisting until the entire fabric forms a tight, compact spiral from the center. As you pull, verify the layers compress evenly to maintain uniform dye absorption.
Remember these key points:
- Twist evenly to avoid uneven dye patterns.
- Pull upward steadily to keep the spiral tight and well-defined.
- Maintain consistent pressure to prevent fabric bunching or gaps.
Mastering this step sets the stage for vibrant, symmetrical rings in your bullseye design. Your careful control here will shine through once dyed.
Secure the Fabric With Rubber Bands at Intervals
After twisting and pulling your fabric into a tight spiral, the next step is to hold that shape firmly by securing it with rubber bands.
Wrap the rubber bands snugly around the fabric at regular intervals, spacing them evenly along the spiral. These bands act as barriers, creating distinct sections that will form the signature bullseye rings once dyed.
Make certain the bands are tight enough to keep the fabric compressed but not so tight that they snap or damage the material. Using multiple rubber bands guarantees the dye stays separated in clear, circular patterns.
Take care to handle the fabric gently as you work, maintaining the spiral’s shape while applying the bands. This step is vital for achieving well-defined, concentric circles in your bullseye design.
Adjust the Bands to Define the Bullseye Rings
Now’s the time to adjust your rubber bands to shape those classic bullseye rings.
Pay attention to how tight you make each band and the spacing between them to create clear, defined circles. Small tweaks here can really make your pattern pop.
Band Placement Techniques
A key step in creating clear bullseye rings is adjusting the placement of your rubber bands. Where you place each band directly influences the size and shape of your rings.
To get those crisp circles, follow these band placement techniques:
- Space Evenly: Place bands at consistent intervals to guarantee uniform rings. Uneven spacing leads to irregular patterns.
- Work from Center Outward: Start with a band at the center point, then add bands progressively outward, controlling the number of rings.
- Pinch and Hold Firmly: When placing each band, pinch the fabric tightly at the fold to prevent dye bleeding between rings.
Adjusting Band Tightness
Three levels of tightness can make a big difference in defining your bullseye rings. When you wrap the rubber bands snugly but not overly tight, the dye seeps under the folds, creating softer, blended edges.
If you pull the bands very tight, you’ll get sharp, crisp lines where the dye can’t penetrate. For a classic bullseye, tighten the bands firmly around each fold to block the dye completely inside those circles.
But don’t make them so tight that they snap or distort the fabric. Looser bands result in more bleeding and less defined rings, which might be a style choice but won’t create the iconic bullseye look.
Adjust each band’s tension carefully to control how bold and clear your bullseye rings turn out.
Spacing for Clear Rings
Once you’ve found the right band tightness, focus on spacing the bands evenly along the fabric folds. Proper spacing is key to achieving the distinct bullseye rings that make this pattern stand out.
If the bands are too close, the rings will blur together. Too far apart, and the bullseye effect weakens. Here’s how to get it right:
- Measure Equal Distances: Use a ruler or estimate evenly spaced intervals along the folds to place your rubber bands.
- Secure Firmly: Each band should be snug but not cutting into the fabric, maintaining the shape without distorting the folds.
- Adjust As Needed: Step back and check the spacing visually before dyeing, ensuring the rings will form clear, clean circles.
Apply Dye Strategically Between the Bands
Focus on applying dye carefully between the bands to create sharp, vibrant rings in your bullseye pattern. Use a squeeze bottle or brush to target each section formed by the folds, ensuring the dye saturates the fabric evenly.
Apply dye precisely between folds using a squeeze bottle for sharp, vibrant bullseye rings.
Avoid over-saturating, which can cause colors to bleed into adjacent bands and blur your design. Apply contrasting colors in alternating rings to enhance the bullseye effect.
Remember to dye both sides of the fabric in each band for consistent color intensity. If you want crisp edges, leave a small gap uncolored between bands.
Take your time and work methodically, checking your progress frequently. This strategic dye application will give your bullseye pattern the clear, bold rings that make it stand out beautifully.
Let the Dye Set and Rinse Your Fabric
After applying your dye, you’ll need to let it set properly to secure vibrant, lasting colors.
Wrap your fabric in plastic to keep it moist, and let it sit for 6 to 8 hours, or longer for deeper hues.
When it’s time to rinse, follow these steps:
- Rinse your fabric under cold water while still tied to remove excess dye without disturbing your pattern.
- Remove the rubber bands carefully, then continue rinsing with warm water until the water runs clear.
- Wash your fabric separately in cold water with mild detergent to lock in the colors.
Taking these steps guarantees your bullseye tie-dye will have crisp rings and vivid shades that last through many wears and washes.
Dry and Reveal Your Perfect Bullseye Design
Three key steps will help you dry and reveal your perfect bullseye design.
First, carefully unwrap your fabric to avoid smudging the colors.
Next, lay it flat on a clean surface or hang it up to air dry. Avoid direct sunlight, which can fade your vibrant hues. If you’re short on time, you can use a dryer on a low heat setting, but be gentle to preserve the pattern’s crisp lines.
Once dry, you’ll see the bold bullseye circles clearly formed.
Finally, give your fabric a gentle wash with mild detergent to remove any excess dye, then dry again if needed.
Following these steps guarantees your bullseye tie-dye pops with sharp, vivid rings every time.
Frequently Asked Questions
Can I Use Synthetic Fabrics for Bullseye Tie-Dye?
You can use synthetic fabrics for bullseye tie-dye, but they don’t absorb dye as well as natural fibers like cotton. Expect lighter, less vibrant colors and consider using dyes formulated for synthetics to improve results.
How Do I Fix Uneven Dye Absorption?
Think of your fabric as a thirsty garden—if some spots drink unevenly, blot those areas with a damp cloth, then reapply dye gently. You’ll help every petal soak evenly, making your colors bloom beautifully.
What Type of Dye Is Best for Vibrant Colors?
You’ll get the most vibrant colors using fiber-reactive dyes, especially Procion MX. They bond well with cotton, resist fading, and offer bright, long-lasting results. Avoid all-purpose dyes if you want bold, vivid patterns.
Can I Combine Multiple Dye Techniques With Bullseye?
You can definitely combine multiple dye techniques with bullseye patterns. Mixing methods like crumple or spiral adds unique effects. Just plan your folds and colors carefully to avoid muddying the design and keep it vibrant.
How Long Should I Wait Before Washing the Dyed Fabric?
Like waiting for a fine wine to mature, you should let your dyed fabric set for at least 6 to 8 hours, or better yet, overnight. This guarantees vibrant colors before you rinse and wash it carefully.