Choose natural fabrics like cotton for better dye absorption and pick a soft pastel fiber-reactive dye for subtlety. Pre-wash your fabric to remove any finishes and tightly bind it with rubber bands for crisp white spaces. Mix your dye carefully, then apply it evenly with a squeeze bottle, avoiding oversaturation to keep colors soft. After dyeing, set the color by letting it sit, then rinse gently in cold water. To style your look effortlessly, pair with neutral basics. Keep exploring to perfect your technique and style.
Key Takeaways
- Choose a natural fabric like cotton and a soft pastel shade of fiber-reactive dye for subtle, vibrant results.
- Pre-wash fabric to remove finishes and tightly bind with rubber bands for defined, delicate white space in the pattern.
- Use simple folds like accordion or spiral and apply dye sparingly with a spray bottle to avoid oversaturation.
- Mix dye solution thoroughly at recommended concentration for even color and apply dye gently to fabric folds.
- After dyeing, rinse in cold water until clear, wash separately with mild detergent, and air dry away from sunlight to maintain softness.
Choosing the Right Fabric for Single Color Tie-Dye
Fabric choice plays an essential role in achieving vibrant and lasting single color tie-dye results. You’ll want to pick natural fibers like cotton, rayon, or silk because they absorb dye better than synthetic fabrics, giving you richer colors.
Avoid polyester and nylon since they resist dye, resulting in dull or uneven shades. Look for tightly woven fabrics to guarantee the dye spreads evenly, preventing patchiness.
Also, consider the fabric’s weight; lightweight materials soak up dye quickly and produce softer patterns, while heavier fabrics give you deeper saturation but may take longer to dry.
Before dyeing, wash your fabric to remove any finishes or dirt that could block dye absorption. Choosing the right fabric sets the foundation for your project, so don’t skip this vital step.
Selecting Your Dye Shade and Materials
Once you’ve picked the ideal fabric, it’s time to focus on the dye shade and materials you’ll use. Choose a dye color that complements your style—soft pastels create subtlety, while deeper hues add richness without overwhelming.
Opt for fiber-reactive dyes if your fabric is cotton or natural fibers; they offer vibrant, long-lasting results. You’ll also need gloves, squeeze bottles or spray bottles for precise application, and a plastic cover to protect your workspace.
If you want a more faded look, consider diluting the dye with water before applying. Remember, less dye often equals a more subtle effect.
Selecting quality materials guarantees your project looks professional and lasts longer, so invest wisely in your dye and tools before you start.
Preparing Your Fabric for Dyeing
Before you start dyeing, pick a fabric that absorbs color well, like cotton or rayon.
Make sure to pre-wash it to remove any finishes that might block the dye.
Then, secure your fabric tightly with rubber bands or string to create sharp, defined patterns.
Choosing the Right Fabric
Choosing the right material can make all the difference in how your single color tie-dye turns out. Natural fibers like cotton, linen, and rayon absorb dye better, resulting in richer, more vibrant colors.
Synthetic fabrics, such as polyester or nylon, often resist dye, giving you a faded or uneven look. If you want a subtle, soft effect, opt for lightweight cotton or bamboo blends—they soak up color gently without overwhelming the fabric’s texture.
Avoid materials with heavy finishes or blends that include too many synthetics, as these can cause blotchy results. Also, consider the fabric’s weave; tighter weaves give cleaner patterns, while looser ones create more diffusion.
Picking the right fabric sets a solid foundation for your tie-dye project, helping you achieve that perfect subtle shade.
Pre-Washing Techniques
Because dye adheres best to clean, residue-free fabric, you’ll want to pre-wash your material thoroughly before starting your single color tie-dye project. This step removes oils, sizing, and dirt that could block the dye from absorbing evenly.
Follow these pre-washing tips:
- Use warm water and a mild detergent to wash your fabric.
- Avoid fabric softeners, as they can leave a coating that repels dye.
- Rinse the fabric well to remove all soap residues.
- Dry the fabric completely or keep it damp if your dye instructions require it.
Taking these steps guarantees your fabric is ready to absorb color beautifully, giving you that subtle, even single color effect you want.
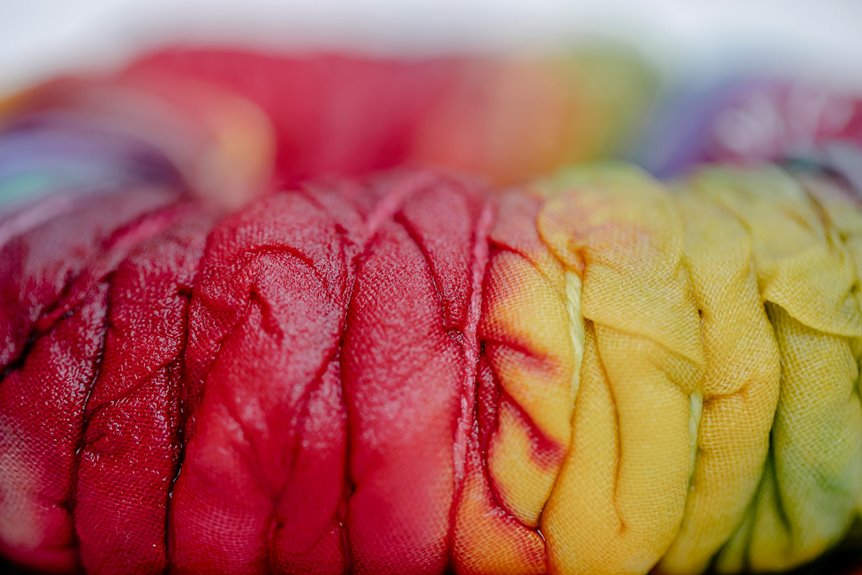
Securing Fabric for Dyeing
To create crisp, defined patterns in your single color tie-dye, secure your fabric tightly using rubber bands, string, or clamps. The tighter you bind your fabric, the more white space you’ll preserve, resulting in subtle, clean designs.
Start by folding, twisting, or scrunching your fabric in the desired pattern, then wrap rubber bands around sections to hold them firmly. Make sure the bands are snug but not so tight that they damage the fabric. If you want softer lines, use looser bindings.
Using clamps can add unique shapes and resist dye in specific areas. Remember, how you secure your fabric directly influences your final pattern, so take your time to experiment and find what works best for your subtle single color look.
Folding and Tying Techniques for Subtle Patterns
To create subtle patterns, start by mastering basic folding methods like accordion or spiral folds.
Then, tie your fabric gently to avoid harsh lines and allow the dye to blend softly.
These simple steps help you achieve delicate, single-color designs with ease.
Basic Folding Methods
Mastering just a few basic folding methods can transform your single color tie-dye projects into subtle, sophisticated designs.
These simple folds control how the dye hits the fabric, creating gentle contrasts and patterns without overwhelming the piece. Here are four folding techniques to try:
- Accordion Fold – Fold your fabric back and forth like a fan to produce parallel lines or stripes.
- Triangle Fold – Fold the fabric diagonally multiple times to form a compact triangle shape, giving angular, geometric patterns.
- Spiral Fold – Pinch the center and twist the fabric into a spiral, creating soft, circular designs.
- Bullseye Fold – Pull up sections of fabric into cones and secure with rubber bands to produce ringed patterns.
Experiment with these folds to find the subtle effects that suit your style.
Gentle Tying Tips
Once you’ve folded your fabric using basic methods, how you tie it shapes the final pattern just as much. To create subtle effects, use gentle tying techniques—avoid overly tight knots that create stark contrasts.
Instead, opt for loose wraps with soft materials like rubber bands or cotton strings, which allow dye to seep gradually. Tie sections evenly to maintain balance, but don’t worry about perfection; slight irregularities add charm.
When securing folds, focus on areas where you want faint lines or gentle gradients. Remember, less tension means softer shifts in your dye.
Mixing and Applying the Dye Correctly
Getting the dye mixture just right is essential for achieving vibrant and consistent results in your single color tie-dye project. Here’s how to mix and apply the dye correctly:
- Measure Carefully: Follow the dye package instructions for water-to-powder ratios to guarantee accurate color concentration.
- Mix Thoroughly: Stir the dye solution until fully dissolved to avoid uneven coloring or clumps.
- Use a Spray Bottle or Squeeze Bottle: These tools help you control the application and target specific fabric areas for subtle effects.
- Apply Evenly: Dab or spray the dye gently on the tied fabric, focusing on the folds without oversaturating to prevent bleeding.
Setting the Dye for Long-Lasting Color
After applying the dye evenly, you’ll want to set it properly to confirm your single color tie-dye stays vibrant over time.
Start by wrapping your dyed fabric in plastic wrap or placing it in a sealed plastic bag to keep it damp. Let it sit at room temperature for 6 to 24 hours—this resting period allows the dye to fully bond with the fibers.
Wrap your dyed fabric in plastic to keep it damp and let it rest 6–24 hours for vibrant color.
Avoid rushing this step; the longer the wait within this range, the richer your color will be.
Once the waiting time is up, unwrap carefully to prevent smearing. Setting the dye well confirms your subtle single color pattern won’t fade quickly, keeping your design looking fresh and beautiful for many wears.
Washing and Drying Your Tie-Dyed Fabric
Although it might be tempting to wash your tie-dyed fabric right away, you should wait until the dye has fully set to prevent color bleeding.
Once ready, follow these steps to care for your new creation:
- Rinse the fabric in cold water until the water runs clear to remove excess dye.
- Wash it separately in cold water with a mild detergent to avoid mixing colors.
- Avoid bleach and fabric softeners as they can damage the dye.
- Air dry your fabric away from direct sunlight to maintain color vibrancy and prevent fading.
Styling Tips for Wearing Single Color Tie-Dye
Properly caring for your tie-dyed fabric guarantees its colors stay vibrant, making it easier to style your pieces confidently. When wearing single color tie-dye, balance is key. Pair your tie-dye top with neutral bottoms or layer with solid-colored jackets to keep the look subtle yet stylish. Don’t be afraid to mix textures or add simple accessories to enhance your outfit without overpowering the dye pattern.
| Style Element | Tip |
|---|---|
| Tops | Choose solid bottoms for balance |
| Bottoms | Match with neutral or denim jeans |
| Accessories | Keep it minimal and complementary |
| Layering | Use solid cardigans or jackets |
Use these tips to create effortlessly chic outfits that highlight your single color tie-dye.
Frequently Asked Questions
Can I Use Natural Dyes for Single Color Tie-Dye?
Absolutely, you can use natural dyes for single color tie-dye! They’ll give your fabric a soft, earthy vibe that’s totally unique. Just remember, natural dyes might take longer to set, but the results are worth it!
How Do I Fix Dye Stains on Skin or Surfaces?
You can fix dye stains on skin by scrubbing gently with soap and warm water or using rubbing alcohol. For surfaces, try a mixture of baking soda and water or a commercial stain remover to lift the color effectively.
Is Single Color Tie-Dye Suitable for Synthetic Fabrics?
Oh, absolutely—because synthetic fabrics just love soaking up dye evenly! But seriously, you can tie-dye synthetic materials, though results might be less vibrant. Use dyes made for synthetics, and you’ll get a decent, subtle effect.
Can I Layer Multiple Dye Applications for Deeper Color?
Yes, you can layer multiple dye applications to deepen the color. Just let each layer dry before applying the next to avoid muddiness. This builds richness and intensity without over-saturating the fabric.
How Long Should I Wait Before Wearing the Dyed Fabric?
You should wait at least 24 hours before wearing the dyed fabric to guarantee the color sets properly. Rinse it thoroughly, then wash separately to avoid color bleeding. This helps keep your design vibrant and long-lasting.