To cut slippery fabrics like crepe, first prepare a large, flat surface and smooth your fabric, using weights rather than pins to keep it steady. Use sharp scissors or a rotary cutter with a self-healing mat for clean cuts. Mark gently with tailor’s chalk within seam allowances to avoid damage. Handle pieces carefully to prevent stretching and store flat with tissue layers. Keep these tips in mind, and you’ll master cutting delicate crepe fabric with confidence—there’s more helpful advice coming up to guide you further.
Key Takeaways
- Prepare crepe by washing gently, ironing flat, and using a non-slip mat to prevent fabric movement during cutting.
- Spread fabric on a large, flat surface and secure with weights or fine pins placed within seam allowances to avoid shifting.
- Mark patterns using tailor’s chalk or washable markers tested on scraps to ensure no damage or stains on the fabric.
- Cut slowly with sharp fabric scissors or a rotary cutter on a self-healing mat, keeping fabric flat and avoiding lifting.
- Support cut pieces fully when moving, stack flat with tissue paper layers, and store in a cool, dry place to maintain shape.
Understanding the Characteristics of Crepe Fabric
Crepe fabric stands out for its distinctive crinkled texture and lightweight feel, which can make it tricky to handle. When you work with crepe, you’ll notice its slightly rough surface, offering a bit of grip compared to smooth silks but still prone to slipping.
Its natural stretch and drape mean it doesn’t hold shape rigidly, so you’ll need to be gentle when laying it out for cutting. Crepe also tends to fray easily along cut edges, so clean, precise cuts are essential.
You’ll want to pay attention to the fabric’s grain and direction, as crepe’s texture can vary, causing patterns to look uneven if cut incorrectly. Understanding these traits will help you manage crepe confidently and achieve cleaner, more accurate cuts.
Gathering Essential Tools for Cutting Slippery Fabrics
Before you start cutting slippery fabrics, make sure you have the right tools on hand, like sharp scissors and fabric weights.
Setting up a clean, flat workspace will help keep the fabric steady and prevent slipping.
With these essentials ready, you’ll have better control and accuracy while cutting.
Choosing the Right Tools
To cut slippery fabrics effectively, you’ll need at least three essential tools that provide control and precision. First, invest in sharp fabric scissors or rotary cutters; dull blades cause snagging and uneven cuts.
Next, use fine pins or pattern weights to keep the fabric steady without damaging delicate fibers. Finally, a clear, flexible ruler or measuring tape helps you maintain accuracy while marking edges.
Avoid bulky or blunt tools that could shift the fabric or create jagged lines. Choosing tools designed specifically for delicate, slippery materials guarantees you can cut confidently and cleanly.
With these in hand, you’ll reduce frustration and improve your results every time you work with challenging fabrics like crepe or silk.
Preparing Your Workspace
Now that you’ve selected the right tools, setting up your workspace can make all the difference when cutting slippery fabrics. First, choose a large, flat surface with plenty of room to spread out your fabric without bunching. A smooth cutting mat or table works best to keep the fabric stable.
Next, ascertain good lighting so you can clearly see the fabric’s texture and cut lines. Gather your essential tools—sharp scissors or rotary cutter, pattern weights, and fine pins—and keep them within easy reach to avoid unnecessary movement.
Finally, prepare the fabric by ironing it flat and securing it with weights or pins to prevent shifting. A well-organized workspace will help you cut accurately and confidently every time.
Preparing Your Work Surface for Precision Cutting
Setting up your work surface correctly is essential for cutting slippery fabrics with accuracy. Start by choosing a flat, clean table that’s large enough to spread your fabric without bunching.
Use a non-slip mat or a silicone shelf liner beneath your fabric to prevent it from sliding as you cut. Smooth out your fabric carefully, ensuring there are no wrinkles or folds that can distort your measurements. Secure the fabric edges with pattern weights instead of pins to avoid shifting.
Keep your cutting tools sharp and within reach to maintain steady, clean cuts. Arrange good lighting overhead to see your cutting lines clearly.
Taking these steps creates a stable, controlled environment, reducing mistakes and helping you cut slippery fabrics like crepe with confidence and precision.
How to Pre-Treat Crepe Fabric Before Cutting
Before you start cutting crepe fabric, you’ll want to pre-treat it to minimize stretching and distortion. Proper pre-treatment guarantees your fabric stays stable and easier to handle.
- Wash gently – Use cold water and mild detergent to remove any finishes that might affect texture or shape.
- Avoid wringing – Instead, press out excess water carefully to prevent fabric distortion.
- Air dry flat – Lay your crepe on a clean, flat surface to dry, keeping it from stretching along folds or edges.
- Lightly steam or press – Use a low-heat iron setting with a pressing cloth to smooth wrinkles without damaging the fabric.
These steps help maintain the fabric’s integrity, making your cutting process smoother and more accurate.
Choosing the Right Pattern Weights and Pins
Choosing the right pattern weights and pins can make a big difference when cutting slippery fabrics. You want weights heavy enough to keep the fabric from shifting but gentle so they don’t distort delicate fibers like crepe.
Look for smooth, flat weights made of metal or acrylic to hold the pattern securely without snagging. When it comes to pins, choose fine, sharp ones labeled for delicate or slippery fabrics. They’ll pierce the fabric cleanly, minimizing runs or pulls.
Use smooth, flat metal or acrylic weights and fine, sharp pins for clean cuts on slippery fabrics.
Avoid thick or dull pins that might damage the fabric or cause puckering. Instead of pinning through multiple layers, rely more on pattern weights to stabilize your fabric.
This combination helps you maintain control and precision, making cutting much easier and cleaner with slippery materials.
Best Techniques for Laying Out Your Fabric and Patterns
Before you cut, make sure your fabric is smooth and flat to prevent shifting.
Lay your patterns carefully, using weights and pins strategically to keep everything in place.
These steps will help you achieve clean, accurate cuts on slippery fabrics.
Fabric Preparation Tips
When working with slippery fabrics, you’ll want to handle your material carefully to prevent shifting and stretching. Proper preparation sets the stage for accurate cutting.
Here are four essential fabric preparation tips:
- Pre-wash and dry your fabric to eliminate sizing and reduce shrinkage.
- Press gently with a cool iron to remove wrinkles without distorting the fabric.
- Use a flat, clean surface—preferably a large table—so the fabric lays evenly without bunching.
- Fold fabric carefully along the grainline, aligning selvages precisely to maintain stability.
Pattern Pinning Strategies
After preparing your slippery fabric carefully, the next step is securing your pattern pieces without causing shifts or distortions.
Lay your fabric flat on a smooth, clean surface, ensuring it’s fully stretched out but not stretched too tight. Position your pattern pieces according to grainlines, then use fine, sharp pins placed perpendicular to the cutting line to hold the pieces firmly.
Pin within the seam allowance to avoid visible holes. For extra stability, try using pattern weights, especially on delicate or very slippery fabrics like crepe. Avoid excessive pinning, which can distort the fabric; instead, space pins evenly every few inches.
If needed, use clips along the edges or baste the pattern to the fabric with a loose hand stitch. This way, you keep your fabric and pattern aligned precisely for accurate cutting.
Tips for Marking Crepe Without Damaging the Fabric
Although crepe’s delicate texture can make marking tricky, you can preserve its integrity by choosing gentle tools like tailor’s chalk or washable fabric markers.
To guarantee your markings don’t damage the fabric or bleed, follow these tips:
- Test your marking tool on a fabric scrap to check for any discoloration or damage.
- Use light, short strokes instead of heavy lines to avoid crushing the fibers.
- Mark on the wrong side of the fabric whenever possible to keep visible areas pristine.
- Avoid using pins to mark; instead, rely on gentle clips or weights to prevent holes.
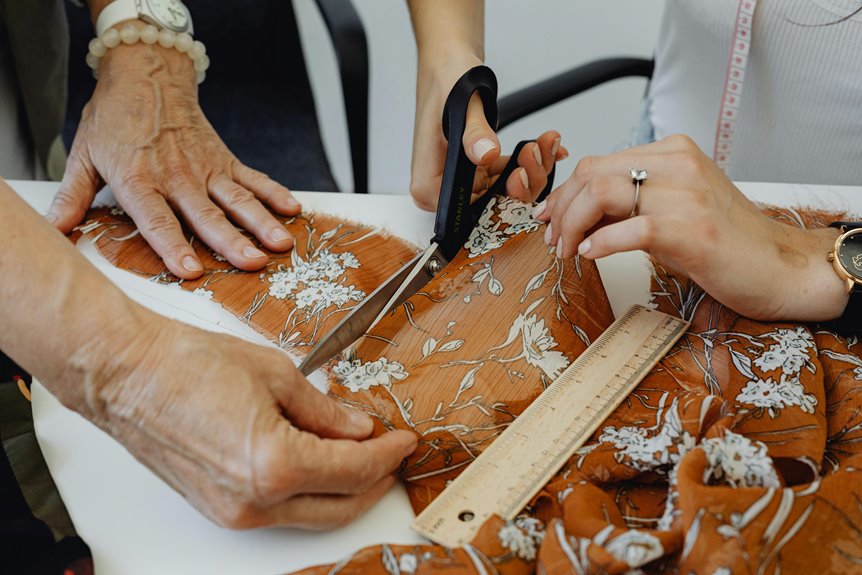
Step-By-Step Guide to Cutting Crepe With Scissors
Cutting crepe fabric requires careful attention to detail to prevent fraying and slipping. First, verify your fabric is flat and secured with weights or pins. Use sharp scissors designed for fabric to make clean cuts. Cut slowly and steadily, following your marked lines precisely. Avoid lifting the fabric too much to keep edges aligned.
| Step | Action | Tip |
|---|---|---|
| 1 | Lay fabric flat | Use weights, not pins |
| 2 | Mark cutting lines | Use tailor’s chalk or pencil |
| 3 | Cut with sharp scissors | Cut in long, smooth strokes |
Using Rotary Cutters Effectively on Slippery Fabrics
Mastering the use of scissors on crepe sets a solid foundation for handling slippery fabrics, but rotary cutters can offer even greater control and precision.
When using a rotary cutter, you need a few key techniques:
- Secure your fabric with weights instead of pins to avoid shifting.
- Use a self-healing cutting mat to protect surfaces and maintain blade sharpness.
- Hold the rotary cutter firmly and apply even pressure, guiding it smoothly along your pattern edges.
- Cut slowly and steadily, especially on curves, to prevent fabric from slipping away.
Handling and Storing Cut Pieces to Prevent Distortion
Three essential steps will help you handle and store slippery fabric pieces without causing distortion.
First, always support the fabric fully when lifting or moving it—don’t let it hang or dangle, as gravity can stretch and warp the fibers.
Second, stack your cut pieces flat on a smooth surface, aligning edges carefully to keep shapes intact. Avoid folding slippery fabrics, as creases can be hard to remove.
Third, store the pieces in a breathable, flat container or between layers of tissue paper to prevent shifting and friction. Make sure the storage area is cool and dry to maintain fabric integrity.
Frequently Asked Questions
Can I Wash Crepe Fabric Without Shrinking It?
You want to keep your crepe fabric’s charm intact, right? So, wash it gently in cold water, avoid harsh spins, and air-dry flat. That way, you won’t invite unwanted shrinkage to the party.
What Sewing Needles Work Best for Crepe Fabric?
You should use fine, sharp needles like size 70/10 or 75/11 for crepe fabric. These needles prevent snags and runs, letting you sew smoothly without damaging the delicate, slippery texture of crepe fabric.
How Do I Fix Mistakes When Sewing Slippery Fabrics?
Mistakes on slippery fabrics can feel frustrating, but don’t worry—you can fix them by gently unpicking stitches with a seam ripper and pressing seams carefully. Patience beats haste, so take your time to avoid further slips.
Are There Specific Thread Types Recommended for Crepe?
You’ll want to use fine polyester or silk thread for crepe since they’re strong and smooth, preventing snags. Avoid cotton thread because it can break easily on delicate, slippery fabrics like crepe.
Can Crepe Fabric Be Ironed Without Damage?
Ironing crepe is like walking on eggshells—you’ve got to be gentle. Use a low heat setting and press with a cloth between the iron and fabric to avoid damage. Don’t rush; take your time.