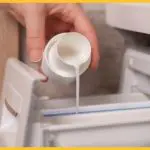
Are you tired of finding gunk and residue in your fabric softener dispenser after each wash cycle? It’s time to give your Whirlpool fabric softener dispenser a thorough cleaning! With a few simple steps, you can easily remove any build-up and keep your dispenser functioning properly.
First things first, you need to identify the type of dispenser you have. Some Whirlpool models have a removable dispenser, while others are built into the agitator. Once you have determined which type you have, you can follow the appropriate steps to clean it.
Keep reading to find out how to clean your Whirlpool fabric softener dispenser and keep it in top condition.
Table of Contents
Identify the Type of Dispenser
Let’s figure out what type of dispenser you’ve got so we can get started on cleaning it! There are two types of fabric softener dispensers in Whirlpool washing machines.
The first one is a removable cup that sits on top of the agitator. You’ll see this type of dispenser in older models. The second type is a fixed dispenser that’s built into the agitator, which is the one you’ll find in newer models.
To check which type of dispenser you have, locate the agitator in your washing machine. If you see a cup sitting on top of it, you have the first type of dispenser. You can simply lift the cup out and clean it separately. If you don’t see a cup and the agitator looks like a single piece, then you have the fixed type of dispenser.
Once you’ve identified the type of dispenser you have, you’re ready to move on to the next step: cleaning it. It’s important to clean your fabric softener dispenser regularly to prevent build-up and ensure it’s working properly.
Now that you know what type of dispenser you have, let’s get started on cleaning it!
Remove the Dispenser
To take out the tray, simply press the release button and pull it towards you. Most fabric softener dispensers are removable and can be easily taken out for cleaning. The release button is usually located on the front or back of the dispenser, and it may be labeled for easy identification.
Once you’ve removed the dispenser tray, you can clean it with warm soapy water. Use a soft brush or cloth to scrub away any residue or buildup, and rinse thoroughly with water. Be sure to dry the tray completely before reinserting it into the washer.
If you find that the dispenser tray is difficult to remove, consult the manufacturer’s instructions or contact customer service for assistance. It’s important to clean the dispenser regularly to prevent mold and mildew buildup, which can cause unpleasant odors and affect the performance of your washing machine.
By taking a few minutes to remove and clean the fabric softener dispenser, you can ensure that your clothes come out clean and fresh every time.
Soak the Dispenser in Hot Water
After removing the tray, immerse it in hot water to loosen any stubborn buildup that may have accumulated over time. This will help to loosen any fabric softener that has dried and hardened over time. Make sure the water is hot enough to break down the buildup but not so hot that it damages the dispenser.
To make the process more effective, add a small amount of dish soap or vinegar to the water. This will help to break down any remaining buildup and sanitize the dispenser. Let the dispenser soak for at least 30 minutes, or longer if necessary. You can also use a soft-bristle brush to scrub away any remaining buildup.
Once the dispenser has soaked, rinse it thoroughly with hot water and dry it completely before replacing it in the washing machine. This will help to prevent any leftover fabric softener or soap residue from causing future buildup.
With a clean dispenser, your clothes will come out fresh and soft each time you wash them.
Scrub the Dispenser
Now it’s time for you to get your hands dirty and really scrub that buildup away from the dispenser. Scrubbing the dispenser is the next step in thoroughly cleaning it. You can use a few different tools to help with this task, including a soft-bristled brush or an old toothbrush.
To start, remove the dispenser from the washing machine and place it on a flat surface. Dip your brush or toothbrush into a mixture of warm water and dish soap. Then, use the brush to scrub the dispenser thoroughly. Be sure to pay special attention to any nooks or crannies where buildup may be hiding.
As you scrub, you may notice that some areas are more stubborn than others. For these tough spots, you can use a mixture of equal parts vinegar and water. Simply dip your brush or toothbrush into the solution and scrub away the buildup. Once you’ve finished scrubbing, rinse the dispenser thoroughly with warm water and dry it off before placing it back in the washing machine.
| Tools to Use | Mixture to Use |
|---|---|
| Soft-bristled brush or old toothbrush | Warm water and dish soap |
| Soft-bristled brush or old toothbrush | Mixture of equal parts vinegar and water |
Incorporating a table into the instructions can make it more visually appealing and easier to follow. Remember to take your time and be patient when scrubbing the dispenser. With a little elbow grease and the right tools, you’ll have a clean and fresh-smelling washing machine dispenser in no time.
Clean the Dispenser Housing
Let’s tackle the next step in getting our washing machine smelling fresh and looking clean: cleaning the housing that holds the dispenser. This is an important step as it ensures that any residue or dirt that may have accumulated in the housing is removed for a thorough clean.
Here are some easy steps to follow:
-
Remove the dispenser drawer: First, remove the dispenser drawer by pulling it out of the housing. This will give you better access to the housing and make cleaning it easier.
-
Clean the housing: Using a clean cloth or sponge, wipe down the inside of the housing. Pay close attention to any hard-to-reach areas and corners where dirt may have accumulated. You can use a cleaning solution or a mixture of water and vinegar to help remove any stubborn stains or build-up.
-
Dry the housing: After cleaning, make sure to dry the housing thoroughly with a clean and dry cloth. This will help prevent any moisture from building up and causing mold or mildew to grow.
Once dry, you can replace the dispenser drawer and enjoy a fresh and clean washing machine.
Reassemble the Dispenser
It’s time to put everything back together and enjoy a fresh and clean laundry experience! Once you’ve thoroughly cleaned the dispenser housing, it’s important to reassemble it correctly.
Start by replacing the fabric softener dispenser cup in its designated slot. Make sure it’s securely in place before moving on to the next step.
Next, reattach the dispenser housing to the agitator or the top of the washer, depending on your model. Be sure to line up the tabs or screws properly to ensure a tight fit. Once it’s in place, gently press down on the housing to ensure it’s securely attached.
Add your fabric softener or detergent to the dispenser and run a cycle to ensure everything is working properly. You’ll notice a significant difference in the way your laundry smells and feels after giving your dispenser a thorough cleaning.
It’s important to clean your dispenser at least once a month to prevent buildup and keep your laundry fresh and clean.
Regular Maintenance Tips
Don’t neglect your laundry routine – keeping up with regular maintenance is key to ensuring fresh and clean clothes every time. To properly maintain your fabric softener dispenser in your Whirlpool washing machine, there are a few tips to follow.
Firstly, make sure to clean it every six months or so. This will prevent any buildup of detergent, fabric softener, or other particles that may clog the dispenser and cause it to malfunction.
To clean the dispenser, simply remove it from the washing machine and place it under running water. Use a soft-bristled brush to scrub away any residue, and then dry it thoroughly with a clean cloth or towel.
It’s also a good idea to inspect the dispenser for any cracks or damage, which can occur over time and affect its performance. If you notice any issues with the dispenser, such as it not dispensing properly or leaking, it may be time to replace it.
Whirlpool offers replacement dispensers that are easy to install and will ensure your clothes come out fresh and clean every time. By following these simple maintenance tips, you can ensure your fabric softener dispenser is working properly and your clothes are always looking and smelling their best.
- Why Is Red Velvet Not Red? - April 25, 2024
- How Do You Describe Velvet Fabric? - April 25, 2024
- How Strong Is Velvet? - April 25, 2024


